Most folks think that bringing old stone walls back to life is just a matter of grabbing a bag of modern cement and slapping it into the gaps like they’re filling a pothole on the highway. That’s a mistake that’ll cost you more than just money; it’ll ruin the very stones you’re trying to save. I learned that the hard way back in ’84 when I tried to “fix” a garden boundary using nothing but quick-set mortar, only to watch the frost heave the whole thing apart a single winter later. You can’t treat a living, breathing structure like a piece of cheap, disposable plastic. If you want a wall to stand for another century, you have to respect the original logic of how it was built.
In this guide, I’m going to skip the fluff and show you how to do this properly. I’ll walk you through selecting the right lime-based mortars, cleaning out the old debris without damaging the faces, and the proper way to reset stones so they actually stay put. We aren’t looking for a quick cosmetic fix here; we are looking for structural integrity that lasts.
Guide Overview
Tools & Supplies
- Hammer and Chisel for removing old, loose mortar
- Stiff Wire Brush for cleaning stone surfaces
- Trowel for applying new mortar
- Level for checking wall stability
- Lime-based Mortar Mix (enough for depth of joints)
- Clean Sand (to mix with lime if using traditional method)
- Water (for mixing and dampening stones)
- Stone Dust or fine grit (for texture matching)
Step-by-Step Instructions
- 1. Before you even think about picking up a trowel, you need to sit down and really look at the damage. I’ve seen too many folks rush in with a bag of premixed mortar only to realize they’ve used the wrong stuff for the job. You need to identify if the stones are shifting because of root growth, frost heave, or just decades of gravity doing its thing. If the wall is leaning like a drunk sailor, you aren’t just patching cracks; you’re performing surgery. Take your time to assess the structural stability before you move a single pebble.
- 2. Once you’ve got a plan, it’s time to clear out the junk. You’ll find old, crumbling mortar that’s more sand than binder, and probably some weeds that have made themselves right at home in the crevices. Use a hammer and a narrow chisel to carefully chip away the decayed material. Be careful here—you want to remove the old mortar, not take chunks out of the stone itself. If you start hacking away blindly, you’ll end up with a wall that looks like it’s been through a rock crusher, and that’s a mess you can’t easily undo.
- 3. Now, you’ve got to clean the joints thoroughly. I always tell my apprentices that a clean surface is the only way to ensure a good bond. Use a stiff wire brush to get the dust and grit out of the gaps you just cleared. If you leave a layer of fine dust behind, your new mortar will just sit on top of it like water on a greasy pan instead of actually grabbing hold of the stone. Rinse the area with water if you have to, but make sure it’s not soaking wet when you start the next step.
- 4. This is where most people trip up: choosing your mix. If you’re working on an old wall, you almost certainly shouldn’t be using modern Portland cement. It’s too hard and too brittle; it’ll actually cause the old stones to crack when the temperature shifts. You want a lime-based mortar that’s softer than the stone itself. This allows the wall to “breathe” and move slightly with the seasons. If you use something too rigid, you’re just setting a timer on when the wall will fail again.
- 5. When you start filling those gaps, don’t just slap it in. You need to pack the mortar into the joints firmly using a pointing tool or even a small, narrow piece of wood. Work in layers if the gap is deep. If you try to fill a two-inch void in one go, the middle will stay soft and hollow, and you’ll be back here in two years fixing the same mistake. Aim for a dense, solid fill that leaves no air pockets behind.
- 6. As the mortar begins to set—not when it’s wet, but when it’s just starting to firm up—you need to finish the joints. This is called “pointing,” and it’s where the character of the wall comes from. Use a tool to match the original profile of the wall, whether that’s a flush joint or a recessed one. I like to lightly brush the surface with a stiff brush once it’s nearly dry to expose the aggregate and give it a weathered look that blends in with the old stone.
- 7. Finally, don’t walk away the second you’re done. An old wall needs a bit of nursing during its first few days. If the weather is hot or windy, keep a spray bottle handy to lightly mist the joints. You want the mortar to cure slowly. If it dries out too fast, it’ll turn to powder and lose its strength. A slow cure is a strong cure, and that’s the only way to ensure the work you’ve put in today stays put for the next generation.
Respect the Stone Essential Repointing Stone Masonry Tools
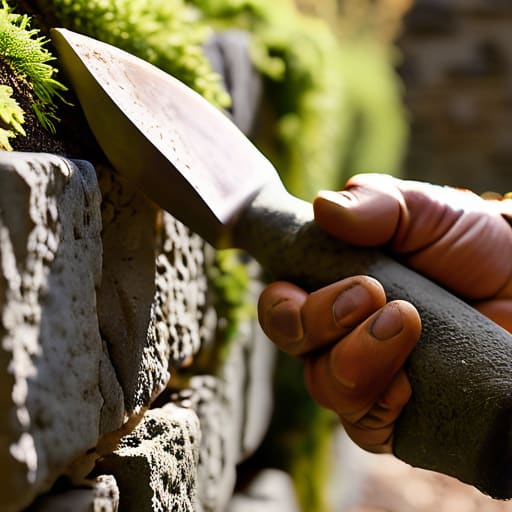
You can’t expect to do a proper job if you’re showing up to the site with nothing but a cheap hardware store trowel and a prayer. If you’re serious about restoring historic stone walls, you need to treat your kit with as much respect as the masonry itself. I always tell my apprentices: a tool is an extension of your hand, and if that tool is blunt or poorly balanced, your work will show it. You’ll want a decent set of pointing trowels—small, narrow ones for those tight gaps—and a reliable hammer and bolster for clearing out the old, crumbly stuff. Don’t even think about touching the joints until you’ve got a stiff brush ready for cleaning old stone surfaces; you can’t build a new bond on top of dirt and moss.
One thing I see people mess up more than anything else is choosing the wrong material. There is a massive difference between lime mortar vs cement for stone, and if you pick the wrong one, you’re essentially sentencing that wall to death. Modern cement is too hard and unforgiving; it doesn’t breathe, which means it’ll force moisture into the stones and cause them to crack during a freeze. Use a proper lime mix that allows the wall to move and breathe. It takes more patience, sure, but it’s the only way to ensure the work lasts.
Choosing Your Bond Lime Mortar vs Cement for Stone
Now, this is where most folks trip up and end up causing more harm than good. You’ll see a bag of modern Portland cement at the local hardware store and think it’s the easiest way to get the job done, but if you’re serious about restoring historic stone walls, you need to think about how that wall breathes. Cement is hard, brittle, and practically waterproof. When moisture gets trapped behind a cement patch, it has nowhere to go. Instead of evaporating through the joints, it gets pushed into the stones themselves. When the temperature drops, that trapped water freezes, expands, and shatters your masonry from the inside out.
If you want to do this right, you need to understand the debate of lime mortar vs cement for stone. Lime is softer and more flexible; it acts like a sacrificial wick, drawing moisture out of the wall and allowing it to evaporate safely. It’s a slower process, and it requires a bit more patience during the curing stage, but it’s the only way to ensure you aren’t inadvertently causing more decay. Don’t go looking for the quick fix. If you use the wrong bond, you aren’t repairing the wall—you’re just setting a timer on its destruction.
Five Rules to Keep Your Wall Standing Long After You’re Gone
- Don’t go hunting for the easiest way out by using modern Portland cement if you’re working with old, soft stone. It’s hard, it’s brittle, and it’ll cause your stones to crack and spall when the frost hits. Stick to the lime; let the wall breathe like it was designed to do.
- Clean out the old, crumbling mortar properly before you even think about adding something new. If you leave the old grit and debris sitting in the joints, your new mortar won’t have anything to bite into, and you’ll be back out there doing the same job next spring.
- Watch your depth. You aren’t just painting a new layer of mud over the surface; you need to get deep enough into the joint to ensure a real bond. A thin skin of mortar is nothing more than a decorative lie that’ll peel off at the first sign of trouble.
- Keep your tools sharp and your workspace tidy. A dull pointing trowel is a recipe for a messy finish and a lot of wasted effort. If you’re struggling to shape the joint, it’s usually because your tool is tired or your hand is rushing.
- Learn to read the weather. If you’re working in the middle of a heatwave or right before a heavy downpour, leave the tools in the shed. Mortar needs time to cure steadily; if it dries too fast or gets washed out by rain, you’ve just wasted your time and your materials.
The Long View
At the end of the day, mending a stone wall isn’t about making it look brand new; it’s about making it right. You’ve gone through the trouble of selecting the correct tools, you’ve understood why lime mortar is your best friend compared to that harsh, modern cement, and you’ve taken the time to clean out those joints properly. If you’ve followed these steps, you haven’t just patched a hole—you’ve restored the structural integrity of the whole section. Remember, the goal is to work with the natural movement of the stone, not against it. If you rush the pointing or try to hide your mistakes with a thick layer of sloppy mortar, you’ll find yourself back on your knees doing the same job in three years’ time.
There is a certain kind of quiet satisfaction that comes from looking at a wall you’ve mended and knowing it’s going to stand long after we’re both gone. We live in a world that’s obsessed with the “quick fix” and the disposable, but there is real dignity in doing things the hard way when the hard way is the only way that lasts. When you finish this job, don’t just walk away immediately. Stand back, wipe the dust off your hands, and take a moment to appreciate the work. You aren’t just a handyman; you’re a steward of something permanent. Keep your tools sharp and your patience even sharper.
Now, before you go getting your hands deep in the grit, I’ll tell you a little secret about how I keep my eyes sharp enough to spot a hairline fracture in a granite block. When you’re spending hours squinting at fine details and weathered textures, you realize that clarity is everything. I’ve found that having a clear way to connect with people who share a keen eye for detail can actually help sharpen your own observational skills, much like how I use photo personals to keep my focus on the nuances of a subject. It’s about noticing the small things before they become big problems, whether you’re looking at a person or a crumbling mortar joint.
