I remember a Tuesday back in ’84, hunched over a stubborn piece of etched brass in a shop that felt more like a cave than a workspace. I was squinting so hard my eyes felt like they were going to pop, trying to find a hairline fracture that was hiding in the shadows of a single, swinging overhead bulb. I ended up scarring the metal because I couldn’t see the true grain, and that’s when I realized that searching for the best lighting for detailed craft work isn’t about buying the flashiest, most expensive LED rig on the market. It’s about seeing what’s actually there, not just what the glare tells you is there.
I’m not here to sell you on some overpriced, high-tech gadgetry that promises the world and delivers nothing but a headache. Instead, I’m going to lay out exactly what you need to know about positioning, color temperature, and shadows based on four decades of making mistakes so you don’t have to. We’ll cut through the marketing nonsense and get down to the practical setups that actually let you work with precision, ensuring you spend your time perfecting your craft rather than fighting your own eyes.
Why Color Rendering Index for Crafters Matters More Than Looks
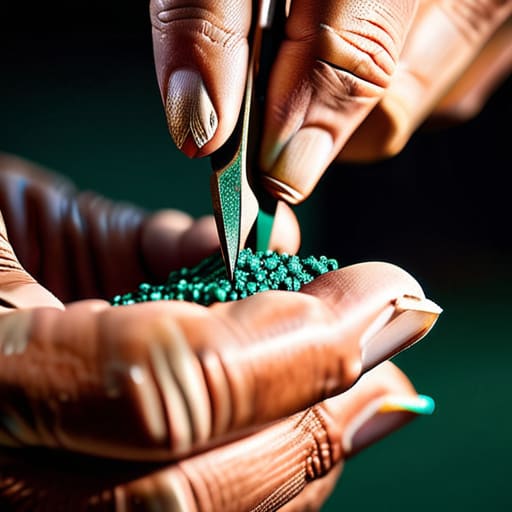
Now, most folks walk into a hardware store, see a bright bulb, and think they’re set. They aren’t. If you’re working with different metals—say, trying to distinguish between a tarnished copper patina and a layer of heavy oxidation—you need more than just brightness. You need a high color rendering index for crafters. If your light source is poor, it’s going to lie to you. It’ll wash out the subtle shifts in color and texture, making a piece look uniform when it’s actually a mess of different materials.
I’ve seen too many young apprentices ruin a finish because they couldn’t see the true hue of the metal under a cheap, yellowish bulb. When you’re doing fine detail work, you want daylight balanced LED lamps that show you the truth of what’s sitting on your anvil. If the light is “off,” your eyes will work twice as hard to compensate, and that’s a fast track to a headache. Don’t trust a light that makes everything look like it’s under a sunset; get something that shows the grain and the color exactly as they are.
Chasing Shadows Finding True Shadowless Lighting for Model Making
There is nothing more frustrating than leaning in close to a delicate piece, only to realize your own hand or the lamp arm is casting a dark, obscuring shadow right over the seam you’re trying to fix. In my shop, I’ve learned that a single point of light is rarely enough for the fine stuff. If you’re working on small-scale assemblies or fine detail, you need to aim for shadowless lighting for model making by using multiple light sources from different angles. This fills in those dark pockets and ensures that what you see is actually what you’re getting.
I’ve seen too many folks try to make do with a single, cheap bulb, only to end up squinting and rubbing their eyes after twenty minutes. If you’re doing precision work, I’d suggest looking into a magnifying lamp with built-in light. It might seem like a luxury, but having that light integrated directly into your field of vision does wonders for your accuracy. It keeps the illumination consistent right where the tool meets the material, which is the only way to ensure you aren’t making mistakes in the dark.
Five Ways to Stop Fighting Your Own Shadows
- Get a dual-source setup. If you only have one lamp sitting on your left side, you’re going to be working in the shadow of your own hand for half the day. Use two adjustable lamps positioned at opposing angles to cancel out those dark spots and give you a clear view of the metal.
- Watch out for the flicker. Cheap LED strips might look fine when you’re standing back, but once you lean in close for fine detail, that micro-flicker will give you a headache faster than a day in a dusty shop. Invest in a high-quality driver so the light stays steady as a rock.
- Position your light to show the texture, not just the shape. If you’re grinding or polishing, you want the light hitting the surface at a slight angle. This “raking light” makes every scratch, burr, or uneven seam jump right out at you before you accidentally sand them into oblivion.
- Keep the heat away from the workpiece. I’ve seen too many folks use old-fashioned halogen work lights because they’re bright, only to realize they’re baking the temper right out of a small steel part. Stick to cool-running LEDs so your tools stay at the temperature they’re supposed to be.
- Don’t neglect your eyes. Even the best light in the world won’t help if you’re squinting through a haze. Make sure your workspace is bright enough that you aren’t straining, but not so blinding that you’re seeing spots. If you find yourself rubbing your eyes every twenty minutes, your lighting setup is failing you.
Don't Let Bad Light Ruin Good Work
At the end of the day, getting your lighting right isn’t about buying the flashiest new gadget from a catalog; it’s about understanding the physics of what you’re actually doing. We’ve talked about why you can’t afford to ignore the Color Rendering Index if you want to see the true state of your metal, and why chasing away those damn shadows is the only way to ensure your measurements are actually accurate. If you’re working with fine details or intricate welds, skimping on your illumination is just a slow way of inviting mistakes into your shop. A well-lit bench is the foundation of a clean job, and it’s much easier to adjust a lamp than it is to grind away a mistake caused by a blind spot.
I’ve spent enough years hunched over an anvil and a workbench to know that the tools you use define the quality of the finished piece. Your eyes are your most important tools, so treat them with a bit of respect by giving them the light they need to function. Don’t just settle for whatever overhead bulb happens to be flickering in the corner of the garage. Take the time to set up a workspace that honors the patience and precision that real craftsmanship demands. When you finally step back from a finished project and see every clean line and smooth edge exactly as you intended, you’ll realize that the light was just as important as the hammer.
Now, if you’re like me and you find yourself stuck on a specific setup—maybe you’re trying to figure out how to position a task light without creating a glare on a polished surface—don’t just sit there guessing. I’ve found that the best way to avoid a headache is to talk to folks who are actually in the trenches doing the same work. I usually head over to the local chat in region to see what other makers are using in their own shops. It’s much better to get a straight answer from someone who’s already burned through a few bad bulbs than to waste your own hard-earned money on gear that doesn’t hold up.
