I remember sitting on a grease-stained stool back in ’84, staring at a seized block that most folks told me was nothing more than a heavy paperweight. They said you needed a million-dollar machine shop and a degree in thermodynamics just to get a spark, but they were dead wrong. The truth is, restoring classic car engines to working order isn’t about having the fanciest diagnostic computers or the most expensive imported tools; it’s about having the patience to listen to what the metal is telling you. If you try to force a piston or rush a honing process because you’re in a hurry to get back on the road, you aren’t restoring anything—you’re just making expensive scrap metal.
In this guide, I’m going to skip the fluff and the high-priced marketing nonsense you find in those glossy magazines. I’ll show you how to properly assess a build, how to respect the tolerances of vintage iron, and how to troubleshoot the mechanical gremlins that keep most hobbyists from ever hearing that first, glorious roar. We’re going to focus on proper technique and fundamental mechanical principles so that when you finally turn that key, that engine doesn’t just run—it lasts.
Guide Overview
Tools & Supplies
- Socket Set and Ratchets for disassembly and reassembly
- Torque Wrench for precise bolt tightening to spec
- Engine Stand to hold the block during work
- Feeler Gauges for checking clearances and gaps
- Compression Tester to diagnose cylinder health
- Engine Degreaser for cleaning grime and oil
- Replacement Gasket Set for sealing components
- Machine Shop Services for resurfacing heads/blocks
- Assorted Fasteners and Bolts for replacements
- Engine Oil and Filters for initial lubrication
Step-by-Step Instructions
- 1. First thing you do is get that engine out of the chassis and onto a sturdy stand. You can’t work on a machine if you’re fighting gravity and cramped quarters at the same time. Once it’s mounted, strip it down to the bare block. Don’t just pull the spark plugs and call it a day; you need every bolt, every gasket, and every piece of trim laid out on a clean bench. I always keep a few labeled bins handy so I don’t end up with a pile of mystery hardware that I can’t find when I’m halfway through the assembly.
- 2. Once the metal is bare, you have to deal with the grime. I’m talking decades of baked-on oil, sludge, and road salt. Don’t go grabbing a high-pressure washer and blasting away blindly, or you’ll force grit into the bearing surfaces where it doesn’t belong. Use a good degreaser and a stiff nylon brush to work the cleaning into the crevices. If you’re dealing with heavy scale, a bit of gentle media blasting can help, but watch your edges so you don’t pit the smooth surfaces of the cylinder walls.
- 3. Now comes the part that separates the craftsmen from the hobbyists: the inspection. You need to look for cracks, scoring, and warping. Take a set of micrometers and a feeler gauge and start measuring. If a cylinder wall is out of spec, you aren’t just going to “make it work.” You’ll need to have it bored or honed to bring it back to a true, smooth finish. Precision is your only friend here; if you try to eyeball a clearance, you’re just building a bomb that’s going to fail on the first heat cycle.
- 4. Next, you tackle the rotating assembly. Check your crankshaft for any signs of scoring or uneven wear. If the journals are rough, they need to be polished or reground. When you’re installing new bearings, make sure you’re using the exact tolerances specified in the original manual. I always say, measure twice and cut once, but in this case, it’s measure three times and verify it with a second tool. Apply a generous amount of assembly lube to everything—never install a part dry or you’ll score the metal before the engine even turns over.
- 5. Don’t neglect the head and the valvetrain. A classic engine is only as good as its ability to breathe. Check the cylinder head for flatness using a straightedge and a precision gauge. If it’s warped, it needs to be surfaced. While you’ve got it apart, inspect the valves and seats for any signs of pitting or carbon buildup. A clean, well-seated valve is the difference between a smooth idle and a constant headache.
- 6. As you move toward reassembly, focus on the seals and gaskets. This is where most people get lazy, and it’s where most leaks start. Use high-quality materials—don’t go buying the cheapest rubber gaskets you can find at the local big-box store. When you’re torquing down the head bolts, follow the manufacturer’s sequence to the letter. If you tighten one side too much before the other, you’ll warp the head and you’ll be tearing the whole thing down all over again.
- 7. The final stage is the “break-in” period. Once the engine is back in the car and the fluids are topped off, don’t just fire it up and let it idle for an hour. You need to get it up to operating temperature and move it through the RPM range to ensure the rings are seating properly against the cylinder walls. This is a delicate dance of heat and pressure. Respect the break-in process; if you push it too hard too fast, you’ll ruin all the hard work you just put in.
Mastering the Vintage Engine Rebuild Process Without Shortcuts
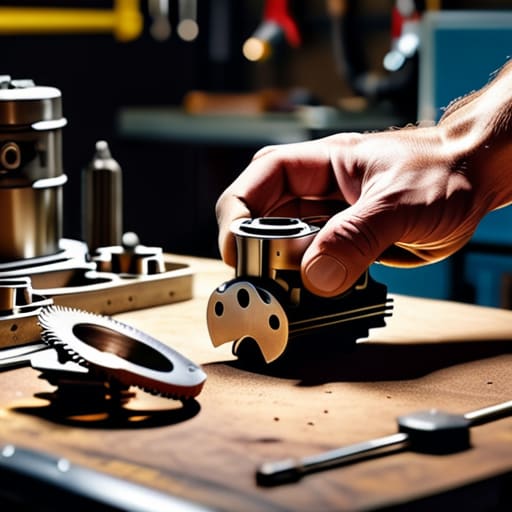
Now, once you’ve got those components stripped down and cleaned, you’re going to find yourself staring at a pile of parts wondering where the hell that one specific shim or gasket is supposed to sit. I’ve spent more nights than I care to admit squinting at greasy manuals, but I’ve learned that you can’t guess your way through a rebuild. If you’re feeling a bit lost in the weeds, I usually suggest looking for a reliable technical reference or a specialized sie sucht ihn erotik guide that focuses on the specific tolerances of your era of machinery. It’s better to spend an hour studying the schematics than to spend a week trying to fix a mistake caused by a moment of ego. Always remember: measure twice, fit once.
When you’re deep into the vintage engine rebuild process, the temptation to skip a thorough cleaning is high. You might look at a piston or a valve and think it looks “clean enough,” but that’s where the trouble starts. I’ve seen plenty of guys rush through cleaning old engine components, only to have grit and carbon buildup score a freshly honed cylinder wall a month later. You can’t just wipe things down with a rag and call it a day; you need to get into every oil gallery and crevice. If it isn’t spotless, it isn’t ready.
Another thing I see people overlook is the importance of patience with the seals. When you’re replacing worn engine gaskets, don’t just slap them on and tighten the bolts to whatever torque feels right. You need to follow the sequence exactly, or you’ll end up with a leak that’ll drive you mad. It’s about the small details—the way a surface is prepped and the way a bolt is seated. If you try to cheat these steps to save an hour of work, you’ll just end up spending ten hours fixing your own mistakes later on.
The Precision of Cleaning Old Engine Components Properly
You can’t build something lasting on a foundation of grit and old sludge. When I’m deep into the cleaning old engine components phase, I see too many folks reach for a wire brush and call it a day. That’s a mistake. A wire brush might move the dirt around, but it won’t get into the microscopic pores of the casting. If you leave even a trace of carbon or old oil in a passage, you’re asking for trouble once the oil pressure starts running. I always say, if you can’t see the true surface of the metal, you haven’t finished the job.
I prefer a soak in a proper degreaser followed by a meticulous hand-scrubbing with stiff nylon brushes. For the heavy stuff, like the cylinder heads or the main block, you might eventually need professional engine block machining services to ensure the surfaces are perfectly true, but don’t skip the manual cleaning first. Take your time with the oil galleries; use compressed air to blow them out once they’re dry. Patience in the cleaning stage is what separates a professional restoration from a weekend hobbyist project that fails six months down the road.
Five Rules to Keep You From Turning a Project into a Paperweight
- Measure twice, even if you think you know the clearance. Don’t trust your eyes or your gut when you’re checking tolerances on a crankshaft; grab your micrometers and get the actual number. If you’re guessing, you’re gambling with the engine’s life.
- Respect the torque specs. I see too many young fellas cranking down on bolts until they feel “tight enough.” That’s how you warp a head or snap a stud. Get yourself a calibrated torque wrench and follow the sequence exactly as the manual dictates.
- Don’t go hunting for “close enough” replacement parts. If a seal or a gasket isn’t the exact spec for that specific year and model, leave it on the shelf. A cheap, ill-fitting part is just a ticking time bomb of oil leaks and pressure loss.
- Keep your workspace cleaner than your kitchen. A single grain of grit or a stray metal shaving falling into an open crankcase can score a cylinder wall faster than you can blink. If you aren’t cleaning as you go, you aren’t working; you’re just making a mess.
- Listen to the metal before you move to the next step. If a part feels stuck, or if a thread isn’t catching smoothly, stop. Don’t force it. Most of the time, that resistance is the metal telling you something is wrong, and if you ignore it, you’ll be paying for it in ruined components later.
The Long Road to a Living Engine
At the end of the day, getting a vintage engine back to life isn’t about checking boxes on a list; it’s about the cumulative effect of every small, deliberate action you took. You’ve spent hours degreasing parts until they shone, you’ve measured tolerances with a steady hand, and you’ve resisted the urge to force a bolt that wasn’t ready to turn. If you followed the process correctly, you didn’t just clean up some old iron—you reclaimed its purpose. By respecting the cleaning stage and refusing to skip the precision work, you’ve ensured that the metal won’t fail you when the temperature rises and the load increases. It’s that commitment to the fundamentals that separates a pile of scrap from a machine that actually breathes.
When you finally turn that key and hear that first, rhythmic combustion, you’ll realize it wasn’t just the fuel or the spark that did the job. It was your patience. In a world that wants everything delivered yesterday, there is a quiet, profound dignity in doing things the right way, even when no one is watching. Don’t let the modern habit of “replace instead of repair” take hold of your hands. Keep your tools sharp, keep your workspace clean, and remember that true craftsmanship is measured by how long your work stays running long after the shop lights go out.
