I can still smell it if I close my eyes—that sharp, biting scent of cutting oil and the rhythmic, metallic shriek of a tool bit fighting a piece of stubborn steel. I remember my first real job in the fabrication shop back in ’78; I thought I could manhandle a workpiece into submission just by cranking the handwheels faster. I learned the hard way that day that metal lathe operation isn’t about brute force or how much money you’ve spent on fancy digital readouts. It’s about feeling the vibration through the handles and listening to what the machine is trying to tell you before you snap a tool or, worse, ruin a perfectly good casting.
I’m not here to sell you on some overpriced, computerized magic that does the thinking for you. What I want to do is pass on the actual mechanics of the craft—the kind of stuff you only learn after you’ve scrapped enough material to fill a scrap bin. I’m going to walk you through the fundamentals of metal lathe operation with a focus on steady hands, proper speeds, and the patience required to get a finish you can actually be proud of. We’re going to do this the right way, so you can build things that actually last.
Table of Contents
Strict Lathe Machine Safety Protocols to Guard Your Hands
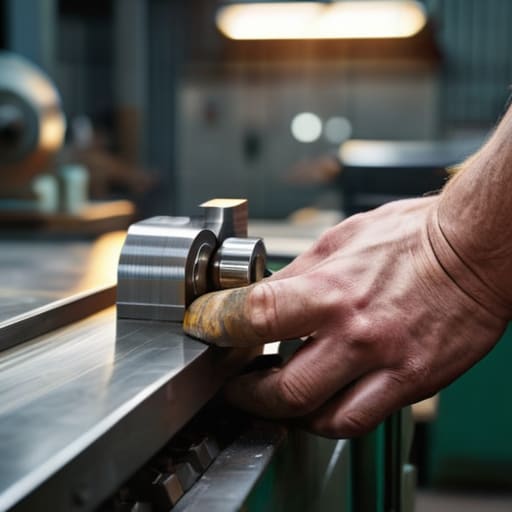
Look, I’ve seen enough close calls in my forty years to know that a lathe doesn’t care about your experience level; it only cares about physics. If you get careless, that machine will take a finger before you even realize you’ve made a mistake. Before you even think about flipping the power switch, you need to establish strict lathe machine safety protocols that are second nature to you. This means no loose sleeves, no dangling jewelry, and for heaven’s sake, keep your hair tied back. I always make it a point to clear my workbench of any stray rags or oily scraps before I start; a cluttered workspace is just an invitation for an accident.
Once you’re actually at the machine, your focus has to be absolute. Never, and I mean never, attempt to adjust your workpiece or clear out metal shavings with your bare hands while the spindle is turning. I use a dedicated brush for a reason. Even if you’ve mastered your workpiece mounting methods and feel confident in the setup, stay vigilant. Keep your eyes on the tool bit and your hands well clear of the rotating chuck. If something sounds off or vibrates too much, stop immediately. Don’t try to “muscle through” a bad cut; that’s how things break and how people get hurt.
Choosing Proper Lathe Chuck Types for a Secure Hold

Now, once you’ve got your safety gear sorted, you have to talk about how you’re actually going to hold your material. If your workpiece isn’t seated right, nothing else matters—you can have the best technique in the world, but if that piece flies out of the machine, you’re looking at a disaster. When it comes to workpiece mounting methods, you need to pick the right tool for the job. For most of the general turning I do in my shop, a standard three-jaw self-centering chuck is my go-to because it’s fast and keeps things centered without much fuss. It’s great for round stock, but don’t get lazy; always double-check your alignment.
If you’re working on something irregular or a piece that’s a bit more temperamental, you’ll want to reach for a four-jaw independent chuck. It takes more time to set up, but it gives you the control needed for achieving true machining precision techniques on odd shapes. You’re adjusting each jaw individually, which means you can dial in the grip perfectly. It’s more work, sure, but in this shop, we don’t trade accuracy for convenience. Choosing the right of the various lathe chuck types is the difference between a clean cut and a ruined afternoon.
Five Rules for Keeping Your Cuts Clean and Your Tools Sharp
- Listen to the machine. A good cut has a steady, rhythmic hum to it; if you start hearing a high-pitched scream or a heavy, irregular chatter, you’re doing something wrong. Stop, check your feed rate, and see if your tool is dull or if you’re pushing too hard.
- Don’t go skimping on the coolant. I’ve seen too many young lads try to run dry just to save a bit of cleanup time, but you’ll only end up burning your tool tip or warping the workpiece. Keep that flow steady to manage the heat properly.
- Measure twice, cut once—and then measure a third time. I don’t care how confident you feel; a micrometer doesn’t lie, but a quick glance with your eyes certainly will. If you’re off by a hair now, you’ll be fighting that error for the rest of the job.
- Watch your chip control. If those metal curls start nesting up around the tool post or getting too long and dangerous, slow down or adjust your depth of cut. You don’t want a bird’s nest of hot steel tangling up your work or, worse, catching your sleeve.
- Clean your ways every single time you finish a session. I’ve seen fine grit and metal shavings get ground into the machine’s precision surfaces because someone was too lazy to grab a rag. Treat your lathe with respect, and it’ll keep giving you accurate work for years.
The Bottom Line Before You Turn the Power On
Never trade safety for speed; if you’re feeling rushed to finish a job, that’s exactly when you’ll lose a finger or scrap a workpiece.
A secure hold is non-negotiable, so pick the right chuck for the job and double-check your clamping before you even think about hitting the switch.
Respect the machine’s limits and listen to the sound of the cut—if it sounds wrong, stop immediately and figure out why instead of forcing it.
The Sound of a Good Cut
You’ll know you’re doing it right not by looking at the dial, but by listening to the machine; if that chatter starts ringing in your ears, you’ve lost your rhythm, and if you try to force it, the metal will fight you every step of the way.
Alistair Fenwick
Getting It Right the First Time

At the end of the day, running a lathe isn’t about how fast you can spin a piece of stock or how many shavings you can pile on the floor. It’s about the fundamentals we’ve covered: keeping your hands clear of the danger zones, picking the right chuck so your workpiece doesn’t become a projectile, and respecting the machine’s limits. If you skip the safety checks or try to force a cut with a dull tool just to save a few minutes, you aren’t being efficient—you’re being reckless. Precision is born from preparation, and if you take the time to set things up properly, the metal will tell you everything you need to know.
I know it can feel a bit daunting when you’re staring down a heavy piece of steel and a spinning spindle, but don’t let that stop you. There is a particular kind of satisfaction that comes from taking a raw, ugly hunk of metal and turning it into something perfectly balanced and smooth to the touch. It’s a skill that stays with you, a bit of true craftsmanship that most people today have forgotten how to value. Just keep your eyes on the cut, keep your tools sharp, and remember that patience is your best tool in this shop. Now, get to work and make something that lasts.
Frequently Asked Questions
How do I know if I'm running my spindle speed too high for the specific diameter of the stock I'm turning?
Listen, you can’t just pick a number and hope for the best. If you’re turning a thick piece of stock and it starts screaming or vibrating like a tuning fork, you’re running too fast. You want to hear a steady, clean hum. A good rule of thumb is to start slow; if the surface finish looks torn or the tool is getting blisteringly hot, back off that spindle. Respect the diameter, or you’ll ruin the cut.
What's the best way to tell if my cutting tool is dull or just poorly positioned in the tool post?
Listen, if you’re seeing a nasty finish or hearing a high-pitched chatter, don’t go grabbing the grinder just yet. First, check your tool height. If that tip is sitting even a hair too high or too low, it won’t bite; it’ll just rub and burn the workpiece. If the geometry is dead-on but you’re still seeing heavy, jagged chips and the metal is turning blue from heat, then you’ve got a dull edge.
How much should I be worrying about chatter when I'm trying to take a deeper cut on a long piece of material?
You ought to be worrying about it, alright. Chatter isn’t just a nuisance; it’s the sound of your machine fighting you and your workpiece screaming for mercy. When you’re working a long piece, that vibration is going to chew up your finish and potentially snap a tool. If you can’t take the depth in one go, don’t force it. Back off the depth of cut, check your tool overhang, and make sure your work is supported.
