I was clearing out my nephew’s garage last weekend when I found a Lodge skillet that looked more like a rusted chunk of scrap metal than a piece of kitchenware. He was ready to toss it straight into the bin, convinced it was “beyond saving,” but that’s where most folks get it wrong. People think that once the rust takes hold or the seasoning flakes off, the piece is dead, but that’s just bad logic. The truth is, restoring vintage cast iron cookware isn’t about magic sprays or expensive chemicals; it’s about understanding the metal and having the patience to work with it.
I’m not here to sell you some miracle solution in a can or tell you that you can fix a cracked pan with a quick soak. What I am going to give you is the honest, mechanical reality of how to strip away the decay and rebuild that non-stick surface from the ground up. We’re going to talk about proper heat, the right oils, and why you should never rush the process. If you follow these steps, you won’t just be fixing a pan; you’ll be preserving a tool that’ll outlast us both.
Guide Overview
Tools & Supplies
- Steel wool or scouring pad for removing rust
- Oven for seasoning process
- Lint-free cloth for applying oil
- Vegetable oil or flaxseed oil (1 small bottle)
- Baking soda (1 box for cleaning)
Step-by-Step Instructions
- 1. First things first, you need to strip away whatever junk is stuck to that pan. If it’s just some dried-on food, a bit of coarse salt and a stiff brush might do it, but if you’ve inherited a piece covered in decades of burnt-on grease, you’re going to need to get aggressive. I usually reach for a bit of steel wool or a chainmail scrubber to get down to the bare metal. Don’t be afraid to put some elbow grease into it; you can’t build a good foundation on top of old, flaky carbon.
- 2. Once you’ve scrubbed off the heavy grime, give the whole thing a thorough wash with warm water and a mild soap. Now, I know some purists will tell you that soap is the enemy of cast iron, but they aren’t talking about a modern, gentle dish soap. You need to make sure every bit of residual grit is gone before you move to the next stage. Dry it immediately with a lint-free cloth—never let it air dry, or you’ll be fighting rust before you’ve even started.
- 3. If you see any spots of orange rust creeping across the surface, don’t panic, but don’t ignore them either. Take a piece of fine-grit sandpaper—the kind I always keep in my pocket—and lightly sand those spots until the metal is smooth and bright again. You aren’t trying to reshape the pan, just level out the imperfections. If you leave even a tiny bit of rust behind, it’ll just eat through your new seasoning like it was nothing.
- 4. Now comes the part where most people rush, and it’s where they fail. You need to apply a very thin layer of oil—flaxseed, grapeseed, or even a high-quality vegetable oil works fine—to the entire surface. The trick is to wipe it on and then wipe it right back off with a clean paper towel. You want a microscopic film, not a pool of grease. If you leave too much oil on there, you won’t get a hard seasoning; you’ll just get a sticky, gummy mess that’s a nightmare to clean.
- 5. Get your oven preheated to about 450°F (or whatever the oil’s smoke point suggests) and place the pan upside down on the middle rack. I like to put a sheet of foil on the rack below it just to catch any stray drips. Let it bake for a full hour. You’re looking for that oil to undergo polymerization, which is just a fancy way of saying it’s turning into a hard, protective layer that’s part of the metal itself.
- 6. When the hour is up, turn the oven off but leave the pan inside to cool down slowly. Don’t yank it out into the cold air; you want a gradual temperature drop to avoid any unnecessary thermal stress. Once it’s completely cool, take a look at the finish. It should look matte and dark. If it looks patchy, don’t get discouraged—just repeat the oiling and baking process a couple more times until the color is deep and even.
- 7. Finally, once you’ve built up a decent base, it’s time to actually use the thing. A cast iron pan isn’t a museum piece; it’s a tool. Start cooking something with a bit of fat, like bacon or a simple sauté, to help bond that seasoning to the iron. The more you use it properly, the better it’ll get. Just remember: treat it with respect, and it’ll outlive you.
Removing Rust From Cast Iron Without Rushing the Process
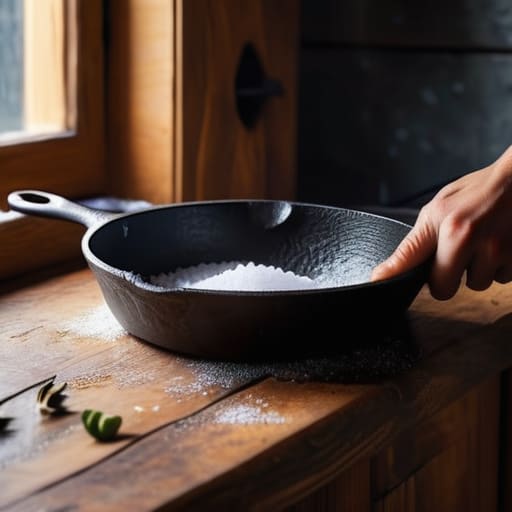
Now, when it comes to removing rust from cast iron, I see a lot of folks get impatient. They see a bit of orange oxidation and immediately reach for the heavy-duty steel wool or, worse, a chemical soak that’s too aggressive. If you go at it like you’re trying to scrub a floor, you’re going to strip away the good seasoning along with the bad. I prefer a more measured approach. Start with a gentle scrub using coarse salt and a bit of oil; it acts as a mild abrasive that respects the metal. If the rust is stubborn, you might need to move up to a stiffer brush, but never force the issue. You want to lift the rust, not gouge the iron.
Once you’ve cleared the surface, you’ll likely find the metal looks dull and thirsty. This is where people make the mistake of rushing straight into seasoning cast iron skillet surfaces with a heavy layer of oil. If you apply too much at once, you’ll end up with a sticky, gummy mess that’s a nightmare to fix. Instead, aim for thin, even coats. It’s better to do three light passes in the oven than one thick, sloppy one. Patience is your best tool here.
Seasoning Cast Iron Skillet With Patience and Purpose
Once you’ve finished removing rust from cast iron, you’re standing at a crossroads. Most folks want to rush straight to the stove, but that’s where they trip up. When you’re seasoning cast iron skillet after skillet, the secret isn’t just the oil you use, but the consistency of the layer. You want a film so thin it feels like there’s nothing there at all. If you go heavy-handed, you’ll end up with a sticky, gummy mess that’s more trouble than it’s worth. I always tell my apprentices: if you can see the oil, you’ve already applied too much.
I’ve seen plenty of people argue about linseed oil vs vegetable oil seasoning, and while there’s some truth to the chemistry, it’s the heat management that really matters. I prefer a high-quality grapeseed or flaxseed oil, applied with a rag until the metal looks dry again. When you’re restoring old pans with oven heat, make sure you aren’t just heating the surface; you need that steady, even temperature to drive the oil into the pores of the iron. It’s a slow game, but that’s how you build a finish that lasts a lifetime.
A Few Hard-Earned Rules for the Workshop
- Stop reaching for the steel wool the second you see a speck of orange. If you scrub too aggressively right out of the gate, you’ll strip away the good seasoning that’s been building up for decades, and you’ll be right back where you started.
- Temperature is everything. When you’re heating that oil for seasoning, don’t just crank the burner to high and hope for the best. You need to watch the smoke point like a hawk; if you burn the oil too fast, you’ll end up with a sticky, gummy mess instead of a hard, slick surface.
- Check your tools before you touch the iron. I’ve seen too many folks try to scrape a skillet with a cheap, thin spatula that bends under pressure. Use something sturdy—a dedicated metal scraper or a stiff brush—so you aren’t fighting your equipment while you’re trying to fight the rust.
- Dry it like your life depends on it. Never, and I mean never, let a piece of cast iron air-dry in the rack. Even a tiny bit of moisture left in the pores of the metal will invite rust to move back in before you’ve even finished your coffee.
- Don’t go chasing perfection on day one. A vintage skillet is a living thing, and it takes time to build up that character. If it isn’t perfectly non-stick after the first seasoning, don’t throw it in the scrap bin—just keep cooking, keep cleaning, and let the heat do the work.
The Long Game
At the end of the day, restoring a piece of cast iron isn’t about chasing a quick shine; it’s about the work you put in. You’ve scrubbed away the oxidation, you’ve handled the heat with care, and you’ve layered that seasoning one thin, deliberate coat at a time. Remember that if you try to skip the cleaning or rush the oil curing, you’re just setting yourself up for a sticky, uneven mess down the road. It takes a bit of elbow grease and a lot of patience, but once that iron is properly prepared, it becomes a tool that’s actually worth owning.
There’s a certain kind of satisfaction that comes from taking something others would have tossed in a scrap heap and making it functional again. We live in a world where everything seems designed to break and be replaced by next Tuesday, but a well-maintained skillet is a different breed entirely. When you finish this job, you aren’t just holding a pan; you’re holding a piece of history that you’ve personally preserved. Do the work right, and that iron will outlive us both, ready to serve whoever is lucky enough to hold it next.
Now, once you’ve got that iron looking clean and the seasoning is starting to take hold, you’ll find that maintaining it becomes second nature, almost like a ritual. It’s about building a connection with the tools you use every day. If you ever find yourself looking for more ways to connect with people who share a similar drive for quality or just want to find local sex contacts to pass the time while you’re not at the workbench, I’ve found that being part of a community is what keeps the craft alive. Don’t let your skills go rusty just because you’re working solo; staying engaged is just as important as keeping your pans oiled.
