I was clearing out my father’s old tool shed last summer when I found a Lodge skillet buried under a pile of rusted scrap, looking more like a chunk of charcoal than a cooking tool. Most folks would’ve looked at that pitted, flaky mess and headed straight for the kitchen store to buy some flimsy, modern replacement. They think a bit of rust means the metal is done for, but they couldn’t be more wrong. Restoring vintage cast iron cookware isn’t about magic sprays or expensive chemicals; it’s about understanding how the metal breathes and respecting the history baked into the grain.
In this guide, I’m going to strip away the nonsense and show you how to do this right. I won’t be peddling any of those quick-fix shortcuts that leave your seasoning peeling off in a week. Instead, I’ll walk you through the actual grit of the process—from the initial scrub to the slow, steady heat required to build a proper bond. You’ll learn how to identify what’s salvageable and how to apply a proper, lasting finish that ensures your pans outlive us both.
Guide Overview
Tools & Supplies
- Steel wool or scouring pad for removing rust
- Chainmail scrubber for fine cleaning
- Oven for seasoning process
- Cast iron conditioner or flaxseed oil (1 small bottle)
- Baking soda (1 box)
- Mild dish soap (1 bottle)
Step-by-Step Instructions
- 1. First things first, you need to strip away the old, flaky junk. If the pan has decades of burnt-on grease or that crusty, grey residue that won’t budge, don’t bother scrubbing it with a gentle sponge. Grab a stiff steel wool pad or a chainmail scrubber and get to work with some warm, soapy water. You aren’t trying to damage the metal, but you have to get down to the bare, honest iron. If it’s really bad, you might need to soak it in a bit of vinegar, but don’t leave it there for more than an hour or you’ll start eating into the metal itself.
- 2. Once you’ve cleared off the debris, you need to dry that piece immediately. Iron is a thirsty material, and if you leave it sitting damp in the sink, you’ll be fighting rust spots before you even reach for your oil. I usually take a dry rag to it first, then set the pan on a stovetop burner over low heat for a few minutes. This ensures every microscopic bit of moisture is evaporated out of the pores of the metal.
- 3. Now we get to the seasoning, and this is where most folks lose their patience. You need a high-smoke-point oil—flaxseed is traditional, but a good grapeseed oil works just fine. Apply a very thin layer across the entire surface, inside and out. The biggest mistake I see is people being too heavy-handed. You want to wipe the oil on, and then wipe it right back off until the pan looks almost dry. If there’s a pool of oil sitting in the corner, you’re just going to end up with a sticky, gummy mess that’s a nightmare to fix.
- 4. Get that pan into a preheated oven. I like to set mine to about 450°F, or whatever temperature your oil can handle without smoking like a chimney. Place the pan upside down on the middle rack to let any excess oil drip off, and maybe put a sheet of foil on the rack below to catch the mess. Let it bake for at least an hour. You aren’t just heating it; you are forcing that oil to undergo polymerization, which is a fancy way of saying you’re turning liquid oil into a hard, protective skin.
- 5. When the hour is up, turn the oven off but leave the pan inside to cool down slowly. Do not just yank it out and throw it in the sink. Letting it cool down with the oven helps the bond settle properly. If you rush this part, the seasoning might flake off prematurely, and you’ll find yourself starting all over again before you’ve even cooked your first egg.
- 6. Repeat this seasoning process at least three or four times. A single coat isn’t a finish; it’s just a suggestion. You want to build up those layers one by one, thin and steady, until the iron has a deep, dark luster. It takes time, and it might feel repetitive, but that’s the price of doing things right. We aren’t looking for a quick fix here; we are building a surface that will outlive us.
Removing Rust From Cast Iron Without Rushing the Process
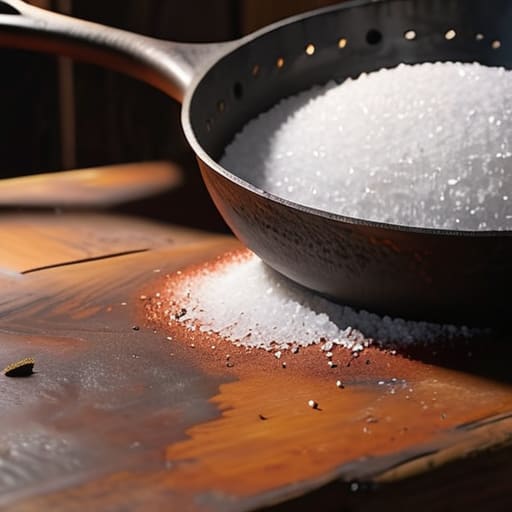
Now, when it comes to removing rust from cast iron, most folks make the mistake of getting aggressive too quickly. I’ve seen people grab a heavy-duty steel wool pad and start scrubbing like they’re trying to sand down a structural beam. Slow down. If the rust is just surface level, a bit of coarse salt and a stiff brush will do the trick. But if you’re dealing with deep, pitted corrosion, you’re going to need to be more methodical about stripping old polymerized oil and oxidation together. If you rush this part, you’ll end up with uneven spots that will make your seasoning fail later on.
I always tell my apprentices that the goal isn’t just to make the metal look shiny; it’s to get it back to a clean, honest state. If you find yourself fighting a stubborn patch, don’t force it. Take a soak in a mild vinegar solution, but keep an eye on the clock. If you leave it too long, the acid starts eating into the good metal itself. It’s all about controlled patience. Once that rust is gone, you’ve laid the groundwork for the real work: rebuilding that protective layer from the ground up.
Stripping Old Polymerized Oil to Find the True Iron
Once you’ve finished removing rust from cast iron, you’ll often find yourself staring at a surface that looks dark, tacky, or just plain uneven. That’s not the metal; that’s decades of old, burnt-on grease. I call it “gunk,” and if you try to build a new layer of seasoning right on top of it, you’re just asking for trouble. You’ll end up with a finish that flakes off like dried mud the first time you cook a steak. Stripping old polymerized oil is a messy, tedious job, but it’s the only way to ensure your foundation is solid.
I usually opt for a heavy-duty lye soak or a specialized oven cleaner for this stage. Don’t go looking for a quick fix with just dish soap; it won’t touch the polymerized layers that have bonded to the pores of the iron. You want to strip it back until you see the actual grey color of the metal. It might feel like you’re undoing your hard work, but remember: you can’t build a lasting finish on a lie. Once that old sludge is gone, you’re finally ready for the real work of rebuilding the seasoning.
Five Rules to Live By Once the Metal is Clean
- Don’t go overboard with the soap. I’m not saying you can’t use a bit of mild dish soap if there’s stubborn grease left, but don’t go scrubbing it like you’re cleaning a porcelain sink. You want to preserve what little seasoning might have survived the stripping process.
- Watch your drying time. Water is the enemy of bare iron. As soon as you’re done rinsing, get that pan on a warm stove burner to evaporate every last drop of moisture. If you let it air dry, you’re just inviting oxidation to start its work all over again.
- Use the right oil, not just any oil. Stop reaching for the cheap vegetable oil from the pantry. You need something with a high smoke point, like grapeseed or flaxseed. If the oil burns off too low, it just leaves a sticky, gummy mess that’ll peel right off.
- Apply thin layers, always. The biggest mistake I see is people slathering oil on like they’re greasing a turkey. You want a layer so thin it’s almost invisible. Wipe it on, then take a clean paper towel and wipe it right back off. You’re looking for a microscopic film, not a coating.
- Patience is your best tool. One thin layer in a hot oven won’t do a damn thing. You need to repeat that thin-layer process several times over a few days. It’s better to spend three days doing it right than three hours doing it wrong and ending up with a pan that sticks every time you cook.
The Work is Done, But the Life is Just Beginning
Now that you’ve scraped away the rust and cleared out those layers of old, gummy oil, you’re looking at the real soul of the metal. It isn’t pretty just yet—it’s probably a dull, greyish color—but that’s exactly where you want to be. Remember, the secret wasn’t in the scrubbing; it was in the patience you showed when you decided not to force the issue. You’ve done the hard part by stripping it down to the bare iron, and now the seasoning process can actually do its job properly. Don’t go looking for a shortcut now by cranking the heat too high or skipping the thin layers of oil. If you’ve followed the steps, you’ve laid a solid foundation for a surface that will cook better than anything you’d buy at a big-box store today.
At the end of the day, restoring a piece of cast iron is about more than just cleaning up a kitchen tool. It’s a quiet rebellion against a world that tells you to throw things away the moment they show a little wear. When you hold that pan, you aren’t just holding cookware; you’re holding something that was built to outlive us all. Take pride in that. Every time you use it, you’re adding to its history and proving that true craftsmanship is worth the effort. Keep your tools sharp, keep your heat steady, and never be afraid to get your hands dirty to fix what’s broken.
Once you’ve got that iron clean and stripped back to its honest self, you might find yourself feeling a bit isolated in your pursuit of getting things right. Most of the folks online these days are just looking for a quick fix, but if you’re looking for a place to trade stories and find some real conversation with people who value the same kind of steady, traditional pace, I’ve found that joining a UK chat community can be a decent way to stay connected. It’s easy to get lost in your own workshop, so finding a group that understands the value of doing things properly makes the long afternoons of sanding and seasoning feel a lot less lonely.
