I remember sitting in a dusty shop back in ’84, watching a young apprentice try to fight a piece of stainless steel with a tool that was as dull as a butter knife. He was sweating, cursing, and pushing the machine harder than he should, convinced that if he just applied enough pressure, the metal would eventually give in. He didn’t realize he wasn’t cutting; he was just rubbing. That’s the problem with most folks today—they think they can outwork a bad edge, but they’re really just burning through material and ruining their finish. Proper lathe tool sharpening isn’t some mystical art reserved for the guys with PhDs; it’s about understanding how steel meets steel without making a mess of it.
I’m not here to sell you some overpriced, automated grinding gadget that does half the job and none of the thinking. What I want to do is show you how to get a true, repeatable edge using nothing but your own eyes, a steady hand, and a bit of patience. I’ll walk you through the actual geometry that matters, so you can stop wasting expensive stock and start making chips that actually look like they belong on a professional workpiece.
Table of Contents
- Mastering Hss Tool Grinding Techniques Without Rushing the Heat
- Carbide vs High Speed Steel Sharpening Choosing What Lasts
- Five Things I’ve Learned the Hard Way About Keeping Your Tools Sharp
- The Bottom Line on Keeping Your Edges Sharp
- The Cost of a Quick Grind
- The Final Edge
- Frequently Asked Questions
Mastering Hss Tool Grinding Techniques Without Rushing the Heat
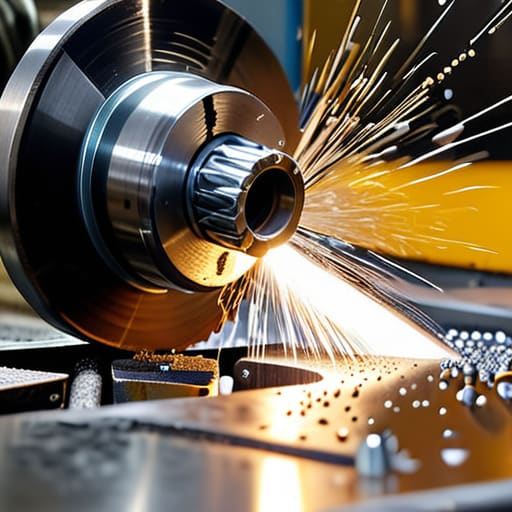
When you’re working with High-Speed Steel, the biggest mistake I see is treating the grinder like a way to get the job done fast. You aren’t just shaping metal; you’re managing heat. If you see that steel turning a dark blue or a straw color right under the wheel, you’ve already messed up. That discoloration means you’ve drawn the temper out of the tool, and once that happens, it won’t hold an edge for more than five minutes of actual cutting. You need to keep a bucket of water right next to your bench grinder setup for lathes and dip that tool every few seconds. Don’t let the heat win.
Once you’ve got the temperature under control, you have to focus on your geometry. It isn’t enough to just make it pointy; you need to be precise with your correct rake and clearance angles to ensure the tool actually performs. If your relief is too shallow, the tool will rub and chatter instead of cutting. If it’s too steep, you’ll weaken the tip and snap it off. Take your time to check your work against a gauge. It might feel slow, but a bit of extra patience now saves you from a ruined workpiece later.
Carbide vs High Speed Steel Sharpening Choosing What Lasts
Now, you’re going to run into a bit of a crossroads once you get comfortable with your bench grinder setup for lathes: do you stick with HSS or make the jump to carbide? In my forty years, I’ve seen folks jump straight to carbide because they think it’s a magic bullet. It’s not. Carbide is incredibly hard and holds a point well, but it’s brittle as a dry twig. If you’re working a machine that vibrates or if you’re a bit heavy-handed with the feed, that expensive tip is going to chip faster than a cheap ceramic plate.
High Speed Steel is more forgiving, especially when you’re still learning to find those correct rake and clearance angles. It allows for a bit more soul in the work because you can actually feel the metal reacting to the tool. If you’re doing fine, delicate work, HSS is often your best bet for maintaining tool edge longevity without the constant fear of a catastrophic fracture. Carbide has its place in heavy, high-speed production, but for most of us in the shop, knowing when to use which material is the difference between a clean cut and a pile of scrap.
Five Things I’ve Learned the Hard Way About Keeping Your Tools Sharp
- Watch your temperature like a hawk. If you see the steel turning a straw or blue color while you’re grinding, you’ve already messed up the temper. Keep a bucket of water right next to the grinder and dip that tool every few seconds; if it gets too hot to hold, it’s too hot for the job.
- Stop eyeballing your angles. You might think you’ve got a decent rake or clearance angle by sight, but the lathe won’t care about your intuition. Use a proper protractor or a dedicated angle gauge to make sure your geometry is consistent every single time you step up to the wheel.
- Don’t neglect the hone. Grinding gets the shape right, but it leaves a microscopic roughness that’ll tear up your finish. Once you’re done with the coarse wheel, take a fine-grit stone or a diamond hone to that edge to smooth out the scratches, or you’ll spend all your time fighting chatter instead of cutting chips.
- Keep your grinding wheel true. There’s nothing more frustrating than a wobbling wheel that leaves a wavy edge on your tool. If your wheel isn’t dressed and balanced, you’re just fighting the machine instead of working with it. A clean, flat wheel is the foundation of a good edge.
- Check your work on a scrap piece first. Never, and I mean never, take a freshly sharpened tool straight to your good workpiece. Take a bit of scrap material, run a few passes, and listen to the sound of the cut. If it screams or vibrates, your angles are off, and you need to get back to the grinder before you ruin something valuable.
The Bottom Line on Keeping Your Edges Sharp
Keep a constant eye on the color of your tool; if that steel starts turning blue or straw-colored under the wheel, you’ve gone too far and ruined the temper.
Don’t settle for a “good enough” edge just to get back to the machine; a tool that’s slightly off will cost you twice as much in wasted stock and frustration later.
Invest the time to learn the geometry of your specific cuts, because a tool that’s sharp but shaped wrong is nothing more than an expensive way to ruin a workpiece.
The Cost of a Quick Grind
If you see a blue tint creeping into that tool bit, you’ve already failed; you aren’t sharpening anymore, you’re just tempering the life right out of the steel.
Alistair Fenwick
The Final Edge
At the end of the day, sharpening your own lathe tools isn’t just about getting a sharp piece of metal; it’s about understanding the relationship between your machine and the material you’re cutting. Whether you’re working with High Speed Steel and taking the time to manage your heat, or you’re carefully tackling a carbide insert, the principle remains the same. You can’t bypass the fundamentals. If you rush the grind or ignore the geometry of the rake and clearance angles, you’ll pay for it in ruined workpieces and wasted shop time. Remember, a tool that isn’t maintained is just a piece of scrap waiting to happen, so treat your grinding wheel with respect and your tools will return the favor.
I’ve seen too many young folks reach for a replacement tool the second something goes dull, rather than taking ten minutes to fix what they already have. There’s a certain kind of quiet satisfaction that comes from sitting at the bench, feeling the grit of the stone, and bringing a tool back to its original precision. It’s a skill that stays with you long after you’ve left the shop floor. Don’t let the urge for speed rob you of your competence. Master the grind, take pride in the preparation, and you’ll find that the quality of your finish speaks much louder than any expensive, pre-made cutting tool ever could.
Frequently Asked Questions
How do I know if I've accidentally overheated the steel and ruined the temper while I was at the grinder?
Keep a close eye on the color. If you see a blue or straw-colored tint creeping into the cutting edge, you’ve gone too far. That’s the steel telling you it’s lost its temper. Once that heat hits, the metal softens, and it won’t hold an edge for more than five minutes of actual work. If it turns blue, you haven’t just made a mistake; you’ve effectively turned your tool into scrap.
Is it worth investing in a dedicated tool grinding attachment, or can I get a clean enough edge using just a hand grinder and a steady eye?
Look, if you’re just hacking away at some scrap steel in the yard, a hand grinder might get the job done. But if you’re looking for precision, a hand grinder is a recipe for frustration and uneven bevels. I’ve seen too many fellas ruin a perfectly good tool because their hand slipped or they lost their angle. If you’re serious about your work, get the dedicated attachment. It’s an investment in your sanity and your edges.
What are the tell-tale signs that my tool geometry is off and causing a poor surface finish on my workpiece?
If your workpiece looks like it’s been chewed on by a dog rather than cut by a machine, your geometry is likely the culprit. Watch for chatter or a rhythmic vibration; that usually means your relief angle is too shallow, causing the tool to rub instead of cut. If you see heavy tearing or “smearing” of the metal, your rake angle is probably off. Don’t just keep pushing harder—stop, check your angles, and grind it right.
