I remember sitting in my shop ten years ago, staring at a piece of hand-hammered copper that looked more like a muddy mess than a work of art. I’d followed a kit I bought online, thinking I could just spray some chemicals on and call it a day, but all I ended up with was a streaky, uneven disaster that looked cheap. People think that mastering copper patina techniques is about finding a magic bottle of solution that does the work for you, but that’s a lie. The truth is, a real patina isn’t something you just “apply”—it’s something you nurture through careful temperature control and a lot of patience.
In this guide, I’m going to strip away the nonsense and show you how to actually control the oxidation process. I won’t be selling you any fancy, overpriced miracle sprays; instead, I’ll walk you through the practical, hands-on methods I’ve used in my own workshop for decades. We’ll cover how to manage heat, how to use common household acids without ruining your metal, and most importantly, how to respect the timing of the chemical reaction. If you’re tired of wasting good material on rushed results, then let’s get to work.
Table of Contents
Guide Overview
Tools & Supplies
- Spray bottle for applying solutions
- Paintbrushes for controlled application
- Protective gloves to prevent skin oils from touching copper
- Respirator mask for chemical fumes
- Copper object or sheet (1 unit)
- Ammonia solution (1 bottle)
- Vinegar or white distilled vinegar (1 bottle)
- Salt (1 container)
- Spray sealant or clear lacquer (1 can)
Step-by-Step Instructions
- 1. Before you even think about touching a chemical, you have to get that copper spotless. I’ve seen too many folks try to slap a patina over fingerprints or old machine oil, and all they end up with is a blotchy, uneven mess that looks like a mistake. Take some fine steel wool or a degreasing agent and scrub the surface until you can see your reflection clearly. If there’s even a trace of grease left, the reaction won’t take, and you’ll just be wasting your time.
- 2. Once it’s clean, you need to decide if you’re going for a heat-induced color or a chemical soak. If you’re using a torch to get those deep blues and purples, you have to control the flame with a steady hand. Don’t just blast it with high heat all at once; you want to move the flame in slow, circular motions to distribute the temperature evenly. If you rush the heat, you’ll scorch the metal and get a muddy finish that you can’t undo.
- 3. If you’ve opted for a chemical patina—like using liver of sulfur or an ammonia-based solution—you need to prepare your workspace properly. Set up a shallow tray and ensure your copper is completely dry after cleaning. When you apply the solution, do it in thin, controlled layers. It’s much better to build the color up slowly over several applications than to drown the piece in a heavy dose and hope for the best.
- 4. Watch the reaction like a hawk. This isn’t a “set it and forget it” kind of job. Depending on the temperature in your shop and the strength of your solution, the copper can change colors in a matter of minutes. I always keep a close eye on the surface to catch that exact moment when the shade is perfect. The second it hits the tone you’re looking for, you need to be ready to stop the process.
- 5. To stop the chemical reaction dead in its tracks, you must neutralize the piece immediately. I usually use a bath of water mixed with a bit of baking soda to kill any remaining acidity. If you skip this step, the patina will keep eating into the metal long after you’ve put it on the shelf, and eventually, that beautiful finish will turn into a crusty, uneven disaster.
- 6. Once the piece is neutralized and rinsed, you’ll notice it looks a bit dull. That’s normal. To bring out the depth of the color, you need to apply a high-quality wax or a specialized metal sealant. Rub it in with a soft cloth using firm, even pressure. This doesn’t just make it shine; it creates a barrier that protects the work you’ve just put in from the air and moisture.
- 7. Finally, let the piece cure in a dust-free area. Don’t go grabbing it or moving it around too much while the sealant is still setting. A good patina needs a little bit of patience to settle into the metal. If you try to rush the drying process, you’ll likely trap moisture or dust under the finish, and you’ll be right back at square one.
The Truth About Verdigris Effect Application and Patience
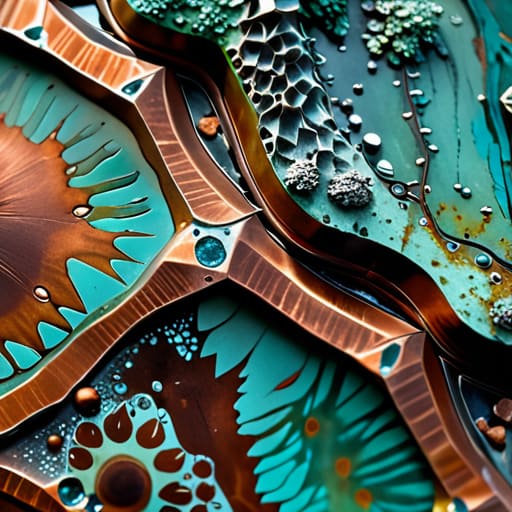
Now, I need to set you straight on something. A lot of folks come into my shop looking for a quick fix, wanting that bright turquoise pop overnight. They think they can just douse the piece in some acidic patina solutions for metal and call it a day. But if you’re looking for a genuine verdigris effect application, you have to understand that nature doesn’t work on a stopwatch. If you force the reaction by cranking up the heat or over-applying the chemicals, you won’t get a deep, crusty texture; you’ll just get a muddy, uneven mess that looks like it was painted on by an amateur.
The real secret to a professional finish lies in the slow build. I always tell my apprentices that you have to watch the metal breathe. You might need to apply your copper metal aging solutions in thin, controlled layers, letting the surface settle between each pass. Once you finally get the color you’re after, don’t just walk away. You’ve got to focus on stabilizing copper oxidation so that the finish doesn’t keep eating into the base metal long after you’ve put the tools down. Patience is your best tool in this shop.
Choosing Proper Acidic Patina Solutions for Metal Longevity
Now, before you go grabbing whatever vinegar or household cleaner you find under the kitchen sink, listen to me: the chemistry matters more than most folks realize. If you’re looking for professional results, you need to understand that different acidic patina solutions for metal will bite into the surface at different rates. I’ve seen plenty of beginners try to rush a finish using overly aggressive acids, only to find they’ve etched the metal so deeply that the surface becomes pitted and uneven. You aren’t just changing the color; you are fundamentally altering the skin of the copper.
If your goal is a long-lasting finish rather than a cheap faux patina for art projects, you have to think about the long game. A shallow, superficial stain will flake off the moment it sees a bit of moisture, leaving you with a mess to clean up. I always tell my apprentices to test a small, inconspicuous scrap first. You want a solution that penetrates the grain without eating the structural integrity of the piece. Respect the chemistry, and the metal will reward you with a finish that actually holds its ground.
Five Rules to Keep from Ruining Your Copper
- Clean your surface until it’s spotless; if there’s a single fingerprint or a trace of oil left on that copper, your patina will go on splotchy and uneven, and you’ll be fighting it for hours.
- Control your heat with a steady hand, not a heavy torch; if you get the metal too hot too fast, you’ll cook the solution right off the surface before it has a chance to actually bite into the metal.
- Test your solution on a scrap piece first, every single time; never assume a new batch of acid or salt will react the same way as the last one, and I’ve seen too many blokes ruin a finished piece because they were too proud to test a bit of waste metal first.
- Don’t go chasing a “perfect” look in one sitting; real patina is a layered process, so it’s better to apply a light coat, let it settle, and come back to it than to drown the metal in chemicals trying to force a result.
- Always rinse thoroughly once you’ve hit the color you’re after; if you leave those acidic salts sitting on the metal once the reaction is done, they’ll keep eating away at the copper until you’ve got nothing left but pits and holes.
## Lessons From the Workbench
Respect the chemistry and the clock; a patina isn’t something you can bully into existence, so if the reaction isn’t happening, step back and let the metal breathe.
Never skimp on your prep work, because if there’s a speck of grease or old oil left on that copper, your solution will bead up and leave you with a blotchy mess instead of a professional finish.
Invest in quality acids and stabilizers from the start, because using cheap, unverified mixtures is a quick way to eat through your metal and ruin a piece you spent hours preparing.
## Respect the Reaction
“You can’t bully a patina into appearing; you either give the chemicals the time they need to bite into the metal, or you’ll end up with a messy, uneven coat that looks more like a mistake than a finish. Real craftsmanship is knowing when to step back and let the chemistry do the work.”
Alistair Fenwick
The Final Polish
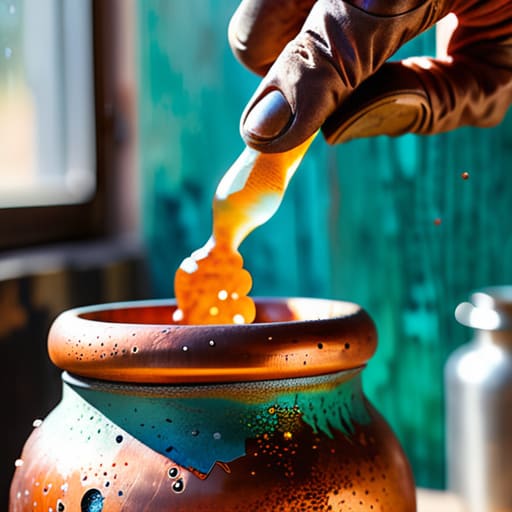
At the end of the day, getting a proper patina isn’t about following a recipe to the letter; it’s about understanding how the metal reacts to the world around it. You’ve learned that choosing the right acidic solution is the foundation, and that rushing the verdigris process is the fastest way to ruin a perfectly good piece of copper. Whether you are using heat to drive the color or letting chemicals do the heavy lifting, remember that consistency is born from observation. If the reaction isn’t looking right, don’t force it. Step back, check your surface preparation, and realize that patience is your most important tool in this shop.
I know it can be frustrating when a piece doesn’t turn out exactly how you pictured it in your head, but that’s just part of the craft. Every mistake is just a lesson in how the material behaves under pressure. My advice to you is to stop looking at the clock and start looking at the metal. When you finally see that deep, authentic color settle in, you’ll know it was worth the wait. Don’t just make things that look pretty; make things that carry a history. Build it right, treat it with respect, and you’ll have something that stands the test of time long after the trends have faded.
Frequently Asked Questions
How do I know if I've gone too far with the acid and actually started eating into the structural integrity of the copper?
You’ll know the second you stop seeing color and start seeing texture. If the surface feels pitted or rough like sandpaper under your thumb—rather than just having a layer of color sitting on top—you’ve gone too deep. If you see any thinning of the metal or if it starts feeling “soft” or brittle, stop immediately. You aren’t just coloring the metal anymore; you’re consuming it. Neutralize the acid right then and wash it clean.
Can I use a wax finish to seal the patina once I'm happy with the color, or will that just trap moisture underneath?
You can certainly use a wax, but you’ve got to do it right. If you just slap a thick layer of cheap wax on there, you’ll trap moisture against the metal and end up with a mess of corrosion under the surface. Use a high-quality microcrystalline wax instead. Apply it thin, buff it well, and make sure the metal is bone-dry before you start. If you respect the seal, the patina stays put.
What’s the best way to handle a patch of uneven coloring if the reaction didn't take the way I planned?
Don’t panic and don’t try to force it with more chemicals. If the color’s blotchy, you’ve likely rushed the application or didn’t prep the surface clean enough. Your best bet is to go back to basics: sand that patch down with a fine grit until you’re back to the bare metal. Once it’s smooth, start the process over. It’s better to strip it and do it right than to layer mistakes on top.
