I was cleaning out a crate of old workshop finds last Tuesday when I pulled out a heavy copper kettle that had been sitting in a damp corner for a decade. Most folks see that thick, crusty green layer and think the piece is ruined, or worse, they go out and buy some expensive, store-bought chemical kit that promises a miracle in seconds. That’s nonsense. People treat copper oxidation like it’s some kind of permanent disease that needs a magic wand, but in my shop, we know it’s just the metal reacting to the world around it. You don’t need a fancy solution; you just need to respect the material and understand why it’s changing.
I’m not here to sell you a miracle in a bottle or give you some complicated, laboratory-grade procedure that requires a degree in chemistry. My goal is to show you how to handle copper oxidation using the same steady, practical methods I used for forty years in the fabrication shops. I’ll walk you through how to clean it without stripping the soul out of the metal and how to maintain it so your hard work actually lasts a lifetime. We’re going to do this the right way—with patience, the right grit, and no shortcuts.
Table of Contents
The Chemical Reaction of Copper and Oxygen

Now, I’m not going to bore you with a chemistry lecture that sounds like it came straight out of a textbook, but you need to understand what’s actually happening on the surface of your metal. When you leave a piece of copper out in the air, you aren’t just looking at a bit of dirt; you’re witnessing the chemical reaction of copper and oxygen in real-time. As soon as that metal meets the air, oxygen begins to latch onto the surface, creating a thin layer of cuprous oxide. If there’s moisture or salt in the air, that process picks up speed, and that’s when you start seeing those deep browns and reds.
It’s a slow, steady transformation. Depending on your environment, you might see a variety of different copper patina colors—from a dull, dark chocolate to that classic, bright verdigris you see on old statues. Some folks think this is just damage, but if you’re working with quality material, it’s actually a form of protection. That layer acts as a shield, stopping the deeper metal from rotting away. You just have to decide if you’re looking for natural vs artificial aging before you start your next project.
Decoding Copper Patina Colors Through Proper Aging
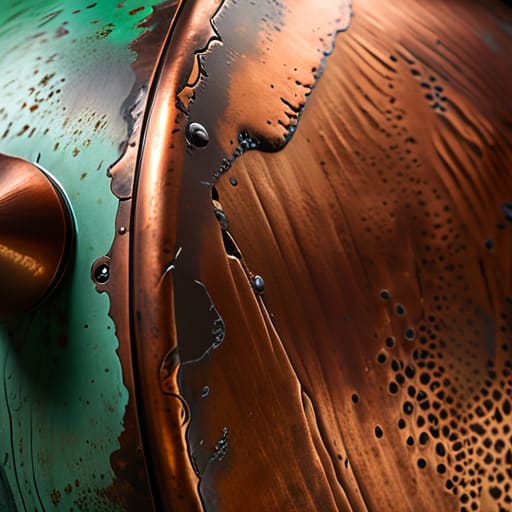
When you look at an old copper kettle or a piece of architectural flashing, you aren’t just looking at decay; you’re looking at a history of exposure. People often mistake the change in color for simple damage, but understanding the different copper patina colors is key to knowing if you’re dealing with a stable protective layer or something that needs your immediate attention. A deep, chocolatey brown usually means the metal is settling into a stable state, while that classic powdery mint green—the verdigris—is the result of a long-term interaction with moisture and carbon dioxide.
There is a massive difference between natural vs artificial aging when it comes to the soul of the piece. If you’re trying to mimic an antique look using acids or salts in the shop, you have to be careful not to rush the process. A quick soak might give you the color, but it won’t give you the depth that decades of slow, steady exposure provide. If you want a finish that actually holds up, you need to treat the surface with respect, ensuring you aren’t just masking the metal, but actually working with the natural chemistry of the material.
Five Ways to Manage Oxidation Without Wasting Your Metal
- Stop reaching for those harsh, store-bought chemical cleaners right away. Most of those acidic sprays strip the metal too fast and leave it looking thin and lifeless. If you’re looking to clean a piece, try a simple paste of salt and vinegar or even just some fine sand and mild soap first. It gives you more control over how much material you’re actually taking off.
- When you’re working with copper that’s already gone green, don’t just sand it blindly. You need to understand if that patina is stable or if it’s actually eating into the integrity of the piece. If it’s a thin, hard layer, leave it be or polish it carefully; if it’s flaky and powdery, you’ve got deeper corrosion that needs a proper mechanical cleaning before you even think about sealing it.
- Invest in a decent quality microcrystalline wax if you want to stop oxidation in its tracks without changing the look of the metal. I’ve used everything from oils to resins in my shop, but a thin coat of high-quality wax creates a barrier that actually lasts. It keeps the oxygen from reaching the surface without making the copper look like it’s been dipped in plastic.
- Watch your heat when you’re brazing or soldering near oxidized sections. If you’re not careful, that heat is going to drive the oxidation deeper into the grain of the copper, making it brittle and a nightmare to work with later. Keep your flame focused and your movements steady; rushing the heat is the fastest way to ruin a good piece of stock.
- Clean your hands before you touch finished work. It sounds like a small thing, but the oils and salts from your skin are a direct ticket to localized oxidation. I keep a bit of sandpaper in my pocket for rough edges, but I also make sure my workspace is clean and my hands are dry. If you treat the metal with respect, it’ll hold its finish a lot longer.
The Bottom Line on Managing Your Copper
Don’t mistake a heavy, crusty buildup for a controlled patina; if the oxidation is flaking off, you’ve gone too far and need to sand it back to clean metal before you can start over.
Avoid the temptation to use harsh, store-bought chemical cleaners that strip the metal too deep—stick to steady, manual abrasion and mild acids if you want to keep the structural integrity of the piece.
Treat oxidation as a process, not a single event; whether you’re aiming for a vintage look or a polished shine, patience with the heat and the grit is what separates a craftsman from a hobbyist.
## Respect the Patina
“That green crust isn’t just dirt to be scrubbed away; it’s the metal’s way of telling you how it’s breathing. If you try to rush the cleaning process with harsh chemicals, you aren’t just fixing a surface—you’re stripping away the character and the protection the copper spent years building up.”
Alistair Fenwick
Don't Fear the Green

At the end of the day, dealing with copper oxidation isn’t about fighting a losing battle against nature; it’s about understanding the chemistry so you can control the outcome. We’ve looked at how oxygen and moisture dance together to change the surface, and we’ve seen how those different patina colors can either tell a story of age or signal a need for a bit of elbow grease. Whether you’re choosing to let that natural verdigris develop to protect the metal or you’re stripping it back to a bright, polished shine, the goal is the same: knowing exactly what you’re working with. If you rush the cleaning process with harsh acids, you’ll just end up pitting the metal and wasting the very material you’re trying to save.
My advice to you is simple: treat your copper with the respect it deserves. Don’t be in such a hurry to reach the finish line that you forget to observe how the metal reacts to your touch. Real craftsmanship is found in the steady patience of a well-executed restoration. When you take the time to do it right—sanding carefully and applying your finishes with intention—you aren’t just fixing a piece of metal. You’re ensuring that whatever you’ve worked on stays in the family for the next generation. Build it well, maintain it properly, and let it last.
Frequently Asked Questions
Is it actually possible to stop the oxidation process entirely, or am I just fighting a losing battle against the air?
Look, I’ll give it to you straight: you aren’t going to win a war against physics. As long as there’s oxygen in the air, that copper is going to want to react. You can’t stop it entirely, but you can certainly slow it down to a crawl. It’s about management, not total victory. Use a good wax or a clear lacquer to create a barrier, but don’t expect it to last forever.
How can I tell the difference between a natural, stable patina and actual corrosive damage that's eating into the metal?
You’ve got to look closer than just the color. A stable patina is like a protective skin; it’s smooth to the touch and sits right on the surface. If you run your finger over it—carefully, mind you—it should feel consistent. But if you feel pitting, or if the surface feels crumbly and uneven, that’s not a patina; that’s corrosion eating the metal. If it flakes off like dry skin, stop what you’re doing.
If I decide to strip the oxidation off, what’s the best way to do it without thinning the metal or leaving deep scratches?
If you’re going to strip it, don’t go grabbing a heavy-duty grinder and hoping for the best; that’s a one-way ticket to ruined metal. Start with some fine-grit wet/dry sandpaper. Keep a bucket of water nearby and sand while the surface is wet—it keeps the grit from clogging and prevents those deep, nasty scratches. Work in circular motions, and if you feel the heat building up, slow down. Patience pays off here.
