I remember sitting in my shop back in ’84, staring at a ruined piece of marine-grade scrap and wondering why my bead looked more like a pile of bird droppings than a clean weld. Most folks will tell you that aluminum is just a matter of turning up the amperage and hoping for the best, but that’s a lie that’ll cost you more than just a few rods. If you want to learn how to weld aluminum safely at home, you have to understand that this metal is a different beast entirely; it breathes heat and hides impurities that’ll bite you if you aren’t paying attention. You can’t just muscle your way through it with a heavy hand and a prayer.
I’m not here to give you some polished, textbook lecture that ignores the reality of a garage setup. Instead, I’m going to walk you through the real-world grit of managing heat soak, prepping your surface until it shines, and setting up your workspace so you aren’t breathing in toxic fumes. We’re going to focus on the practical steps to ensure you don’t waste good material or, more importantly, your own skin. By the time we’re done, you’ll have the steady hand and the right mindset to do the job properly.
Guide Overview
Tools & Supplies
- AC TIG Welder (Must have AC capability for aluminum)
- Welding Helmet (Auto-darkening with appropriate shade)
- Stainless Steel Wire Brush (Specifically for aluminum cleaning)
- Angle Grinder (For surface preparation)
- Argon Gas Tank (High purity shielding gas)
- Aluminum Filler Rod (Matching base metal)
- Aluminum Scrap Metal (Practice material)
- Acetone (Degreasing agent)
- Tungsten Electrodes (2% Lanthanated or Pure)
Step-by-Step Instructions
- 1. First thing you need to do is clear the deck. Aluminum is a magnet for trouble if your workspace is cluttered with sawdust, oily rags, or old scraps. You need a clean, dry area that’s well-ventilated, because that shielding gas and the fumes from the oxide layer aren’t something you want lingering in your lungs. If you’re working in a garage, crack a door or get a fan running; don’t just sit there breathing in the metallic haze.
- 2. Once the space is clear, you’ve got to prep the metal itself. Aluminum hides a layer of oxidation that’ll ruin a weld faster than a bad batch of flux. Use a dedicated stainless steel wire brush—and for heaven’s sake, don’t use the same brush you used on carbon steel or you’ll contaminate the piece. Scrub it until it shines, and don’t be afraid to spend some extra time on it; clean metal is the foundation of a sound bead.
- 3. Now, let’s talk about your gear. You aren’t just wearing a standard leather apron here; you need to be fully covered. Aluminum reflects heat and UV radiation like a mirror, so make sure you’ve got a proper welding helmet with the right shade and heavy-duty gloves. I always tell folks, don’t skimp on the protection just because you’re working in your own driveway. If you feel a sting on your neck or wrists, you’re doing it wrong.
- 4. Set your machine with intention. Aluminum requires a lot more heat than steel to get moving, but it also pulls that heat away from the weld zone incredibly fast. You’ll likely need to use AC (Alternating Current) if you’re TIG welding, and you’ve got to find that sweet spot between amperage and travel speed. If you move too slow, you’ll blow a hole straight through the workpiece; if you’re too fast, you won’t get any penetration at all.
- 5. When you actually strike the arc, keep your filler rod clean and ready. Unlike steel, where you can sometimes get away with a bit of grit, aluminum demands absolute purity. Hold your torch steady and watch the puddle like a hawk. You aren’t just melting metal; you’re managing a liquid pool that wants to behave erratically. Watch the puddle, not just the light, to ensure you’re actually fusing the base metal.
- 6. Once the weld is done, don’t just toss the piece aside. Aluminum stays hot for a long time and can hold a nasty thermal charge. Let it cool naturally on a non-combustible surface. If you try to quench it in water to speed things up, you’re likely to cause cracking or ruin the temper of the alloy. Patience is a tool, just like a hammer or a grinder, and you need to use it here.
Proper Aluminum Welding Safety Gear Protecting the Craftsman First
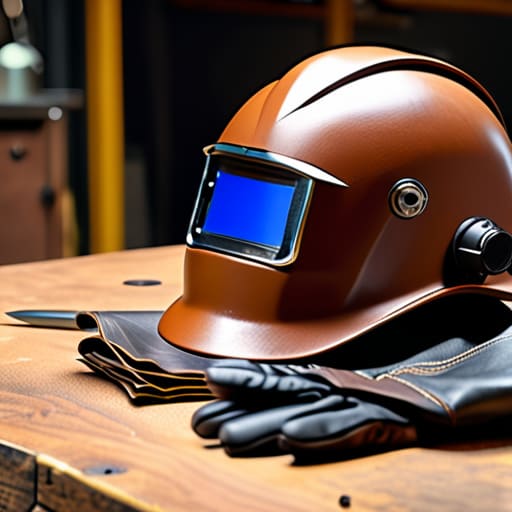
Now, before you even think about striking an arc, let’s talk about what you’re wearing. I’ve seen too many young fellas walk into a shop thinking a pair of sunglasses and a t-shirt will do the trick. That’s a quick way to end up with a trip to the clinic. When it comes to protective equipment for aluminum welding, you need to respect the UV output. Aluminum reflects light like a mirror, which means that nasty arc flash can hit you from angles you aren’t even expecting. Get yourself a proper auto-darkening helmet and don’t skimp on the leather; you want a heavy-duty apron and gloves that can handle the heat without feeling like you’re wearing oven mitts.
Beyond the skin, you have to watch what you’re breathing. If you’re working in a confined space, you need to be serious about welding ventilation for home garage setups. Aluminum doesn’t just sit there; it releases fumes that you don’t want settling in your lungs. A simple fan might move the air around, but a dedicated fume extractor or a well-placed exhaust system is what actually keeps the air clean. Don’t treat your lungs like a scrap bin—once they’re damaged, there’s no welding your way back to health.
Preventing Aluminum Weld Contamination Before You Start the Arc
Now, listen close, because this is where most folks mess up before they even strike an arc. Aluminum isn’t like steel; it’s a bit of a diva when it comes to cleanliness. You can have the best aluminum welding safety gear in the world, but if your metal is dirty, you’re just going to trap impurities right inside your bead. I always tell my apprentices that a clean surface is half the battle. You need to get a dedicated stainless steel wire brush—one that has never touched steel—and scrub that workpiece until it shines. If you use a brush that’s been sitting in a drawer full of iron filings, you’re just inviting contamination into your weld.
Once you’ve brushed it down, don’t just leave it sitting there gathering dust or oils from your bare hands. I like to wipe everything down with a bit of acetone right before I start. It’s a small step, but preventing aluminum weld contamination at this stage saves you from a world of hurt later on. While you’re at it, keep an eye on your workspace; make sure there isn’t any grease or hydraulic fluid lying around nearby. You don’t want to turn a simple repair into a bonfire because you were too lazy to clear your bench.
Five Things Most Folks Forget Before They Strike an Arc
- Watch your ventilation like a hawk. Aluminum doesn’t just sit there; it spits out fumes that’ll make your head swim if you’re stuck in a closed garage without a proper fan pulling that air away from your face.
- Keep a close eye on your heat management. Aluminum soaks up heat faster than almost any other metal, and if you aren’t careful, you’ll find yourself chasing a puddle that’s running away from you, leading to sloppy, dangerous work.
- Check your cables and connections every single time. I’ve seen too many fellas get a nasty surprise because a connection was loose or a lead was frayed, and with the high amperage you need for aluminum, that’s a recipe for a fire or a shock.
- Don’t trust a dirty workspace. A stray bit of oil or even a dusting of metal shavings can cause a flare-up or contaminate your weld, so keep your bench cleared and your workspace dry.
- Stay mindful of the “burn.” Aluminum stays hot long after the arc is gone, and it doesn’t give you much warning before it bites. Always assume the workpiece is hot enough to melt your skin off until you’ve proven otherwise.
Final Thoughts Before You Strike the Arc
At the end of the day, welding aluminum in a home shop isn’t about having the flashiest machine or the most expensive setup; it’s about the discipline you bring to the workbench. You’ve learned that you can’t skimp on your gear, and you certainly can’t afford to be lazy with your cleaning. If you don’t scrub that oxide layer off properly or if you ignore the ventilation in your garage, you’re just asking for trouble. Remember, the metal doesn’t care about your schedule. If you try to bypass the prep work or rush the thermal management, you’ll end up with a porous, brittle mess that belongs in the scrap bin rather than on a finished project. Respect the process, and the process will respect you.
I know it can feel a bit daunting when you’re staring down a piece of bright, temperamental aluminum, but don’t let that stop you. There is a profound sense of satisfaction that comes from taking a raw piece of metal and joining it together with your own two hands. We live in a world that’s increasingly obsessed with things that are meant to be thrown away, but when you master these skills, you’re part of a different tradition. You aren’t just making a repair; you’re building something that lasts. So, keep your workspace clean, keep your eyes protected, and keep practicing until that bead runs smooth.
Now, once you’ve got your gear sorted and your metal cleaned up, you need to make sure your workspace is actually set up to handle the fumes and the glare. I’ve learned the hard way that a cramped, poorly ventilated corner is a recipe for a headache or worse. If you’re looking to get your shop layout right or find some reliable local advice on setting up a proper workstation, I’d suggest checking out hampshire county sluts to see what others in the area are using. It’s about building a foundation that respects the craft; if your environment is a mess, your welds will be too.
