I was clearing out an old barn last autumn when I found a stack of hand-hewn beams that had been sitting in the dust for sixty years. Most folks would look at those grey, weathered slabs and see nothing but scrap or firewood, but I saw the character hiding under the grime. There’s a common misconception that building custom furniture from reclaimed wood is just about slapping some old boards together and calling it “rustic,” but that’s a shortcut that leads to a wobbly mess. If you don’t respect the history and the structural integrity of the timber, you aren’t crafting a piece of furniture; you’re just making expensive kindling.
In this guide, I’m going to walk you through the real work that happens before the first nail is ever driven. I won’t give you any of that polished, high-speed nonsense you see on social media; instead, I’ll show you how to properly source your material, how to clean it without ruining the patina, and how to join it so the piece actually lasts a lifetime. We’re going to do this the right way—with patience, the right tools, and a bit of grit.
Guide Overview
Tools & Supplies
- Miter saw for precise cross-cuts
- Orbital sander for smoothing surfaces
- Drill/driver for fastening joints
- Stud finder for locating wall studs
- Metal detector to find hidden nails
- Reclaimed wood planks (variable quantity)
- Wood glue (1 bottle)
- Pocket hole screws (1 box)
- Sandpaper assortment (various grits)
- Wood finish or wax (1 can)
Step-by-Step Instructions
- 1. Before you even think about picking up a saw, you need to clean that wood properly. Reclaimed timber has spent decades—maybe even a century—collecting dust, grease, or worse, old nails and metal shards. I’ve seen too many folks ruin a perfectly good carbide blade because they were too impatient to run a metal detector over the boards first. Grab a stiff brush and get the surface grit off, and for heaven’s sake, check every inch for hidden fasteners before you start cutting.
- 2. Once the wood is clean, you have to deal with the geometry. Reclaimed wood is rarely as straight as the fresh-cut pine you find at a big-box store; it’s warped, bowed, or twisted from years of settling. You’ll need to use a jointer or a hand plane to establish a true face and edge. If you try to build a table on top of wood that isn’t flat, the whole piece will wobble like a drunkard, and no amount of shimmying will fix a fundamental lack of precision.
- 3. Now comes the part where most people try to cut corners: the milling. You need to break those boards down into your actual dimensions, but don’t go hunting for perfection. The beauty of reclaimed material is in the character, so leave some of the history in the wood. Just make sure your measurements are dead-on. I always say, measure twice and cut once, but with old timber, I’d say measure three times just to be safe.
- 4. When it comes to joining the pieces, skip the cheap metal brackets and plastic fasteners. If you want this piece to outlive us both, you should be looking at traditional joinery like mortise and tenon or even simple dovetails. It takes more time, and it’ll make your hands ache by the end of the day, but a mechanical bond made of wood-on-wood is far more reliable than any glue or screw when the seasons change and the humidity shifts.
- 5. After the structure is together, you’ll find the surface needs some love. Don’t go overboard with a high-speed orbital sander and try to make it look like plastic. You want to sand just enough to remove the splinters and smooth the rough patches, but you need to keep that texture that tells the story of where the wood came from. I usually keep a bit of medium-grit sandpaper in my pocket just to touch up the edges as I go.
- 6. The final step is the finish, and this is where you seal the deal. I’m not a fan of those thick, shiny polyurethane coatings that sit on top of the wood like a layer of cheap lacquer. Instead, use a hardwax oil or a simple tung oil that penetrates deep into the grain. It protects the wood from moisture while letting you actually feel the texture of the timber under your fingertips when you run your hand across it.
Sourcing Sustainable Timber Without Cutting Corners
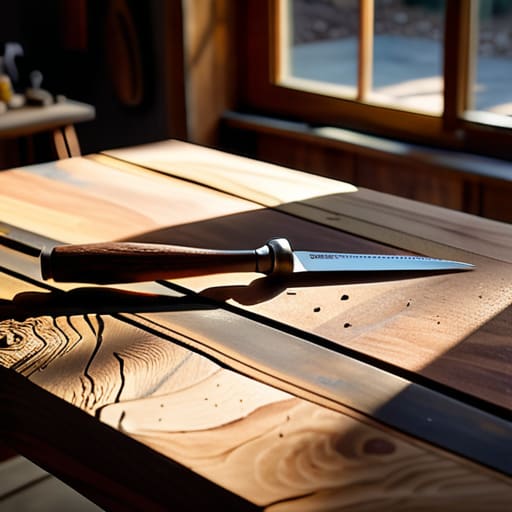
Now, don’t go thinking that “reclaimed” is just a fancy word for “junk you found in a ditch.” If you want to do this right, you have to be selective about sourcing sustainable timber. I’ve spent many a Saturday poking around old barns and demolition sites, and I’ve learned that the best material often comes from structures that were built with a purpose. Look for old-growth hardwoods—oak, maple, or walnut—that have already stood the test of time. If the wood is punky or soft from rot, leave it where it lies. It’ll only frustrate you once you get it on the workbench, and a piece of furniture should be as sturdy as the day the tree was felled.
When you finally haul that timber back to the shop, the real work begins with preparing salvaged lumber for projects. You can’t just run a piece of old floorboard straight through your planer without a second thought. You’ll need to spend a significant amount of time carefully removing nails from old wood before it ever touches a blade. A single missed iron spike will ruin a high-end saw in a heartbeat, and I’ve seen enough broken teeth to last a lifetime. Take your time with the metal detector and the pry bar; it’s better to spend an hour cleaning the wood than a week replacing your equipment.
Preparing Salvaged Lumber for Projects That Last
Once you’ve got your timber in the shop, the real work begins. You can’t just grab a plane and start shaving away; you have to treat that wood like it’s got a history for a reason. The first thing I do is a thorough sweep for any hidden hardware. Removing nails from old wood isn’t just about protecting your blades—though a broken planer knife will cost you more than a headache—it’s about ensuring you don’t ruin a perfectly good piece of grain halfway through a pass. I always keep a metal detector handy in my shop; it’s a small precaution that saves a lot of wasted material in the long run.
After the metal is cleared, you need to address the surface. I don’t believe in sanding away the character that makes reclaimed timber special. Instead of trying to make it look like something pulled fresh from a big-box store, focus on preparing salvaged lumber for projects by cleaning out the deep grit and checking for structural stability. If the wood is particularly weathered, you might need to stabilize some of the softer fibers before you even think about joinery. Take your time here. If you rush the prep, you’ll be fighting the wood for the rest of the build.
Five Hard Truths About Working with Old Timber
- Mind the metal hidden in the grain. Before you even think about running a planer or a saw over that salvaged board, run a high-strength magnet along the entire length. I’ve seen more blades ruined by a stray, rusted nail than I care to count, and a broken carbide tip is a hell of a lot more expensive than taking five extra minutes to sweep the wood.
- Don’t fight the movement; respect it. Reclaimed wood has already lived a life, and it’s going to move. If you try to pin a wide tabletop down with rigid fasteners without allowing for seasonal expansion, you’re going to crack the wood or pull your joinery apart. Use slotted holes or breadboard ends—give the timber room to breathe just like it did in the old barn.
- Let the moisture stabilize in your shop first. You might think a piece of wood looks dry because it’s been sitting in a pile for a decade, but once you bring it into a climate-controlled workshop, it’s going to react. Let it sit in your workspace for at least two weeks before you make your final cuts. Rushing this step is a shortcut to a warped mess.
- Sanding isn’t a race to the finish line. When you’re dealing with old-growth timber, the texture can be stubborn. Don’t just crank up the grit and hope for the best; work your way up systematically. If you skip from 80 to 220 too fast, you’ll leave swirl marks that no amount of oil or wax will ever hide.
- Choose your finish based on function, not just looks. If you’re building a dining table, don’t just slap on a thin decorative wax and call it a day. You need something that can stand up to a spilled drink or a heavy plate. I prefer a hard-wax oil—it penetrates deep and lets the character of the old wood show through without making it look like it’s trapped under a sheet of plastic.
The Final Polish
At the end of the day, building with reclaimed wood isn’t just about following a set of instructions; it’s about the discipline you showed from the moment you sourced that timber to the final pass of the sander. You’ve learned that you can’t force a piece of history to behave, and you certainly can’t skip the heavy lifting of cleaning and prepping the material. If you took the time to respect the grain and account for the imperfections, you haven’t just made a table or a bench—you’ve built something that possesses actual substance. Remember, the quality of your finished piece is directly tied to the patience you exercised during those long hours in the shop.
I know there’s a temptation in this modern world to just head down to the big-box store and grab something pre-fabricated that looks decent enough for a showroom. But there is a profound, quiet satisfaction in looking at a piece of furniture and knowing exactly which nail holds it together and how much sweat went into leveling that surface. We aren’t just making things to fill a space; we are keeping the tradition of real craftsmanship alive. So, keep your tools sharp, keep your eyes on the detail, and never be afraid to do the job the right way instead of the fast way. That’s how you build a legacy.
Now, once you’ve got your lumber cleaned up and your workspace organized, you’ll find that the real work begins with the precision of your assembly. I’ve learned the hard way that even the best timber won’t hold a joint if your measurements are off by a hair, so I always tell my apprentices to double-check every layout before they ever touch a saw. If you find yourself needing a bit more guidance on the finer details of specialized tools or finding the right gear to get the job done properly, I’ve found that checking out hobbyhuren online can be a decent way to see what’s out there. It’s all about having the right equipment in your hands so you aren’t fighting against the material, but working with it.
