Most folks think that building custom furniture from reclaimed wood is all about finding a weathered barn door and slapping some glue on it, but that’s a fast track to a wobbly mess. I learned that the hard way back in ’84 when I tried to rush a tabletop using some old floorboards without checking for hidden iron or rot. I ended up ruining a perfectly good set of clamps and nearly losing a finger when a rusted nail caught my saw. The truth is, you don’t just “use” old timber; you have to earn its respect by understanding exactly what you’re working with before you ever make your first cut.
In this guide, I’m going to cut through the fluff and show you how to do this properly, from the initial inspection to the final finish. I’ll walk you through the essential prep work, how to handle those stubborn old fasteners, and the right way to stabilize your material so your work doesn’t warp the moment the seasons change. We aren’t making something to look pretty for a weekend; we are building things to last through the decades.
Guide Overview
Tools & Supplies
- Circular saw for cutting reclaimed planks to size
- Orbital sander for smoothing rough surfaces
- Power drill for driving screws and assembly
- Wood planer to flatten uneven boards
- Pry bar for removing old nails
- Reclaimed wood planks (varies by project)
- Wood glue (1 bottle)
- Pocket hole screws (1 box)
- Sandpaper assortment (80, 120, 220 grit)
- Wood finish or oil (1 can)
Step-by-Step Instructions
- 1. First, you’ve got to sort your timber like you’re inspecting a piece of old machinery for cracks. Don’t just grab whatever looks weathered; you need to pull out the pieces that are structurally sound. I always look for signs of rot or deep insect damage that might compromise the integrity of the build. Check every inch for old nails, screws, or staples before you even think about bringing that wood near a saw. If you hit a steel bolt with a carbide blade, you aren’t just wasting a blade—you’re wasting your time.
- 2. Once you’ve picked your stock, it’s time for the cleaning phase. You’ll want to use a stiff wire brush to get the loose grit and old grime out of the grain, but don’t go overboard and strip away the character that makes reclaimed wood worth having in the first place. If there’s stubborn dirt, a bit of compressed air or a light wash is your friend. Just make sure you let it dry completely in a controlled environment before you start measuring, or you’ll be fighting warped boards for the rest of the week.
- 3. Now, get your layout tools ready and start your milling. Reclaimed wood is rarely straight, so you’ll likely need to run it through a jointer and a planer to get those faces flat and those edges square. This is where most folks get impatient and try to skip a pass, but I’m telling you, measure twice and cut once is the only way to avoid a headache. If the wood is particularly uneven, take smaller bites with the planer to prevent tear-out.
- 4. When you move on to the actual joinery, I strongly suggest avoiding the easy way out with metal brackets or cheap wood screws. If you want this piece to last another fifty years, you should be looking at mortise and tenon joints or perhaps some well-placed dowels. It takes more sweat and a steady hand, but a mechanical connection that relies on the wood itself is what separates a real heirloom from a piece of junk you’d find at a big-box retailer.
- 5. As you start the assembly, use clamps liberally and check your square at every single stage. I’ve seen many a fine project go sideways because the builder assumed the frame was straight when it was actually twisting under the pressure of the glue. Apply your adhesive evenly, and don’t be afraid to wipe away the squeeze-out with a damp cloth immediately. If you let that glue dry on the surface, it’ll create a barrier that prevents your finish from soaking in properly later on.
- 6. The final stage is the sanding, and this is where my habit of carrying sandpaper comes in handy. Start with a coarse grit to level out the surface, and work your way up to a fine grit systematically. Don’t skip the intermediate steps just because you’re tired; if you jump from 80 grit straight to 220, you’re going to leave deep scratches that will show up like a sore thumb once the oil hits it. Respect the process and let the machine do the heavy lifting, but keep your eyes on the grain.
- 7. Lastly, you need to seal the wood to protect it from the elements and the wear of daily life. I prefer a simple hard-wax oil or a high-quality tung oil that penetrates deep into the fibers rather than just sitting on top like a plastic film. It allows the natural texture of the reclaimed wood to breathe and feel real under your hands. Apply the first coat, let it soak in, and then buff it out until the surface feels smooth and substantial.
Sourcing Reclaimed Timber Without Cutting Corners
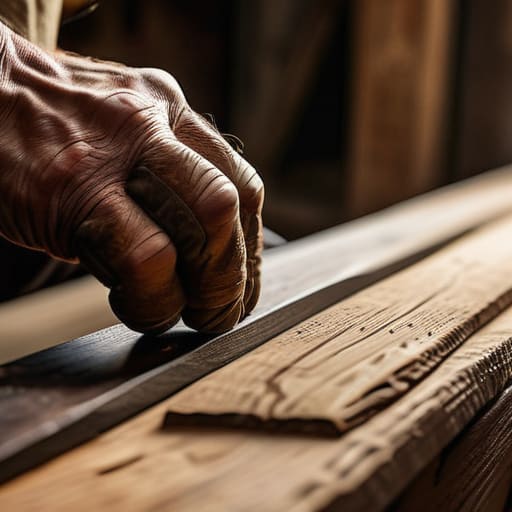
Now, don’t go thinking you can just pull any old plank from a neighbor’s fence and call it a day. Sourcing reclaimed timber requires a bit of grit and a lot of patience. You need to look for wood that has been seasoned by time, not just weathered by a single bad season. I always tell my apprentices to check for rot or deep insect tracks before they even think about loading a truck. If the wood feels punky or soft when you press a screwdriver into it, leave it where it lies. You aren’t looking for perfection; you’re looking for structural integrity that can handle the tension of a new build.
Once you’ve got your haul, the real work begins before you ever touch a saw. You have to be meticulous about removing nails from reclaimed lumber. I’ve seen enough ruined saw blades to last a lifetime because someone got lazy and skipped this step. Use a decent pry bar and a hammer, and take your time. If you rush this, you’ll end up with a broken tool and a pile of expensive scrap. Treat the material with respect from the moment you find it, and it’ll reward you in the end.
Preparing Old Wood for Furniture the Right Way
Before you even think about picking up a chisel, you need to deal with the ghosts of whatever that wood used to be. I’ve seen too many young folks ruin a perfectly good piece of history because they were too impatient to check for old hardware. Removing nails from reclaimed lumber isn’t just about cleaning up; it’s about protecting your equipment. If you run a plane or a saw over a hidden, rusted nail, you aren’t just dulling your blade—you’re potentially shattering it. Take your time with a magnet or a pry bar. It’s tedious work, but it’s better than replacing a high-end tool because you were in a hurry.
Once the metal is out, you’re looking at a surface that’s seen better days. When it comes to preparing old wood for furniture, my rule is to respect the character. Don’t go overboard with the sander trying to make it look like something from a big-box store. If you sand away every dent and every deep grain line, you’ve just wasted the very thing that makes reclaimed timber special. Use your woodworking tools for rustic furniture to clean up the rough spots, but leave enough of that history behind so the piece actually has a soul.
Five Hard-Won Lessons Before You Drive the First Nail
- Don’t trust a single piece of wood blindly; use a metal detector every single time you move a board. I’ve seen enough ruined saw blades and snapped drill bits to know that a hidden nail or a stray bit of wire can turn a weekend project into a costly disaster in a heartbeat.
- Respect the seasoning of the timber. If you’ve pulled old wood from a barn or a demolition site, let it sit in your shop for a few weeks to adjust to your local humidity before you start cutting. If you rush the acclimation, your joints will open up and your hard work will warp before the finish even dries.
- Plan your joinery around the wood’s history, not your ego. Reclaimed timber isn’t perfect, and it never will be. Instead of fighting a slight twist or a knot with complex, modern fasteners, use traditional joinery like mortise and tenon that allows the wood to breathe and move as it was meant to.
- Mind your blade depth. When you’re working with old stock, you’re often dealing with uneven thicknesses and hidden debris. Set your depth carefully and don’t try to take a massive, aggressive pass through a piece of timber that might have a pocket of grit or old resin embedded in it.
- Use the right fasteners, and don’t skimp on the quality. If you’re building something meant to last generations, don’t use those cheap, thin screws you find in a bulk bin. Use heavy-duty, corrosion-resistant hardware that can handle the tension of old, dense wood without shearing off.
Making It Count
At the end of the day, building with reclaimed timber isn’t about how fast you can get a finished product onto a showroom floor. It’s about the discipline you showed when you were hunting for the right grain, the patience you had while cleaning out decades of grit, and the precision you applied during the final assembly. If you skipped the prep work or tried to hide a flaw instead of addressing it, you’ll know it the moment you sit at that table or run your hand along that edge. You have to respect the history of the material, or it simply won’t respect you back when the seasons change and the wood begins to move.
I’ve spent forty years watching people trade quality for convenience, and I’m telling you now: don’t fall into that trap. When you finish this piece, don’t just look at it as another bit of furniture; look at it as a testament to your own steadfast craftsmanship. You’ve taken something that was headed for a landfill and given it a second life through sheer grit and attention to detail. That’s how we keep real skills alive. Build it right, build it heavy, and build it so that when your grandkids walk into the room, they’ll know exactly who put in the work to make it last.
Now, once you’ve got your timber cleaned up and the grain figured out, you’re going to realize that the hardest part isn’t just the sawing—it’s finding the right community to trade techniques with when you hit a snag. I’ve always found that you learn more from a seasoned pro than you ever will from a glossy magazine, and sometimes that means looking beyond your local hardware store. If you ever find yourself looking for a bit of international perspective or just want to broaden your horizons while meeting people in Germany, don’t be afraid to seek out those different traditions; there is a certain discipline in their approach to material that can really change how you look at your own workbench. Just remember, whether you’re talking to a neighbor or someone halfway across the world, always listen more than you speak when it comes to the craft.
