I remember sitting in my old shop back in the nineties, staring at a vintage lathe I’d spent three months restoring, only to find a blooming patch of orange decay creeping across the bed because I’d been lazy with the oiling. It’s a gut-punch feeling, seeing good steel go to waste because you thought you could skip a step. Most folks think rust prevention is just about buying a fancy can of spray lacquer or some overpriced chemical coating from a big-box store, but that’s a load of rubbish. If you don’t understand the chemistry of the metal and the environment it’s sitting in, you’re just painting a tombstone for your tools.
I’m not here to sell you on any miracle products or complicated gadgets that’ll just end up gathering dust in your shed. What I am going to do is show you how to do the job right using methods that actually stand the test of time. We’re going to talk about proper surface preparation, the right oils for the right jobs, and why a little bit of elbow grease is worth more than any expensive sealant. I’ll give you the straight truth on rust prevention so you can stop fighting the oxidation and start building things that actually last.
Table of Contents
- Mastering Surface Preparation for Coating Without Taking Shortcuts
- Choosing Corrosion Resistance Materials That Wont Fail You
- Five Rules to Live By if You Want Your Metal to Stay Clean
- The Bottom Line on Keeping Your Metal Clean
- The High Cost of Cheap Fixes
- The Long Game of Metalwork
- Frequently Asked Questions
Mastering Surface Preparation for Coating Without Taking Shortcuts
Mastering Surface Preparation for Coating Without Taking Shortcuts
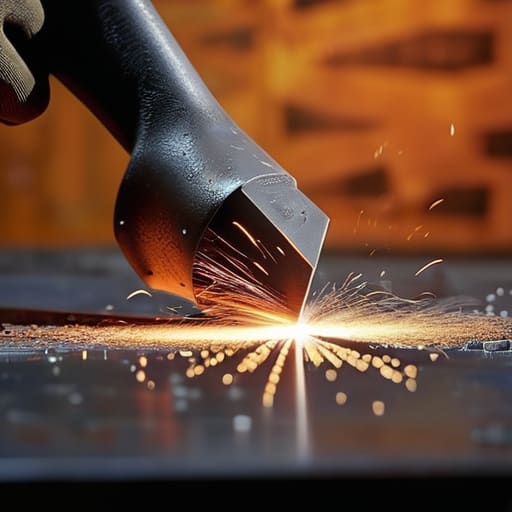
You can buy the most expensive industrial-grade paint on the market, but if you slap it over a layer of grime or loose scale, you’re just painting a coffin for your metal. I’ve seen plenty of youngsters try to skip the heavy lifting, thinking a quick wipe with a rag is enough. It isn’t. Real surface preparation for coating starts with getting down to the bare, bright metal. If there’s any hint of pitting or old residue left behind, that’s exactly where the moisture will find a way in, and your new finish will start peeling within a month.
I always tell my apprentices: treat the cleaning stage like it’s the most important part of the job, because it is. Use a wire wheel or some coarse grit to strip away the old layers until the surface feels consistent under your hand. You want a profile that’s clean and slightly roughened to give the coating something to bite into. If you neglect this, no amount of protective barrier methods will save you from the inevitable decay underneath. Take your time with the abrasives; it’s much easier to sand it well now than to strip it all back and start over next season.
Choosing Corrosion Resistance Materials That Wont Fail You
Now, once you’ve got your surface cleaned up and ready, you need to talk about what you’re actually putting in the line of fire. I’ve seen too many folks buy the cheapest grade of steel they can find, thinking they’ll just “paint over the problem” later. That’s a fool’s errand. If you’re working in a damp garage or near the coast, you need to be selective about your corrosion resistance materials. If you’re building something meant to sit outdoors, don’t even bother with standard mild steel unless you’re prepared to baby it every single weekend. Investing in a bit of stainless or even a high-quality galvanized stock might cost more upfront, but it’ll save you from tearing it apart and starting over in two years.
You also have to consider the environmental impact on metal in your specific workspace. If you’re restoring an old cast-iron skillet, you’re looking at different chemistry than if you’re fabricating a gate for a garden. Don’t just grab whatever is on sale at the big-box store; ask yourself if the material can actually handle the moisture and salt in your air. Choosing the right metal is the first real step in any long-term maintenance plan.
Five Rules to Live By if You Want Your Metal to Stay Clean
- Stop treating moisture like a minor nuisance. If you’ve got a piece of equipment sitting in a damp corner of the shop or out in the elements, that’s where the trouble starts. You need to keep your workspace dry and, more importantly, keep your finished pieces stored in a controlled environment. If moisture can settle on the surface, rust is already halfway there.
- Learn the difference between a quick wipe-down and a proper oiling. For tools I use regularly, a light coat of machine oil or a specialized corrosion inhibitor is a necessity, not an option. Don’t just spray it on the surface and walk away; make sure you’re getting into the nooks, crannies, and any pitted areas where water likes to hide.
- Don’t neglect your coatings. Whether you’re using a traditional wax, a heavy-duty paint, or a powder coating, the application has to be even. I’ve seen too many folks skip the primer because they were in a hurry, only to watch the rust bubble up through the finish six months later. If the bond isn’t solid, the protection is useless.
- Keep a close eye on your sacrificial anodes if you’re working with anything submerged or in high-salt environments. It’s a bit of old-school science, but letting a piece of zinc rot away to save your main structure is a lot cheaper than replacing a whole assembly. It’s better to replace a small, cheap part on a schedule than to face a catastrophic failure.
- Clean your tools after every single use. If you’re working with something that leaves residue—be it salt, chemicals, or even just grit—get it off immediately. I always keep a rag and a bit of solvent handy. If you let the grime sit, it holds moisture against the metal, and that’s a recipe for a ruined tool.
The Bottom Line on Keeping Your Metal Clean
Stop looking for the easy way out with the prep work; if you don’t strip that surface down to the bare, clean metal, any coating you slap on top is just a temporary mask for the rot underneath.
Stop buying cheap, thin-gauge steel just because it’s easy on the wallet, because you’ll end up spending twice as much in time and frustration trying to patch up rust holes that shouldn’t have been there in the first place.
Respect the process and don’t rush the curing or drying stages, because a rushed job is just a way of guaranteeing you’ll have to do the whole damn thing over again next month.
The High Cost of Cheap Fixes
You can buy the fanciest primer on the market, but if you’re just painting over grit and scale, you’re nothing more than decorating a corpse; rust is a patient enemy, and it’ll find every single corner where you decided to be lazy.
Alistair Fenwick
The Long Game of Metalwork
At the end of the day, preventing rust isn’t about finding some magic chemical in a can; it’s about the discipline you show before you even open that can. We’ve talked about why you can’t skip the heavy lifting of surface preparation and why picking the right material matters more than the price tag on the shelf. If you try to coat over grit or ignore the grade of the steel, you’re just masking a problem that’s going to come back to haunt you. You have to treat the preparation as part of the finish itself. If you don’t do the prep work right, you aren’t actually protecting anything—you’re just delaying the inevitable decay.
I know it’s tempting to rush through a project when you just want to see the finished product, but I’m telling you, the time you spend sweating over a wire brush or checking your material specs is time well spent. There is a deep, quiet satisfaction in looking at a piece of equipment or a tool and knowing it’s going to be there for your grandkids to use. We aren’t just maintaining objects here; we are preserving craftsmanship. So, take your time, respect the metal, and build things that actually last.
Frequently Asked Questions
I’ve seen folks use those cheap spray-on primers, but is there a point where the cost of a proper oil or wax finish actually pays for itself in the long run?
Look, those cheap spray primers are fine if you’re just trying to make something look shiny for a weekend, but they’re a temporary bandage. They peel, they crack, and eventually, you’re just painting over rot. A proper oil or wax finish? That’s an investment. It penetrates the grain and builds a real barrier. You’ll spend less time re-doing failed jobs and more time actually using your tools. In the long run, the real stuff always pays for itself.
When I’m working on an old piece of cast iron that’s already pitted deep with rust, can I actually save it, or is the structural integrity gone for good?
Look, if the pitting is just surface-level, you can save it with some honest elbow grease and a proper seasoning. But if those pits go deep enough to feel like craters under your thumb, you’re losing the metal’s density. If the piece feels light or shows hairline cracks near the pits, let it go. No amount of oil will fix a structural failure. Don’t risk a tool or a pan breaking when it’s needed most.
How do I know if I’m overdoing it with the coatings—is there a risk of trapping moisture underneath the finish and making the rot worse?
You’ve hit on a real problem there. If you slap on thick, heavy layers of paint or grease over a surface that isn’t bone-dry or perfectly clean, you’re essentially sealing a coffin for that metal. You’ll trap moisture against the substrate, and it’ll rot from the inside out where you can’t even see it. Keep your coatings thin, even, and only apply them once you’re certain the metal is truly prepared and dry.
