I remember standing over a workbench back in ’84, staring at a botched aluminum housing that looked like it had been dipped in cheap, speckled paint rather than properly treated. The kid running the line had tried to skip the cleaning stages to hit a production quota, and the result was a finish that flaked off the moment it hit a shop rag. It’s the same nonsense I see today: people treating anodizing metal like it’s some magic trick you can perform with a quick soak and a prayer. They forget that you aren’t just coloring a surface; you are changing the very structure of the metal itself.
If you’re looking for a flashy, high-speed way to make things look pretty for a social media post, you can find plenty of that fluff online. But if you want to learn how to do this right—the way that ensures a finish won’t peel or pit the first time it sees a bit of real-world use—then you’re in the right place. I’m going to walk you through the actual mechanics of the process, from the chemistry to the patience required, so you can build things that last instead of just wasting good material.
Table of Contents
Mastering the Electrolytic Cell Metal Treatment
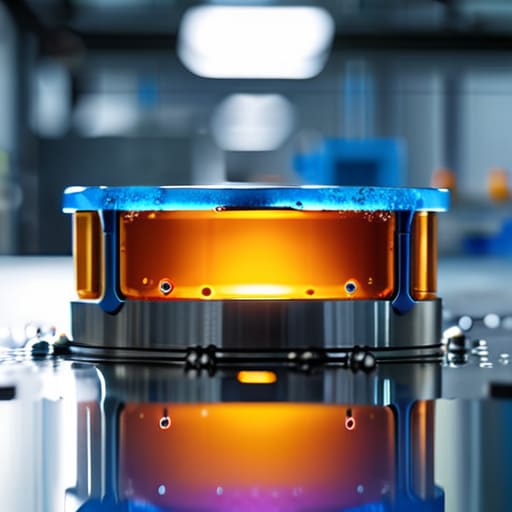
Once you’ve got your bath prepared, the real work begins inside the tank. Setting up your electrolytic cell metal treatment isn’t just about dipping a piece of scrap into some acid and hoping for the best; it’s about controlling the flow of ions. You need to ensure your cathodes are spaced evenly and your power supply is steady. If your current fluctuates too wildly, you’ll end up with a finish that looks blotchy and uneven. I’ve seen plenty of fellas ruin a perfectly good workpiece by cranking the voltage too high, thinking they could speed things up. That’s a mistake you only make once.
The goal here is to build a controlled, porous structure on the surface. This is where you determine the final aluminum oxide layer thickness, which dictates how much protection you’re actually getting. If you’re too impatient with the timing, that layer will be thin and brittle. You want a dense, uniform growth that integrates with the base metal. It’s a slow game, but if you respect the chemistry, you’ll end up with a finish that offers far superior corrosion resistance compared to any cheap spray-on coating.
Why Aluminum Oxide Layer Thickness Matters
Now, you might be tempted to think that a little bit of coating is enough to get the job done, but you need to understand that the aluminum oxide layer thickness is what actually determines whether your work survives the elements or ends up in the scrap bin. It isn’t just about changing the color or giving it a bit of shine; it’s about building a structural shield. If that layer is too thin, you haven’t really done anything more than a superficial rinse. You’ll find that the piece looks fine on your workbench, but the moment it faces real-world moisture or salt, the metal will start to pit and fail.
I’ve seen plenty of folks try to cut corners here, thinking they can save time by shortening the soak, but that’s a fool’s errand. A thicker, more robust layer is the primary driver behind the corrosion resistance of anodized metal. If you’re working on something meant for outdoor use or heavy machinery, you can’t treat this like a hobbyist’s craft project. You have to respect the chemistry. If you don’t get that thickness right, you’re just waiting for the inevitable decay to set in.
Five Rules to Keep Your Anodizing from Going Sideways
- Clean your metal until it’s spotless; if you leave even a fingerprint or a smudge of shop grease on that aluminum, the oxide layer won’t take evenly, and you’ll end up with a blotchy mess that’s a nightmare to fix.
- Watch your temperature like a hawk, because if that electrolyte bath gets too hot while you’re working, it’ll start eating away at the very layer you’re trying to build, leaving you with a soft, useless finish.
- Don’t go skimping on the current; you need a steady, reliable flow of electricity to drive the reaction, so make sure your connections are tight and your power supply isn’t struggling to keep up.
- Respect the timing on your submersion; it’s tempting to pull the piece out early to see how it looks, but if you don’t give it the full time it needs to build that protective crust, you’re just wasting your time and your chemicals.
- Always seal your work properly at the end, because an unsealed anodized surface is just an invitation for corrosion to move in and ruin all your hard work.
The Bottom Line on Doing It Right
Respect the clock and the chemistry; if you try to cut corners on your immersion times or skip the cleaning stages, you’re going to end up with a finish that peels like old paint.
Watch your voltage like a hawk, because a little bit of impatience with the power supply will bake a brittle oxide layer that’s more trouble than it’s worth.
Remember that a good anodized finish starts long before the metal hits the bath, so don’t bother with the electrolysis if you haven’t properly prepped and polished the surface first.
## Respect the Layer
Anodizing isn’t just about changing the color of a piece; it’s about growing a protective skin that’s part of the metal itself. If you try to cheat the timing or skimp on the bath, you aren’t getting a finish—you’re just getting a coating that’s waiting to peel off.
Alistair Fenwick
Respect the Process, Respect the Metal

At the end of the day, successful anodizing isn’t about following a recipe blindly; it’s about understanding the relationship between your electrolyte bath and the metal you’re trying to protect. You’ve got to keep a close eye on your voltage, ensure your cleaning process is thorough enough to prevent pitting, and—most importantly—you cannot afford to skimp on that final sealing stage. If you rush the thickening of the oxide layer or try to cut corners on the temperature of your sealing solution, you aren’t just saving time; you are guaranteeing a failure that will show itself the moment the piece is put to work. It’s a delicate balance of chemistry and patience, and if you don’t respect the variables, the metal won’t respect you.
I know it can feel tedious when you’re standing over a tank waiting for the chemistry to do its job, but that’s where the real work happens. We live in a world that wants everything done yesterday, but a well-anodized piece of aluminum tells a different story—it tells a story of intentionality and craft. When you finish a job and see that perfectly uniform, hardened surface, you’ll know it wasn’t luck that got you there; it was your discipline. Take your time, watch your gauges, and remember that we aren’t just coating surfaces—we are building things that are meant to endure.
Frequently Asked Questions
What kind of sealer should I use if I want that oxide layer to actually hold up against heavy wear?
If you’re looking for real durability, skip the quick dips and go with a hot water seal. You need to submerge those parts in boiling distilled water for about twenty to thirty minutes. It forces the oxide layer to hydrate and swell, closing up those microscopic pores. It’s a bit of a chore, but if you want that finish to stand up to actual use instead of just looking pretty, you can’t cut corners on the sealing.
How do I know if my acid bath is getting too contaminated with metal buildup to keep working?
You’ll see it in the clarity of the bath. If that liquid starts looking cloudy or develops a murky, swirling tint instead of staying relatively clear, your metal ions are stacking up. Keep an eye on your voltage, too; if you’re having to crank the power just to maintain your current, the buildup is choking the process. Don’t push it. Once it gets too thick, you’ll stop getting a uniform finish and start wasting good material.
Can I use this same setup for different alloys, or am I going to ruin the finish if I switch from pure aluminum to something else?
Hold your horses there. You can’t just swap alloys like you’re changing a lightbulb. If you jump from pure aluminum to a 6061 or a 7075 series without adjusting your voltage or your bath chemistry, you’re going to end up with a blotchy, uneven mess. Different metals react differently to the current. Take the time to dial in your settings for each specific alloy, or you’ll just be ruining good material.
