I can still smell the sulfur and the heavy, metallic tang of molten metal that used to hang in the air of my old fabrication shop every Tuesday morning. I remember one particular afternoon, back in the late eighties, when a young apprentice tried to rush a pour because he thought he could beat the cooling rate. He ended up with a cracked mold and a heap of expensive, useless scrap that took us three days to clean up. That’s the thing about the bronze casting process; it doesn’t care about your schedule or your ego. If you try to outrun the physics of the metal, it’ll bite you every single time.
I’m not here to sell you on some fancy, high-tech shortcut or a way to do this without getting your hands dirty. What I am going to give you is the honest truth about how to manage your heat and your molds so you don’t waste a lick of material. We’re going to walk through the grit and the grime of the bronze casting process step-by-step, focusing on the fundamentals that actually matter. If you’re willing to respect the heat, I’ll make sure you walk away with something worth keeping.
Table of Contents
Choosing Your Path Sand Casting vs Lost Wax Methods
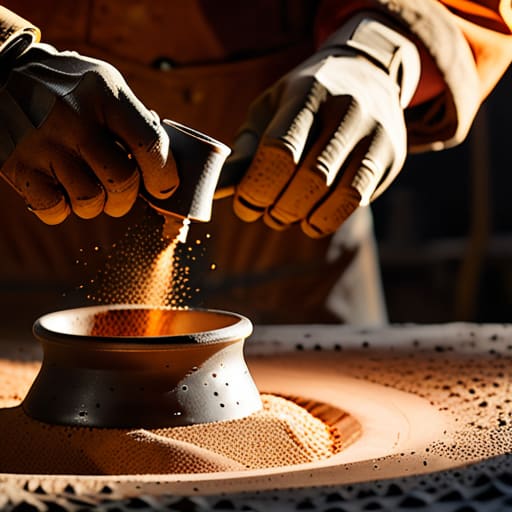
Now, before you even think about lighting a furnace, you need to decide how you’re actually going to shape this piece. In my experience, the choice between sand casting vs lost wax isn’t just about the final look; it’s about how much patience you have for the setup. Sand casting is my go-to for larger, more rugged items—think heavy brackets or simple geometric shapes. You pack your pattern into a flask of specialized sand, create the cavity, and you’re ready to pour. It’s efficient, but you won’t get those microscopic details.
If you’re looking to capture the fine texture of a leaf or the subtle lines in a face, you’ll need to move toward investment casting techniques. This is the lost wax method, and it’s a much more meticulous dance. You build up a wax model, coat it in ceramic, and burn the wax out to leave a perfect void. It takes longer and requires more specialized metal foundry equipment, but the precision is unmatched. Just remember: whichever path you pick, you better be prepared to respect the material.
Mastering the Melt Essential Metal Foundry Equipment
Before you even think about striking a match, you need to make sure your workspace is set up right. You can’t just wing it with a backyard fire pit and hope for the best. You’ll need a reliable furnace—something that can hold a steady, even heat—and a proper crucible that won’t crack when the temperature climbs. I’ve seen too many beginners try to save a few bucks on cheap tools, only to end up with a ruined melt or, worse, a dangerous accident. Investing in quality metal foundry equipment isn’t an extravagance; it’s your first line of defense against a bad pour.
Once you’ve got your heat source, you need to focus on molten metal temperature control. It’s not just about getting the bronze liquid; it’s about getting it to the exact degree where it flows smoothly into every nook and cranny of your mold. If it’s too cool, you get cold shuts; if it’s too hot, you’re burning off the very elements that give your piece its strength. Keep a decent pyrometer handy and don’t trust your eyes alone. Precision in the melt is what separates a professional piece from a lump of scrap.
Five Rules to Keep Your Casting from Turning into a Scrap Heap
- Watch your moisture like a hawk. If there’s even a hint of dampness in your sand mold or your wax pattern, that molten bronze is going to react violently when it hits it. I’ve seen more ruined pours from a bit of trapped steam than from a bad temperature reading, so make sure everything is bone-dry before you even think about cracking that crucible.
- Don’t trust a single thermometer. I always use two different ways to check my heat—one digital and one by the color of the metal itself. If you rely solely on a cheap sensor that might be lying to you, you’ll end up with either a pour that’s too cold to fill the fine details or a metal that’s so overheated it’s eating away at your mold.
- Keep your sprue system clean and logical. A lot of beginners treat the gating system like an afterthought, but it’s the lungs of your casting. If your channels are too narrow or your vents are blocked, you’re going to get air pockets and incomplete fills. Think about how the metal needs to flow, not just how to get it into the cup.
- Pre-heat your molds, no exceptions. I don’t care how much you want to get the job done quickly; if you pour liquid bronze into a cold mold, the temperature shock will cause the metal to freeze prematurely. You’ll end up with “cold shuts” where the metal didn’t quite fuse together, leaving you with a piece of junk that’ll crack the moment you try to finish it.
- Respect the dross. When you’re melting, you’re going to get a layer of impurities floating on top. Don’t just ignore it and pour anyway. Take the time to skim that slag off clean. If you pour that filth into your mold, you’re just baking defects directly into the heart of your work, and no amount of sanding is going to fix a structural flaw.
The Bottom Line Before You Pour
Don’t go choosing a method just because it looks easier on paper; pick the one that matches your patience and the level of detail your project actually demands.
Your equipment is only as good as your maintenance, so treat your furnace and crucibles with respect or they’ll fail you when the metal is at its hottest.
Always prioritize safety and steady heat over speed, because rushing a melt is the quickest way to ruin a good batch of bronze and waste a lot of hard-earned money.
## The Soul of the Pour
“You can buy all the fancy crucibles and induction furnaces in the world, but they won’t teach you a thing about the metal. Bronze has a temperament; if you try to bully it with speed or ignore the way it flows when the heat isn’t quite right, it’ll show you exactly where you cut corners the moment it cools.”
Alistair Fenwick
The Final Pour
At the end of the day, mastering bronze casting isn’t about having the most expensive furnace or the fanciest studio setup; it’s about understanding the relationship between your tools and the material. We’ve covered the heavy lifting—from deciding whether a sand mold or a lost wax pattern suits your specific project, to making sure your foundry equipment is up to the task of handling such high temperatures. Remember, whether you are pouring a small decorative piece or a larger industrial component, the foundation always comes down to preparation and patience. If you skip a step in the cleaning or the heating process, the metal will let you know, and usually, it’ll let you know in the form of a ruined casting and a lot of wasted time.
Don’t let the complexity of the melt intimidate you. Every master smith I ever worked with started exactly where you are, standing there with a bit of uncertainty and a lot of respect for the flame. There will be failures—metal that doesn’t flow quite right or molds that crack—but that is where the real learning happens. My advice is to embrace the grit of the process. When you finally pull that finished piece out of the sand and see the shape you’ve brought into being, you’ll realize that you haven’t just made an object; you’ve mastered a craft. Now, get to work, and keep your eyes on the heat.
Frequently Asked Questions
How do I know when the bronze is actually ready to pour, or am I just guessing by the color of the flame?
Look, if you’re just eyeballing the flame, you’re playing a dangerous game with your scrap. A bright orange flame doesn’t tell you a damn thing about the chemistry inside the crucible. You need to watch the metal itself. You’re looking for that specific, liquid shimmer—not just a glow, but a surface that looks like molten mirror. Use a pyrometer if you can, but if you’re going old school, trust your thermometer and your experience. Don’t guess.
If I'm working in a small home shop, what kind of ventilation do I really need to keep those fumes from settling in my lungs?
Listen, if you’re running a furnace in a garage, you can’t just crack a window and call it a day. You need real airflow. I always set up a high-volume exhaust fan right above the crucible to pull those heavy fumes up and out. If you can’t afford a professional hood, at least get a powerful shop fan to move the air constantly. Don’t be stubborn about it; those fumes aren’t just unpleasant, they’re dangerous.
What’s the best way to handle porosity or tiny air bubbles in the finished piece without ruining the whole casting?
Look, if you see tiny pinholes or pits in your bronze, don’t panic—it happens to the best of us. If they’re shallow, your best bet is a bit of patience and some fine-grit sandpaper to smooth them out. For deeper voids, you’ll need to get the torch out and do a bit of localized brazing or welding to fill the gap. Just remember: don’t try to sand away a structural flaw; fix the metal first.
