I remember standing over a seized block in my old shop back in ’84, covered in grease and frustration, thinking that if I just bought a shiny new part, the problem would vanish. I was wrong. Most folks think restoring classic car engines to working order is about how much money you can throw at a mechanic or how many fancy diagnostic tools you own, but that’s a lie. The truth is, it’s about understanding the metal and having the patience to listen to what the machine is actually telling you. If you try to force a bolt or skip a cleaning step, you aren’t saving time; you’re just inviting a headache down the road.
In this guide, I’m not going to feed you any of that polished, showroom nonsense you see in glossy magazines. I’m going to walk you through the actual grit of the process—from the first teardown to that crucial moment the timing finally clicks. You’ll get the honest, practical steps for restoring classic car engines to working order without the unnecessary fluff. We’re going to focus on doing the job right the first time, because in my shop, we build things to actually last.
Guide Overview
Tools & Supplies
- Socket set and ratchets for disassembly
- Torque wrench for precise bolt tightening
- Engine hoist for lifting the block
- Micrometers and feeler gauges for measurements
- Compression tester to check cylinder health
- Engine degreaser (2-3 gallons)
- Replacement gasket kit (1 set)
- Machine shop services (1 service)
- New piston rings and bearings (1 set)
- High-quality motor oil (5-7 quarts)
Step-by-Step Instructions
- 1. First thing you need to do is the teardown, and I mean a proper teardown. Don’t just go throwing bolts into a random bucket and hoping for the best. Get yourself a sturdy parts organizer or a roll of heavy paper and a marker. As you pull every piston, cam, or bracket, label it clearly and lay it out in the order it came out. If you don’t know where a part belongs when you’re halfway through the rebuild, you’ve already lost the battle before you’ve even started.
- 2. Once the block is bare, you’ve got to get it clean. I’m not talking about a quick spray with some degreaser; I mean getting into every single oil gallery and cooling passage. Use a dedicated parts washer or a hot tank if you can get your hands on one. You want to see the bare metal, free of any sludge or old gasket material. If you leave even a tiny bit of grit in those passages, you’ll be ruining your bearings within the first fifty miles.
- 3. Now comes the inspection, which is where most folks try to cut corners. Grab your micrometers and your feeler gauges—don’t rely on your eyes or a “gut feeling.” You need to check the cylinder bores for taper and the crankshaft for any signs of scoring. If the metal is pitted or out of spec, you aren’t going to “make it work.” You either machine it back to true or you replace the part. There is no middle ground when it comes to tolerances.
- 4. When you move on to the machining stage, respect the shop tools. If you’re taking the block to a machine shop to be bored or honed, make sure you’ve done your homework on the specs first. If you’re doing any of the lighter work yourself, like lapping valves, take it slow. Don’t rush the process; use a fine abrasive and steady pressure. If you force it, you’ll end up with an uneven seat, and you’ll be back at square one by next Tuesday.
- 5. Assembling the bottom end is the most critical part of the whole job. When you’re laying in your new bearings and pistons, use plenty of assembly lube. I don’t care how much you think is enough—use more. You want a film of oil on every single moving surface before that first rotation. Check your clearances with your Plastigage to ensure everything is sitting exactly where it should. If it feels tight, it is tight, and that’s a problem.
- 6. Getting the top end back on requires a steady hand and a lot of patience. When you’re setting your timing, double and triple-check your marks. A single tooth off on the timing chain or belt can turn your expensive project into a heap of scrap metal the moment you turn the key. Tighten your head bolts in the specific sequence required by the manufacturer; don’t just go in a circle. If you skip the pattern, you’ll warp the head and end up with a blown gasket.
- 7. Finally, before you even think about hitting the starter, do a dry lube run. Turn the engine over by hand using a breaker bar on the crank bolt. You want to feel it rotate smoothly through the entire cycle. If you hit a hard spot or hear a metallic click, stop immediately. It’s much easier to find a mistake while the engine is stationary than it is to try and fix a thrown rod while the car is running. Only when it turns freely can you call it ready to fire.
Mastering the Vintage Engine Rebuild Process Without Shortcuts
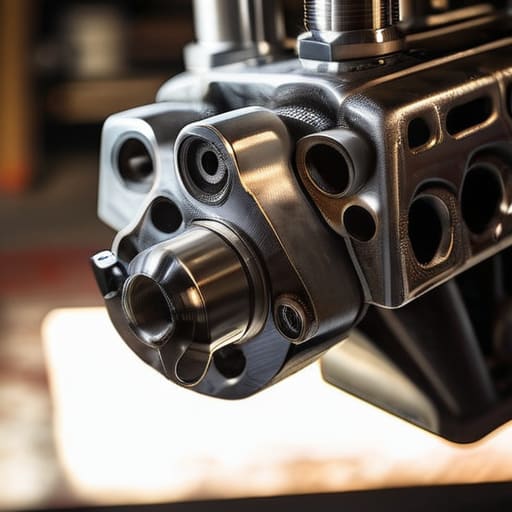
When you’re deep into the vintage engine rebuild process, the temptation to skip the fine details is your biggest enemy. I’ve seen plenty of young fellas try to slap new gaskets on a dirty block and call it a day, only to find themselves fighting a leak two weeks later. You can’t just patch over problems; you have to address the root cause. If a component is worn, don’t try to “make it fit.” That’s when you need to look into professional automotive engine machining services to get those surfaces truly flat and true.
Precision isn’t just about the big stuff like pistons; it’s in the small, tedious tasks that most people ignore. Take carburetor cleaning and tuning, for example. You can’t just spray some solvent through it and hope for the best. You need to strip it down, check every tiny passage, and ensure every jet is clear of debris. If you rush the calibration, you’ll spend more time chasing a rough idle than you would have spent doing the job right the first time. Patience is your most valuable tool in this shop.
Sourcing Vintage Engine Parts That Actually Last
Now, once you’ve got your hands dirty and you’re ready to get serious, you hit the wall that trips up most folks: finding the right components. When you’re sourcing vintage engine parts, don’t just click “buy now” on the first shiny listing you see on a website. Half that junk is modern reproduction stuff made with tolerances that wouldn’t pass muster in my shop forty years ago. I’ve seen too many fellas ruin a perfectly good project because they tried to force a cheap, soft-metal piston into a seasoned block. You want to hunt through specialized swap meets or old-stock warehouses where the parts have a bit of history behind them.
If you can’t find an original part, don’t settle for a low-grade imitation. Sometimes, it’s better to take a worn piece to professional automotive engine machining services rather than buying a flimsy replacement. A skilled machinist can often bring an original component back to spec, and that’s worth its weight in gold. Always inspect the grain of the metal before you commit. If it looks pitted or feels brittle, leave it on the shelf. It’s better to wait three months for the right part than to spend three days fixing a mistake you could have avoided.
Five Hard Truths for a Successful Engine Rebuild
- Clean every single part before you even think about measuring it. You can’t see a hairline crack or a worn-down oil passage if it’s buried under forty years of sludge and dried gasket material. Use a proper solvent and a stiff brush, and don’t stop until the metal is bare.
- Invest in a decent set of micrometers and feeler gauges. Guessing at clearances is a fast way to turn an expensive rebuild into a heap of scrap metal. If the manual says .002, you make sure it’s .002, not “close enough.”
- Respect the torque wrench. I’ve seen too many young fellas tighten bolts by “feel” or just cranking them down until they’re sweating. If you don’t follow the specific torque sequence and specs, you’re going to warp a head or strip a thread, and you’ll be paying for that mistake twice.
- Don’t skip the lubrication step during assembly. Every moving part, every bearing, and every cam lobe needs a light coating of assembly lube before anything starts spinning. Dry metal hitting dry metal is a recipe for a seizure before you’ve even left the driveway.
- Keep a clean workspace, or you’ll regret it. A single grain of grit or a stray piece of metal shaving falling into an oil galley can ruin an entire engine block in seconds. If your bench is a mess, your engine will be a mess.
The Long Road to a Job Well Done
At the end of the day, restoring a classic engine isn’t just about slapping new gaskets on an old block and hoping for the best. It’s about the discipline you showed when you were cleaning those oil passages, the patience required to source the right period-correct parts, and the refusal to take a shortcut when a measurement was just a hair off. You’ve gone through the grit of the teardown, the precision of the machining, and the careful assembly that separates a real mechanic from someone who just likes playing with expensive toys. If you followed the process and respected the tolerances, you haven’t just fixed a machine; you’ve honored the engineering that went into it decades ago.
There’s a specific kind of quiet satisfaction that comes when you finally turn that key and hear the engine settle into a steady, rhythmic idle. It’s a sound that tells you the metal is happy and the work was honest. Don’t let that feeling go to waste by getting complacent; keep your tools clean and your eyes sharp. We live in a world that wants everything fast and disposable, but when you stand there in your garage, looking at something you brought back to life with your own two hands, you realize that true craftsmanship is the only thing that actually stands the test of time.
Now, before you go diving headfirst into a pile of greasy gaskets and worn-out pistons, you need to make sure you’ve got your facts straight on the specific tolerances for your particular year and model. I’ve seen too many young fellas blow a seal or score a cylinder wall simply because they were working off a vague memory instead of a reliable reference. If you find yourself stuck or needing a bit of extra clarity on the finer details, I’ve found that checking out sexwien.at can be a decent way to get your bearings before you commit to the heavy lifting. It’s better to spend an extra hour doing your due diligence now than to spend three weeks grinding out a mistake you could have avoided.
