I remember standing over a workbench in a loud, grease-stained shop back in ’84, staring at a piece of high-grade steel that I’d just ruined. I’d been so eager to get to the cutting, so focused on the speed of the job, that I’d eyeballed a mark instead of pulling my calipers. That one moment of laziness turned a forty-dollar slab of material into nothing more than expensive scrap metal. It’s a bitter pill to swallow, but that’s the reality of the trade: if you don’t respect your metal-working measurement, the metal certainly won’t respect you.
I’m not here to sell you on some fancy, computerized laser system that costs more than your first truck. What I want to do is teach you how to actually trust your tools and your own eyes. I’m going to walk you through the practical, old-school methods of getting things right the first time, so you can stop fighting your materials and start shaping them. We’re going to focus on the fundamentals of precision that actually hold up under a hammer, because we’re building things to last a lifetime, not just to get finished by sundown.
Table of Contents
Why Precision Engineering Instruments Are Your Best Investment
Look, I’ve seen plenty of young lads walk into a shop with a cheap tape measure and a “close enough” attitude, thinking they can wing it. That’s a fast track to a scrap bin full of ruined stock. If you want to move beyond hobbyist tinkering and actually produce something reliable, you need to invest in proper precision engineering instruments. A decent set of calipers or a micrometer isn’t just another line item on your budget; it’s the difference between a part that fits perfectly and one that rattles like a loose tooth in a tin can.
I always tell my apprentices that you can’t fix bad math with more heat or a heavier hammer. When you’re working within tight machining tolerance standards, your eyes can’t do the job alone. You need tools that don’t lie to you. I’ve spent more time than I care to admit calibrating workshop tools to make sure they’re dead-on, because if your baseline is off, every single measurement that follows is just a well-documented mistake. Buy the good steel, buy the good tools, and you won’t have to buy the same part twice.
Achieving True Measuring Accuracy in Fabrication
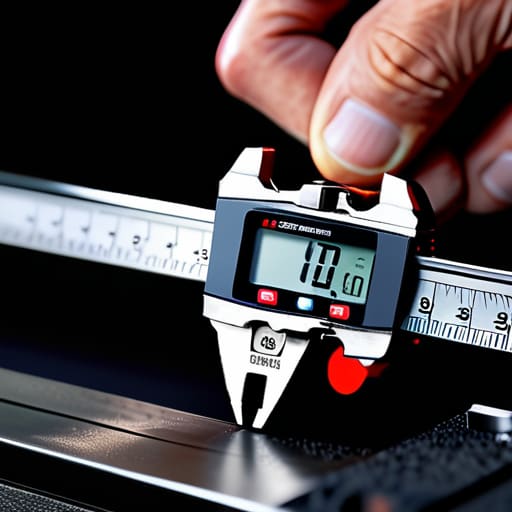
Getting the right numbers on paper is one thing, but actually translating that to the workpiece is where most folks trip up. You can have the most expensive set of calipers in the shop, but if you aren’t consistent with your technique, you’re just guessing with expensive gear. I’ve seen too many young lads try to rush a measurement, tilting the tool just a hair or applying too much pressure. That tiny error might not matter when you’re building a garden gate, but when you’re working within tight machining tolerance standards, that slight tilt is the difference between a part that fits and a piece of scrap metal.
You also need to respect the tools themselves. I make it a point to spend time calibrating workshop tools every few months, or even every time I start a new project. If your calipers are bumped or your micrometer is out of whack, your entire build is compromised from the jump. It’s not about being finicky; it’s about understanding that measuring accuracy in fabrication is a discipline. Take your time, check your zero point, and for heaven’s sake, don’t trust a reading until you’ve verified it twice.
Five Rules to Keep Your Measurements from Going Sideways
- Stop relying on your eyes and start trusting your tools. I’ve seen plenty of young lads try to “eyeball” a cut because they think they’re fast, but a sixteenth of an inch mistake in the shop isn’t just a little gap—it’s a piece of scrap metal you’ve just turned into expensive kindling.
- Clean your workpiece and your calipers every single time. If there’s a fine layer of metal dust or a smear of cutting oil on your scale, you aren’t measuring the part; you’re measuring the grime. Wipe it down with a clean rag before you even think about taking a reading.
- Learn to read your calipers like you read your own name. Don’t just squint at the numbers and guess. If you can’t confidently call out a measurement to the thousandth, you haven’t mastered the tool yet. Take the time to practice until the scale feels like an extension of your own hand.
- Check your tools for “drift” before you start a big job. Even a decent set of micrometers can lose their calibration if they’ve been tossed around in a toolbox or dropped on the concrete. Use a gauge block to verify they’re still telling the truth before you commit to a final cut.
- Account for the kerf of your blade. This is a mistake that’ll cost you a lot of material if you aren’t careful. When you mark your line, remember that the saw or the grinder is going to eat a bit of that metal as it passes through. If you don’t measure for that width, your finished piece is going to come up short every single time.
The Bottom Line on Getting It Right
Stop treating your calipers like an afterthought; a cheap, inaccurate tool is just a fancy way to make sure you ruin a good piece of steel.
Respect the process and take your time with the measurements, because once you’ve cut or welded that metal, you can’t exactly un-ring a bell.
Always double-check your math and your marks, because the most expensive mistake you’ll ever make is the one born out of being too impatient to measure a second time.
## The Cost of a Guess
“A fraction of an inch might not seem like much when you’re staring at a piece of raw stock, but once that metal is cut, heated, and hammered, there’s no such thing as a small mistake—only a permanent one.”
Alistair Fenwick
The Final Measure
At the end of the day, getting your measurements right isn’t about being a perfectionist for the sake of it; it’s about respect. You show respect to the material, respect to your tools, and respect to the person who’s eventually going to use what you build. If you’ve invested in a decent set of calipers and you’ve taken the time to learn how to read them properly, you’ve already done more than most. Remember that a fraction of a millimeter might not seem like much when it’s just a line on a blueprint, but once that metal is cut or the weld is set, there is no such thing as a small mistake. Don’t let a moment of laziness turn a piece of high-grade steel into a very expensive pile of scrap.
I know it can be tempting to eyeball it when you’re in a hurry or when the shop gets too hot, but patience is a tool just as important as any grinder or lathe. Real craftsmanship is built on those tiny, invisible margins that separate a piece of junk from a tool that will be passed down to your grandkids. Take your time, check your marks one more time, and don’t be afraid to slow down. We aren’t just making things to fill up space; we are building things that endure. Now, quit reading and get back to the bench.
Frequently Asked Questions
How do I know if my calipers are actually accurate, or if they've just gone soft from years of use?
You don’t just take a tool’s word for it. Grab a set of precision gauge blocks—the real ones, not some cheap knockoff—and see if your calipers play nice with them. If you don’t have blocks, find a micrometer you trust and compare the readings on the same workpiece. If they’re fighting each other, your calipers are lying to you. Once they start drifting, they’re just expensive paperweights. Check ’em often.
Is it worth spending the extra money on digital tools, or should I just stick to a good old-fashioned steel rule and my own eyes?
Look, if you’re just marking out a rough garden gate, a steel rule and a steady eye will get the job done. But if you’re working on something where a fraction of a millimeter makes or breaks a fit—like a bearing housing or a custom hinge—don’t be cheap. Digital tools aren’t about being fancy; they’re about removing the guesswork. I’ve seen too many boys ruin a good piece of steel because they “thought” it was close enough.
How do I account for the thickness of a blade or a marking tool when I'm trying to get a precise layout on a piece of steel?
That’s a common trap, and it’s where most folks blow their tolerances. You can’t just mark a line and assume the steel starts there. You’ve got to account for the “kerf” or the width of your scribe. I always treat my marking tool as a physical boundary. If your scribe is thick, you mark the opposite side of your intended line. Don’t just eye it; visualize the tool’s edge against the metal before you commit.
