I remember sitting in a cramped fabrication shop back in ’84, watching a young apprentice try to save a few bucks by slapping a cheap, spray-on lacquer over a piece of raw mild steel. He thought he was being clever, but within a month, that surface was bubbling and flaking off like bad skin. It’s the same nonsense I see today—people getting overwhelmed by a dozen different metal finishing options touted by catalogs, most of them designed to pad a profit margin rather than protect the work. Most of these modern “solutions” are nothing more than cosmetic band-aids that won’t survive a single season of real-world use.
I’m not here to sell you on the flashiest or most expensive coating on the market. My goal is to strip away the marketing fluff and give you the straight truth about which methods actually hold up when the weather turns or the tools get put to work. We’re going to look at these metal finishing options through the lens of durability and common sense, focusing on techniques that ensure your project remains as solid ten years from now as it is the day you finish it.
Table of Contents
Mastering Metal Substrate Preparation Before the First Coat
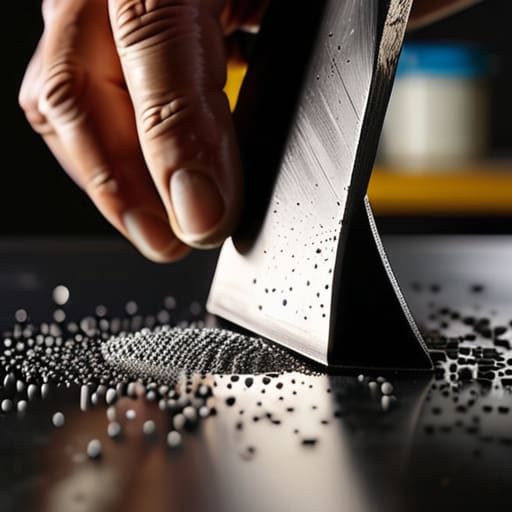
You can spend a fortune on the best paints or powders in the shop, but if you haven’t done the grunt work on the metal itself, you’re just throwing money into the scrap bin. Most folks want to jump straight to the pretty part, but metal substrate preparation is where the real battle is won or lost. If there’s a microscopic layer of oil, mill scale, or even a fingerprint left on that surface, your finish isn’t going to bond; it’s just going to sit there waiting for the first sign of moisture to peel it right off.
I’ve seen too many young guys try to rush this stage, thinking a quick wipe with a rag will do the trick. It won’t. You need to get in there with a proper degreaser or a mechanical abrasive to ensure the surface is truly “white metal” or at least chemically clean. Whether you’re looking into corrosion resistance methods for an outdoor gate or just prepping a small tool, the goal is the same: a clean, consistent surface. Take the time to sand, scrub, and inspect. If you don’t respect the substrate, the finish won’t respect you.
Corrosion Resistance Methods That Wont Fail You

Once you’ve got your substrate cleaned and ready, you have to decide how you’re actually going to fight off the rust. There isn’t a one-size-fits-all answer here, and choosing the wrong path is a fast way to watch your hard work pit and flake within a season. If you’re looking at corrosion resistance methods, you need to think about the environment the piece will live in. A decorative bracket for a dry hallway doesn’t need the same heavy-duty defense as a gate sitting out in the salt air or the rain.
When you’re weighing your options, you’ll likely find yourself stuck on the debate of electroplating vs powder coating. Now, don’t get caught up in what’s cheapest; think about the bond. Powder coating provides a thick, durable skin that’s great for general protection, but if you need precision or a specific metallic look that won’t chip under heavy use, plating might be the better way to go. Don’t just pick the easiest application method; pick the one that ensures you won’t be stripping and redoing the whole job two years from now.
Five Rules of Thumb for a Finish That Actually Sticks
- Match your finish to the metal’s purpose. There’s no sense in using a decorative clear coat on a tool that’s going to see heavy grease and grit; you’ll be stripping it off in a week. If it’s a workhorse, use something rugged like powder coating or a heavy oil; if it’s just for show, you can afford to be a bit more delicate.
- Watch your heat management. If you’re using a thermal spray or a heat-cured finish, don’t just guess the temperature. If you overheat the substrate, you’ll warp the piece or compromise the metal’s integrity, and no amount of sanding is going to fix a structural bend.
- Don’t skip the testing phase. Before you commit to coating a whole batch of parts, take a scrap piece of the exact same material and run the full process. It’s better to find out your mixture is too thin or your spray pressure is off on a piece of junk than on your finished project.
- Mind the edges. I’ve seen plenty of folks coat a flat surface beautifully, only to have the finish peel right off the sharp corners. Take the time to slightly break those edges with a file or sandpaper first; a finish needs a bit of surface area to grab onto, and sharp corners are where the trouble starts.
- Respect the environment. If you’re working in a damp shop or a high-humidity area, your choice of finish becomes a lot more critical. Don’t try to save a few bucks on a cheap paint when you’re working in a coastal climate; you’ll spend more time fighting rust than you would have spent buying the right stuff in the first place.
The Bottom Line on Finishing Your Work
Never skip the prep work; if you try to hide a rough surface or a bit of grease under a coat of paint, that finish is going to peel off before you’ve even finished your coffee.
Pick a protection method based on how the tool will actually be used, not how much it costs at the hardware store, because a cheap finish is just a waste of good metal.
Slow down and do it right the first time, because in my experience, it takes twice as long to strip a bad job than it does to apply a proper one.
The Truth About the Surface
A finish isn’t just a coat of paint to hide your mistakes; it’s the final line of defense between your hard work and the elements. If you don’t respect the metal underneath, no amount of shiny lacquer is going to stop it from rotting away.
Alistair Fenwick
Making the Right Choice for the Long Haul
At the end of the day, picking a finish isn’t about what looks flashiest under a showroom light; it’s about understanding the relationship between your metal and its environment. We’ve walked through the necessity of a clean, prepared substrate and the different ways to fight off rust before it starts. Whether you decide on a powder coat for heavy-duty protection or a simple oil finish for a piece of hand-forged kitchenware, remember that the integrity of the bond depends entirely on the work you did before the finish ever touched the surface. Don’t skip the prep work just to save an hour of labor, because shortcuts are just debt you’ll have to pay back later with more sanding and more wasted material.
I know it can feel overwhelming when you’re staring at a pile of raw steel and a catalog of chemical processes, but don’t let the complexity freeze you up. Start small, experiment on some scrap metal, and learn how these materials react to heat and friction. There is a deep, quiet satisfaction in looking at a piece of metal you’ve finished yourself and knowing that, because you did it right, it’s going to outlast us both. Take your time, trust your hands, and build things that are worth keeping.
Frequently Asked Questions
How do I know if a finish is just for looks or if it's actually going to stop the rust from creeping back in?
Look, if you’re just looking at the shine, you’re asking the wrong question. A finish is for looks, but a barrier is for protection. You need to check the technical data—not the marketing fluff. If it’s just a decorative lacquer, it’ll crack and let moisture underneath. You want something that chemically bonds or creates a dense, impermeable layer, like a proper powder coat or a heavy-duty zinc plating. If it doesn’t stop the oxidation at the source, it’s just makeup.
Is it worth the extra time and money to go with a professional coating, or can I get a decent, lasting result in my own shop?
Look, if you’re working on a decorative piece for the mantle, your shop setup is plenty. But if that metal is going to live outside or face heavy friction, you might want to bite the bullet and pay a professional. Industrial powder coating or hot-dip galvanizing offers a level of bond you just can’t replicate with a spray can and a prayer. Don’t waste your time and good material trying to mimic a machine.
What's the best way to choose a finish if the piece is going to be used heavily every day versus just sitting on a shelf?
If it’s just sitting on a shelf, you can afford to be a bit more decorative—maybe a light oil or a thin lacquer to keep the dust off. But if that piece is going to see daily abuse, like a tool or a kitchen implement, you need something rugged. I’d lean toward powder coating or a thick, baked-on finish. Don’t pick something pretty that’ll flake off the first time it hits the workbench.
