Most folks think that restoring vintage wooden furniture to original condition is all about slapping on a fresh coat of polyurethane and calling it a day. They see a scratched tabletop or a faded finish and think they can just mask the problem with more chemicals. That’s a mistake that’ll haunt you for years. I learned that the hard way back in ’84 when I tried to “fix” my father’s old oak sideboard by rushing the stripping process. I ended up gouging the grain so deep I nearly ruined a piece that had survived three generations. You can’t hide poor workmanship under a shiny layer of plastic; you have to respect the material and understand what’s happening beneath the surface.
In this guide, I’m going to walk you through the proper way to do things—the way that actually lasts. We aren’t going to talk about shortcuts or those fancy, overpriced “miracle” sprays you see in big-box stores. Instead, I’ll show you how to identify the wood, how to safely strip away the old gunk without damaging the integrity of the piece, and how to apply a finish that breathes with the timber. If you’ve got the patience to do it right, I’ll make sure you get it right.
Guide Overview
Tools & Supplies
- Orbital Sander for smoothing surfaces
- Screwdriver set for removing hardware
- Tack cloth for removing fine dust
- Paintbrushes or foam applicators for finishing
- Sandpaper assortment (80, 120, 220 grit)
- Wood cleaner or mineral spirits
- Wood stain or oil finish
- Furniture wax or polyurethane sealant
Step-by-Step Instructions
- 1. Before you even think about reaching for a piece of sandpaper, you need to get that old, grime-caked finish cleaned off. I’ve seen too many folks start sanding right away, only to find they’ve just ground a mixture of old wax and decades of household grease deep into the grain. Grab a bucket of warm water and a bit of mild soap, and scrub it down thoroughly with a soft cloth. If you don’t get the surface clean first, you’re just making a mess of everything that follows.
- 2. Once the piece is dry, you need to assess the damage to the actual structure. Check every joint, every drawer slide, and every corner for movement. If a chair wobbles or a tabletop feels soft, you aren’t just looking at a cosmetic job; you’re looking at a structural one. I always say you have to fix the bones before you worry about the skin, otherwise, all your hard work on the finish will be wasted the moment someone sits down.
- 3. Now comes the part where most people lose their patience: stripping the old finish. If the piece has layers of old varnish or lacquer, don’t try to sand it all off in one go. Use a quality chemical stripper to lift the old gunk, and work in small, manageable sections. It’s a slow, tedious process, but you have to respect the wood enough to let the chemicals do the heavy lifting instead of trying to muscle through it with a power sander.
- 4. When the old finish is gone, you can finally start the sanding process, but keep your ego in check. Start with a coarser grit to level out the surface, then move progressively to finer grits. I keep a bit of sandpaper in my pocket for a reason—you’ll find tiny imperfections even when you think you’re done. The key is to never skip a grit level, or you’ll end up with deep swirl marks that will show up like a sore thumb once you apply the new oil or stain.
- 5. After the sanding is finished, take a vacuum and a tack cloth to remove every single speck of dust. I can’t tell you how many times I’ve seen a man ruin a beautiful finish because he left a fine layer of sawdust in a corner. If the surface isn’t perfectly clean, your new finish won’t bond correctly, and you’ll be looking at a cloudy, uneven mess that’ll haunt you every time the sun hits it.
- 6. The final stage is applying the new finish, and this is where you prove you’ve got the discipline. Whether you’re using an oil, a wax, or a traditional shellac, apply it in thin, even coats. Don’t try to get it all done in one heavy layer just to save time. You need to apply patience in layers, waiting for each coat to dry completely before moving to the next. If you rush this, you aren’t building something to last; you’re just making something that looks good for a week.
Respect the Grain Mastering Sanding Techniques for Antique Wood
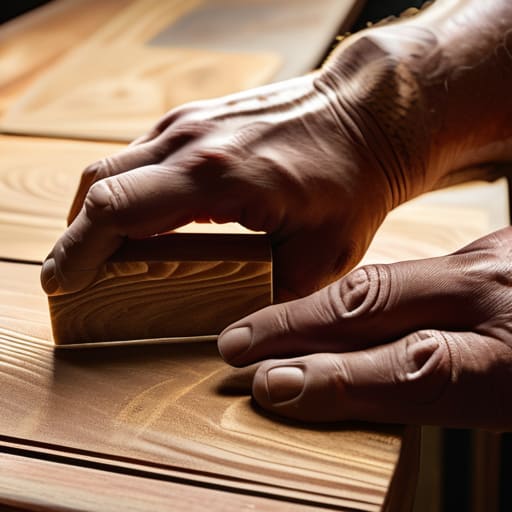
Now, listen close, because this is where most folks blow it. You might be tempted to grab a high-powered orbital sander and just rip through the surface to get it done, but that’s a fast track to a ruined heirloom. When you’re working with something old, you have to work with the grain, not against it. If you start sanding across the fibers, you’re going to leave permanent gouges that no amount of stain will ever hide. I always tell my apprentices: if you don’t respect the direction the wood grew, you’re just making more work for yourself later.
I’ve spent more time than I care to admit repairing scratches in old wood that someone else was too impatient to handle properly. Before you even think about the heavy grit, make sure you’ve done the hard work of removing old varnish and lacquer by hand or with a gentle chemical stripper. You want a clean slate. Once the old gunk is gone, move through your grits slowly and methodically. It’s a slow process, but patience is the most important tool in your workshop. If you rush the sanding, you’ll never get that smooth, professional finish that makes an antique look like it was just pulled from the craftsman’s bench.
Removing Old Varnish and Lacquer Without Wasting Good Material
Now, here’s where most folks lose their nerve and start hacking away at the piece. When you’re removing old varnish and lacquer, the temptation is to grab a heavy-duty sander and just rip through the surface to get to the “clean” wood. Don’t do that. You’ll end up gouging the grain or thinning out the wood to the point where you can’t even apply a proper finish. I’ve seen too many apprentices turn a century-old tabletop into a piece of scrap because they were too impatient to use a chemical stripper. Use a decent solvent that respects the layers; it’ll do the heavy lifting so you don’t have to fight the wood with sandpaper.
Once that old gunk is off, you’ll likely find some battle scars left behind. This is your chance for repairing scratches in old wood before you move on to the staining phase. Take your time with a bit of wood filler or a localized sanding pass. If you rush this, you’re just going to trap those imperfections under your new finish, and they’ll stare back at you every time the light hits the surface. Remember, a good restoration isn’t about making it look brand new; it’s about honoring the history of the piece.
Five Hard-Won Lessons Before You Pick Up the Brush
- Stop and inspect the joints before you even think about the finish; if the glue has dried out and the frame is wobbly, all the fancy oil in the world won’t save a piece that’s structurally unsound.
- Don’t go buying a whole kit of fancy modern stains until you’ve tested a small, inconspicuous spot on the underside of the piece to see how the old wood actually reacts.
- Keep your workspace clean of dust and grit, because if you let debris settle into your finish, you aren’t restoring a masterpiece, you’re just making a dusty mess.
- Patience with the drying times is non-negotiable; if you try to apply a second coat before the first has truly set, you’ll end up pulling the finish right back up with your rag.
- Always work with the direction of the grain, not against it, or you’ll spend your entire afternoon trying to sand out scratches that you should have never made in the first place.
The Finished Piece and the Long Road Ahead
At the end of the day, restoring a piece of antique furniture isn’t just about stripping away the grime or smoothing out the surface; it’s about understanding the soul of the material you’re working with. You’ve gone through the grit of the sanding, the patience of stripping the old lacquer, and the careful application of new finishes. If you’ve done it right, you haven’t just covered up the flaws—you’ve honored the history of the wood. Remember, if you skipped a step or tried to rush the drying time just to get to the finish line, it’ll show in the final result. A job done with shortcuts is just a temporary fix, but a job done with proper technique ensures that the piece will stand steady for another fifty years.
I know it can feel tedious when you’re staring at a pile of sawdust and empty chemical cans, but that’s where the real work happens. There is a profound sense of satisfaction in looking at a piece of furniture and knowing that your own hands brought its luster back to life. We live in a world that’s obsessed with the new and the disposable, but I urge you to hold onto the old. When you take the time to repair and restore rather than replace, you’re keeping a tradition of quality alive. So, wipe off your tools, clean your workspace, and take pride in what you’ve built. You didn’t just fix a chair; you preserved a legacy.
Once you’ve got that old finish stripped away, you’re going to find that the wood is thirsty for something to protect it, and you can’t just slap on any cheap, grocery-store canned spray and expect it to hold. I always tell my apprentices that the quality of your sealant determines whether a piece survives another fifty years or starts peeling in six months. If you’re looking for the right tools or specialized supplies to get the job done properly, I’ve found that checking out ao sex nrw can give you a better idea of what’s actually worth your hard-earned money. It’s better to invest in the right materials once than to spend your whole weekend fixing a botched job.
