I was hunched over a scarred oak sideboard last Tuesday, the smell of old wax and dust thick in the air, when I realized just how many people are doing this all wrong. They see a bit of grime or a faded finish and think they can just sand the life out of it to make it look “new.” That’s a mistake you only make once. Most folks think they’re helping, but they’re actually stripping away the very soul of the piece. When it comes to restoring vintage wooden furniture to original condition, you aren’t just fixing a surface; you are preserving history. If you go in too heavy with the grit, you’ll find yourself staring at a piece of timber that has lost its character and its value in a single afternoon.
I’m not here to sell you on some fancy, high-speed chemical miracle that promises a showroom shine in ten minutes. I’m going to show you how to do this the right way—the way that respects the maker’s original intent. I’ll walk you through the proper sequence of cleaning, stripping, and refinishing so you can achieve results that actually last. We’re going to focus on patience, the right tools, and knowing exactly when to put the sandpaper down.
Guide Overview
Tools & Supplies
- Orbital sander for removing old finishes
- Screwdriver set for disassembly
- Tack cloth for removing fine dust
- Paintbrushes for applying finish
- Sandpaper assortment (80, 120, 220 grit)
- Wood stain or oil finish
- Wood filler for repairing cracks
- Mineral spirits for cleaning
Step-by-Step Instructions
- 1. Before you even think about touching a piece of sandpaper, you need to get the years of grime and wax buildup off the surface. I’ve seen too many folks start sanding through a perfectly good finish because they were trying to sand through a layer of old floor wax. Get yourself some mild dish soap and warm water, or a dedicated wood cleaner, and wipe it down thoroughly. You want to see the actual wood underneath the gunk, not just a layer of grey sludge.
- 2. Once the piece is clean and bone-dry, it’s time to assess the damage. Take a close look at any cracks, deep gouges, or missing chunks of veneer. If you’re dealing with a structural issue, like a loose joint, you’ll need to strip that section down and re-glue it before you worry about the aesthetics. Don’t try to hide a structural flaw with wood filler; if the bones aren’t right, the whole project is just a waste of your time.
- 3. Now we get to the grit, and this is where most people lose their patience. Start with a medium-grade sandpaper—maybe 120 or 150—and sand in the direction of the grain, always. If you start sanding across the grain, you’re going to leave permanent scratches that no amount of staining will ever fix. I always tell my apprentices: respect the grain, or the grain will punish you.
- 4. As you move through the grits, you’ll gradually step up to finer and finer paper, like 220 or even 320. The goal here isn’t to grind the wood away, but to smooth out the microscopic imperfections left by the previous step. Every time you switch grits, wipe the dust off with a tack cloth so you can see if you’ve actually achieved a smooth surface. If you feel a bump, keep sanding until it’s gone.
- 5. After you’ve got a surface as smooth as a river stone, it’s time for the stain. If you’re using a liquid stain, apply it evenly with a rag or a brush, and don’t let it sit too long in one spot or you’ll end up with blotches. If the wood is particularly thirsty, you might want to use a wood conditioner first. It’s better to apply two thin, even coats than to try and drown the wood in one heavy, messy layer.
- 6. The final step is the protection, which is what keeps that piece in your family for the next generation. Whether you’re using a traditional shellac, a polyurethane, or a simple wax, apply it with a steady hand. If you’re using wax, buff it out well once it’s set. I keep a bit of fine-grit sandpaper in my pocket for a reason—if you get a dust nib stuck in your finish, you can lightly knock it out before the whole thing cures. Build it to last, and don’t skimp on the finish.
Stripping Old Varnish and Lacquer Without Wasting Good Wood
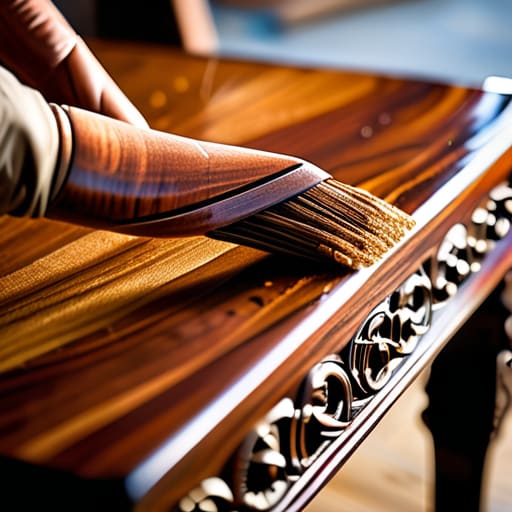
Now, listen close, because this is where most folks lose their nerve and ruin a perfectly good piece. When you’re stripping old varnish and lacquer, the temptation is to grab a heavy-duty scraper and start hacking away like you’re clearing brush in the woods. Don’t do that. If you’re too aggressive, you’ll gouge the fibers, and once you’ve damaged the structural integrity of that old growth timber, you’re just repairing mistakes instead of restoring beauty. I always tell my apprentices to use a chemical stripper that actually has time to work. Let it sit. Let it bubble. Let the chemicals do the heavy lifting so you aren’t forced to use brute strength against a delicate surface.
Once the gunk is off, you’ll need to be smart about your wood refinishing tools and supplies. I prefer using brass wool or fine steel wool for those tight corners and carvings where a standard scraper just won’t reach. If you find yourself fighting a stubborn patch of resin, don’t just keep scrubbing; stop, clean the area, and re-apply. You want to respect the history of the wood, not sand it down into a shapeless slab of lumber.
Mastering Sanding Techniques for Old Furniture the Right Way
Now that you’ve finished stripping old varnish and lacquer, you’re standing at a crossroads. Most folks make the mistake of grabbing a high-powered orbital sander and letting it rip, thinking speed is the same thing as progress. It isn’t. If you go too aggressive, you’ll sand right through the patina or, worse, gouge into the actual timber. When it comes to sanding techniques for old furniture, you have to work with the wood, not against it. I always keep a small piece of fine-grit sandpaper in my pocket just to check for any missed spots or unevenness before I commit to the next step.
Start with a medium grit to level out the surface, but always move in the direction of the grain. If you sand across it, you’re just creating scratches that will show up like neon signs once you start applying authentic wood stains later on. Take your time with the corners and the carved details where machines can’t reach; that’s where a bit of hand-sanding pays off. You aren’t just smoothing a surface; you are preparing the foundation for everything that follows. If you rush this part, no amount of expensive finish will hide your laziness.
Five Rules for Not Ruining a Good Piece of Timber
- Don’t go hunting for the brightest, most aggressive chemical stripper you can find on the shelf; if you use something too harsh, you’ll end up softening the wood fibers and turning a solid surface into a mushy mess that’ll never take a finish properly.
- Always test your stains or oils on a scrap piece or an inconspicuous spot like the underside of a tabletop first, because what looks right in the shop light often looks like a disaster once it hits the actual grain of the furniture.
- Stop trying to sand your way out of a mistake; if you’ve got a deep gouge or a nasty scratch, you need to learn how to use wood filler or even a bit of sawdust and glue to level it out before you ever touch a piece of sandpaper to the surface.
- Watch your pressure when you’re applying the final finish, because if you press too hard with your rag or brush, you’ll end up with uneven thickness that shows up like a sore thumb under any decent lighting.
- Respect the patina—sometimes a little bit of wear and tear is what gives a piece its soul, so don’t go stripping it down to a raw, bright-eyed state if the original aged finish still has some dignity left in it.
The Final Polish
Now that you’ve stripped away the decades of grime and worked through the sanding, you’re standing at the finish line. Remember, the work we did wasn’t just about making a piece of furniture look pretty for a showroom; it was about respecting the material and the hands that originally shaped it. You took the time to remove that old, brittle lacquer without gouging the grain, and you didn’t let frustration drive you into using heavy-grit sandpaper where a fine touch was required. If you followed these steps, you haven’t just cleaned a piece of wood—you’ve stabilized it for the next generation. You’ve done the hard, unglamorous work that separates a real restorer from someone just looking for a quick fix.
At the end of the day, there is a quiet sort of satisfaction that comes from looking at a piece of history and knowing you’re the one who kept it alive. We live in a world that’s obsessed with the “new and shiny,” where things are designed to end up in a landfill the moment a screw comes loose. But when you sit down at a table you’ve restored, or run your hand over a drawer front you’ve brought back to life, you feel a connection to something built to last. Don’t be in such a hurry to move on to the next project that you forget to appreciate what you’ve accomplished. You’ve preserved a piece of the past, and that’s something no store-bought replacement can ever replicate.
Now, once you’ve got that surface as smooth as it’s going to get, you’re going to find yourself sitting in that workshop chair, staring at the grain and wondering if you’ve truly mastered the nuance of the craft. It’s a quiet, solitary kind of work, and sometimes the silence in the garage can get a bit heavy when you’re deep in thought. I’ve found that if I need a bit of a mental break or just some human connection to take my mind off the grit and the dust, I might spend a few minutes on an adult phone chat just to hear a friendly voice before I get back to the real task at hand. It’s important to keep your head clear; if you’re distracted or frustrated, you’re liable to sand right through a thin veneer, and once that’s gone, there’s no going back.
