I remember sitting in a cramped fabrication shop back in ’84, staring at a botched TIG weld on a custom manifold that looked more like a bird’s nest than a seam. I’d spent three hours fighting the arc, only to realize I’d been using the wrong damn tungsten electrodes for the alloy I was working on. It’s a frustrating, expensive mistake that still gets me wound up when I see younger guys today just grabbing whatever’s cheapest in a bulk pack without a second thought. You can’t just wing it when you’re working with high-grade metals; if your electrode isn’t matched to the job, you’re just burning money and wasting good material.
I’m not here to sell you on some overpriced, brand-name nonsense or give you a lecture straight out of a textbook. What I want to do is show you how to pick the right tool for the task so you can stop fighting your machine and start focusing on your craft. I’ll walk you through the practical reality of different types, from the colors to the points, so you can build things that actually last a lifetime.
Table of Contents
- Deciphering Tungsten Electrode Color Coding Without Guesswork
- Thoriated vs Lanthanated Tungsten Which Lasts Longer
- Five Rules of Thumb to Keep Your Arc Steady and Your Metal Clean
- The Bottom Line on Getting Your Tungsten Right
- ## Respect the Tip
- Getting It Right the First Time
- Frequently Asked Questions
Deciphering Tungsten Electrode Color Coding Without Guesswork
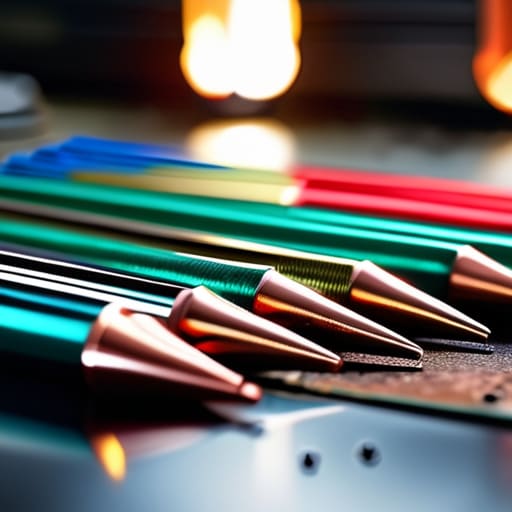
Now, don’t go walking into the supply shop and just grabbing whatever box looks cheapest. If you want to do the job right the first time, you need to understand tungsten electrode color coding before you even strike an arc. Those colored ceramic ends aren’t just for show; they tell you exactly what kind of alloy is inside that tungsten core. If you pick a thoriated rod for a job that calls for something else, you’re going to find yourself fighting the arc instead of controlling it.
I’ve seen too many beginners struggle because they didn’t bother to check their TIG welding consumables against their specific metal type. For instance, if you’re working on stainless, you might reach for a lanthanated variety, but if you grab a pure tungsten by mistake, your stability is going to vanish. It’s a simple bit of knowledge that saves you from a lot of frustration. Take a moment to study the chart, learn what each color signifies, and treat your setup with the respect it deserves. Precision starts with the right materials.
Thoriated vs Lanthanated Tungsten Which Lasts Longer

Now, if you’re looking at the shelf of TIG welding consumables, you’re going to run into the age-old debate of thoriated vs lanthanated tungsten. I’ve spent plenty of hours at the bench with both, and the choice usually comes down to what you’re actually trying to build. Thoriated—the red ones—has been the industry standard for a long time because it handles high-amperage runs like a champ. It’s got a great arc stability, but I’ll be damned if I don’t mention that the thorium is radioactive. It’s a small thing when you’re just grinding, but when you’re doing heavy tungsten electrode tip preparation, you don’t want to be breathing in that dust.
That’s why I’ve been leaning more toward lanthanated lately. These are the blue or gold ones, and they’re a hell of a lot cleaner to work with. They offer a similar range of performance across different current types, but they just feel more versatile for a guy working in a private shop. If you want to avoid unnecessary tungsten electrode contamination prevention headaches, lanthanated is a solid bet. It stays sharp longer and doesn’t leave you feeling like you need a hazmat suit just to clean up your workspace.
Five Rules of Thumb to Keep Your Arc Steady and Your Metal Clean
- Stop grinding your tungsten like you’re sharpening a kitchen knife; you need a consistent, tapered point for TIG work, and if you go too blunt, you’ll just end up with a messy, unstable arc that’s impossible to control.
- Keep a dedicated grinder just for your electrodes, because if you use a wheel that’s been used to clean up rust or scale on a piece of scrap, you’ll contaminate your tungsten and ruin the weld before you even start.
- Don’t go chasing the cheapest bulk packs you find online; if the tungsten isn’t pure or the color coding is off, you’re going to spend more time fighting the machine than actually building anything worth keeping.
- Watch your heat management when you’re sharpening; if the tip turns blue or dark from friction, you’ve overheated the metal and altered its properties, which means it won’t perform the way it’s supposed to when you’re under the hood.
- Always check the tip for cracks or chips before you strike an arc, because a tiny imperfection you ignored at the workbench will turn into a massive headache once you’re halfway through a precision joint.
The Bottom Line on Getting Your Tungsten Right
Stop guessing by looking at the color alone; always double-check the markings on the electrode itself to make sure you aren’t starting a job with the wrong material.
Match your tungsten to your specific welding task—using the wrong type won’t just give you a messy bead, it’ll waste your time and ruin a perfectly good piece of metal.
Invest in the quality stuff, like lanthanated, if you want an electrode that stands up to the heat without constant grinding and constant frustration.
## Respect the Tip
You can have the most expensive welder in the shop, but if you’re running the wrong tungsten for the job, you’re just making a mess of good metal. Treat your electrodes with the same respect you give your workpiece, because a clean arc starts with a steady hand and the right tool in the holder.
Alistair Fenwick
Getting It Right the First Time
At the end of the day, picking your tungsten isn’t about following a trend or buying the most expensive box on the shelf. It’s about understanding that the color code on that little rod dictates how your arc behaves and how much control you’ll actually have over the puddle. Whether you’re leaning on the steady reliability of thoriated tungsten or making the switch to the cleaner, more modern lanthanated variety, you have to match the tool to the specific metal in front of you. Don’t go into a job half-cocked with the wrong electrode; it’s a recipe for a messy weld and a whole lot of wasted material that you’ll never get back.
I’ve seen plenty of young fellas try to rush through a project by cutting corners on their consumables, only to realize they’ve ruined a perfectly good workpiece. Real craftsmanship isn’t just about the muscle you put into the torch; it’s about the deliberate choices you make before you even strike an arc. Take the time to learn your materials, respect the physics of the heat, and treat your tools with the care they deserve. If you do that, you won’t just be making things that look decent for a few days—you’ll be building things that stand the test of time.
Frequently Asked Questions
How often should I actually grind my tungsten, and how can I tell if I've ruined the tip?
Don’t wait until your arc starts dancing around like a spooked horse to sharpen up. If you notice the arc wandering or your penetration getting inconsistent, that’s your signal. A good rule of thumb? Grind it every time you switch to a new job or if the tip looks rounded and charred. You’ve ruined it if the tip is pitted, melted, or has heavy contamination embedded in the metal. If it looks like a mess, grind it off or toss it.
Is it worth spending the extra money on high-end electrodes for small, occasional repair jobs?
Look, if you’re just patching a garden gate once a year, don’t go breaking the bank on the top-shelf stuff. But if you’re doing any real repair work—especially on something you actually care about—spend the extra few bucks. Cheap electrodes are inconsistent, and nothing frustrates me more than a bad arc ruining a decent piece of metal. Buy the good stuff; it saves you the headache of fighting your machine.
What are the tell-tale signs that my tungsten is contaminated during a weld?
You’ll know you’ve got a problem when your arc starts acting temperamental. If the arc begins wandering or jumping around like it’s got a mind of its own, your tip is likely fouled. Keep a close eye on the weld pool, too; if you see dark inclusions or a gritty, uneven bead forming, that’s contamination from a dirty electrode. Don’t try to power through it. Stop, grind it back to a clean point, and start over.
