I remember standing in a dusty salvage yard back in ’84, looking at a rusted-out enamel advertisement that most folks would’ve called scrap. A young kid from the local college told me I should just sand it down to the bare metal and hit it with a fresh coat of modern spray paint to make it “look new.” I nearly dropped my wrench. That’s the problem with how people approach vintage sign restoration these days; they think a quick coat of cheap lacquer can replace the soul of the original material. If you strip away the character and the history just to satisfy a trend, you aren’t restoring anything—you’re just destroying a piece of history to make it look like something from a big-box store.
I’m not here to sell you on fancy, overpriced chemical kits or tell you that you need a laboratory to get the job done right. What I’m going to give you is the straight truth on how to handle old metal, how to respect the patina, and how to fix the damage without losing the piece’s integrity. We’re going to talk about real techniques that work in a practical workshop, focusing on patience and precision rather than speed. If you’re willing to put in the work, I’ll show you how to make those signs last another fifty years.
Table of Contents
Respect the Rust Proven Removal Techniques for Metal
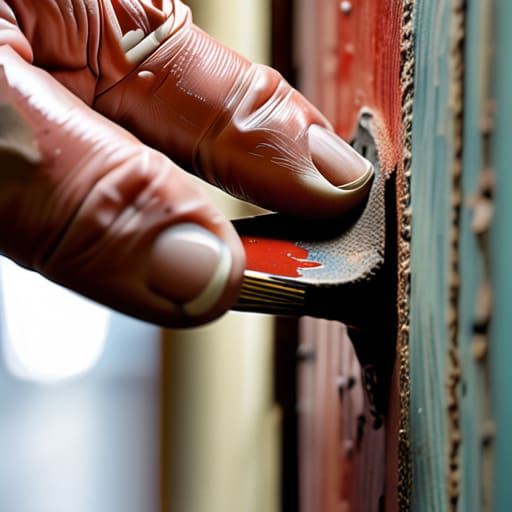
Now, before you go grabbing a heavy-duty grinder and trying to blast the surface clean, stop and look at what you’re actually dealing with. I’ve seen too many folks ruin a perfectly good piece of history because they treated it like a piece of scrap from a junkyard. When it comes to rust removal techniques for metal, the goal isn’t just to get it shiny; it’s to get it clean without eating into the original substrate. If you’re working on something delicate, like restoring porcelain enamel signs, you can’t go in with abrasives. You’ll chip the glass coating faster than you can blink, and once that enamel is gone, there’s no going back.
For most iron or steel signs, I prefer a more patient approach. Start with a gentle soak in a mild acid or even just some fine steel wool and some elbow grease. You want to strip the oxidation, not the character. If you see deep pitting, you have to decide if you’re fixing the metal or just cleaning the surface. Don’t be in such a hurry to see the bright metal underneath that you strip away the very patina that gives the sign its soul.
Preserving Antique Advertising Signs Without Rushing the Work
Once you’ve cleared away the heavy scale, you’re entering the most delicate part of the job. When you’re preserving antique advertising signs, there is a fine line between cleaning them up and stripping away the very soul of the piece. I’ve seen too many youngsters go in with heavy abrasives or harsh chemicals, thinking they’re doing a favor to the metal, when all they’re doing is erasing decades of history. If you’re working on something like restoring porcelain enamel signs, you have to be even more careful; that glass-like coating is brittle, and one wrong move with a wire wheel will leave you with a pitted mess that no amount of paint can hide.
Take your time with the surface prep. If the sign has some minor pitting or light oxidation, I prefer a gentle hand with fine-grit sandpaper—I always keep a bit in my pocket for a reason—rather than reaching for the grinder. You want to stabilize the metal, not sand it down to nothing. Patience is your best tool here. If you rush the leveling process, you’ll find that your final finish looks uneven, reflecting light in a way that screams “amateur” rather than “restored.”
Five Rules for Keeping the Character in the Metal
- Don’t go hunting for a brand new finish. If the sign has a bit of patina or some light surface oxidation that isn’t eating into the structural integrity, leave it alone. You’re trying to restore history, not make something look like it just rolled off a modern assembly line.
- Watch your heat. If you’re using a torch to straighten a bend or strip old paint, keep a close eye on the color of the metal. If you get it too hot, you’ll bake the temper right out of it or warp the entire sheet, and a warped sign is a headache you can’t just sand away.
- Test your solvents on the edges first. Before you go dousing the whole piece in a degreaser or a paint stripper, find a spot in the corner where nobody’s looking. You need to know if that chemical is going to eat through the original pigment or leave a nasty stain behind.
- Use the right grit for the job. I see too many folks jump straight to a coarse abrasive to save time. You’ll end up with deep gouges that’ll haunt you forever. Start fine, work your way up, and always remember that a smooth surface is earned, not forced.
- Seal it properly once the work is done. Whether you’re using a clear coat or a traditional wax, make sure it’s something that can stand up to the elements. If you don’t protect the metal you just cleaned, all that sweat and effort will be washed away by the first rainstorm.
The Bottom Line on Getting It Right
Never trade the integrity of the original metal for a quick finish; if you strip too much away trying to make it look new, you’ve lost the very history that makes the sign valuable.
Invest in quality abrasives and proper solvents rather than the cheapest stuff on the shelf, because the wrong chemical can eat through a patina faster than you can say “oops.”
Slow down and let the materials tell you when they’re ready, whether that’s waiting for the rust to lift or letting the primer cure properly—haste is the fastest way to end up with a scrap heap instead of a masterpiece.
The Cost of Speed
You can’t argue with a piece of metal that’s survived eighty years of rain and sun; if you try to force a finish before the metal is truly clean and stable, you aren’t restoring history, you’re just painting over a lie.
Alistair Fenwick
The Final Polish
At the end of the day, restoring a vintage sign isn’t about making it look brand new; it’s about honoring the history etched into the steel. We’ve talked about the necessity of stripping back that rust without gouging the substrate, and the importance of using the right sealants to keep the elements at bay. If you’ve followed these steps, you haven’t just cleaned a piece of metal—you’ve stabilized a piece of history. Remember, whether you are working with enamel or heavy-gauge sheet metal, the goal is to stop the decay while leaving the character intact. Don’t go looking for the fastest way to finish the job, because shortcuts are just a slow way to ruin a good sign.
I know it can be tempting to just slap some cheap spray paint on a pitted surface and call it a day, but that’s not what we do in a real workshop. Real craftsmanship requires you to sit with the piece, observe how the light hits the metal, and respect the time it took to manufacture it in the first place. When you finally hang that sign up and see it catch the sun, you’ll know it’s going to stand for another fifty years. Build it to last, keep your tools sharp, and never let the rush of the modern world dictate the pace of your hands.
Frequently Asked Questions
How do I tell the difference between original factory paint and a cheap, modern repaint before I start stripping it?
Before you go grabbing the chemicals, you need to look closer. Original factory enamel has a depth to it—it sits in the metal, not just on top of it. If you see heavy brush marks or a thick, plastic-like layer that looks like it’s trying to hide the surface, that’s a modern repaint. I usually use a magnifying glass or just a careful scratch test in a hidden corner. If it flakes off in big, brittle chunks, it’s likely a cheap job.
Is it better to use a chemical stripper or stick to mechanical methods like wire wheels to avoid damaging the underlying metal?
Look, there’s no single “right” way, but there’s a right way for the specific piece of metal in front of you. If you’re working on a heavy-duty steel sign, a wire wheel or some coarse sandpaper will get the job done without much fuss. But if you’re dealing with thin, old sheet metal, don’t go at it with a grinder; you’ll burn through it before you know it. In those cases, a gentle chemical stripper is your best friend. It lets the chemistry do the heavy lifting so you don’t have to rely on brute force. Just watch your ventilation, and don’t let the chemicals sit too long.
What's the best way to seal the metal once it's clean without making the sign look like it's covered in cheap plastic?
If you slap a thick layer of clear coat on there, you’ve just turned a piece of history into a cheap piece of plastic. You’ll lose the soul of the metal. For a sign, I prefer a high-quality microcrystalline wax—something like Renaissance Wax. It penetrates the surface, kills the oxidation, and gives it a soft, honest luster rather than that artificial, wet-look shine. It’s thin, it’s durable, and it respects the patina.
