I remember sitting in my first shop back in the seventies, staring at a piece of brushed steel that looked like absolute rubbish because I’d tried to “speed up” the finishing process. I had grabbed a handful of whatever cheap, generic grit was sitting in the bin, thinking it didn’t matter as long as the surface looked shiny. I was wrong. I spent three hours trying to buff out the deep, ugly scratches I’d practically carved into the metal, only to realize that using the wrong metalworking sandpaper is a fast track to wasting your time and your material. You can’t cheat the physics of abrasion; if you start with a bad grit, you’re just fighting a losing battle against the grain.
I’m not here to sell you on some fancy, high-tech abrasive system that costs more than your welder. What I want to do is cut through the noise and show you how to actually select the right grit for the job you’re doing. I’ll be sharing the practical, hard-earned lessons I’ve picked up over forty years in the trade so you can stop fighting your workpiece and start respecting the metal.
Table of Contents
Aluminum Oxide vs Silicon Carbide Picking the Right Tool
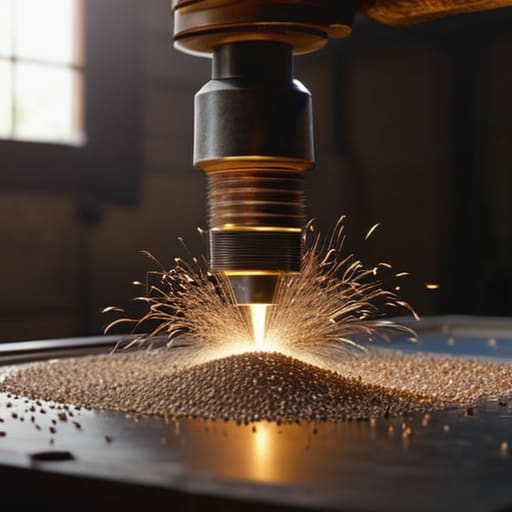
Now, when you’re standing at your bench, you’ll likely see two main types of abrasive on the shelf, and picking the wrong one is a quick way to waste both your time and your material. Most of the heavy lifting I do involves aluminum oxide, which is your old reliable for tougher, more ductile metals. It’s got a bit more “give” to it, meaning it won’t shatter the moment you apply pressure. If you’re working on something like mild steel or even some of the older cast-iron pieces I restore, aluminum oxide is usually the better bet because of its superior abrasive material durability.
On the other hand, if you’re working on something brittle or looking for a much finer finish, you’ll want to reach for silicon carbide. It’s much sharper and harder, which makes it perfect for non-ferrous metals or glass, but it tends to break down faster under heavy pressure. When you’re debating aluminum oxide vs silicon carbide, just remember: use the oxide for the heavy removal and save the carbide for when you’re chasing that final, mirror-like smoothness. Don’t try to force a coarse grit to do a fine job; you’ll just end up fighting the metal instead of working with it.
Abrasive Material Durability Making Your Supplies Last
Now, I’ve seen too many young lads walk into a shop, blow through half a pack of high-end sheets on a single project, and then complain about the cost. The truth is, if you aren’t paying attention to how your abrasive wears down, you’re just throwing money into the scrap bin. You have to understand abrasive material durability and how it reacts to the specific metal in your vise. Some materials will clog up and glaze over in seconds if you’re pushing too hard, while others will crumble before you’ve even leveled the surface.
If you’re working on something stubborn like stainless, don’t just grind away blindly. I always suggest keeping a close eye on your sandpaper grit progression for metal to ensure you aren’t actually creating more work for yourself. If you jump from a coarse grit straight to a fine one without cleaning the surface in between, you’ll just be sanding down the deep scratches you were trying to get rid of. It’s a waste of time and a waste of good paper. Take a breath, watch the grain, and work with the metal, not against it.
Five Hard-Won Rules for Not Wasting Your Grit
- Stop skipping steps in the grit sequence. I’ve seen too many young fellas try to jump from a coarse 80 grit straight to a 400 like they’re in a race. If you don’t spend the time leveling out the deep scratches from the heavy stuff first, you’re just polishing the mistakes you made earlier.
- Keep your work surface clean between every single change. If a single grain of coarse grit stays on your cloth when you move to a finer grade, it’ll leave deep gouges in your metal that’ll take you an hour to fix. Wipe the part down and shake out your paper every time.
- Don’t press down harder just because you’re tired. Sandpaper works through friction and movement, not brute force. If you start leaning into it like you’re trying to grind the metal away, you’ll end up with uneven patches and heat buildup that can mess with the temper of certain alloys.
- Watch for the “glazing” effect. When the paper starts looking shiny and smooth instead of gritty, it’s done. You can try to force it, but you’re just generating heat and friction without actually cutting anything. Toss it in the scrap bin and grab a fresh sheet; it’ll save you more time than you think.
- Use a backing block for anything flat. If you use just your fingers, you’re applying uneven pressure based on how your hand is shaped, and you’ll end up with a surface that looks wavy under a shop light. A hard rubber or wooden block keeps the pressure consistent and the surface true.
The Bottom Line for Your Workbench
Don’t waste good time or good metal by grabbing the first sheet of grit you see; match your abrasive to the specific metal you’re working on, or you’ll just end up fighting the material.
Treat your sandpaper like any other quality tool—don’t push it until it’s useless, because a worn-out grit only creates heat and friction without actually doing the work.
Patience beats speed every single time; if you skip the progression of grits and try to jump straight to a fine finish, you’re going to leave scratches that no amount of polishing can fix.
## The Cost of Haste
“A lot of young fellas think they can skip the fine grits to save twenty minutes, but you can’t polish out a mistake made by being impatient. If you don’t respect the progression of the grit, you’re just moving the scratches around instead of actually removing them.”
Alistair Fenwick
Finishing the Job Right
At the end of the day, choosing your abrasive isn’t just about picking a color or a brand off a shelf; it’s about understanding the metal sitting on your workbench. Whether you’ve decided that aluminum oxide is the better bet for your steel projects or you’ve opted for the aggressive bite of silicon carbide on a stubborn casting, remember that your choice dictates the quality of your final finish. Don’t go skimping on the quality of your grit, and for heaven’s sake, don’t skip the intermediate steps. If you jump straight from a coarse grind to a fine polish, you’re just going to spend twice as much time trying to hide the scratches you should have leveled out an hour ago. Respect the process, and the material will respect you back.
I’ve seen too many young folks walk into a shop looking for a quick fix, only to end up with a piece of scrap because they tried to outrun the clock. Metalwork isn’t a race, and it certainly isn’t about how fast you can get to the finish line. It’s about the quiet satisfaction of running your hand over a surface that’s smooth, even, and built to endure. Take that extra moment to check your progress, swap out a clogged sheet, and listen to what the metal is telling you. When you stop treating your supplies like disposable junk and start treating them like essential tools, you stop just making things and start practicing true craftsmanship.
Frequently Asked Questions
How can I tell if I'm using too much pressure and actually heating up the metal instead of just smoothing it?
If you feel the metal getting hot to the touch, you’ve already gone too far. Sanding should be a controlled, steady process, not a friction burn. If the surface feels warm, you’re pushing too hard and likely loading up your grit with heat-damaged metal particles. Stop, let it cool, and lighten your hand. You want the abrasive to do the work, not your brute strength. Don’t fight the material; just guide it.
Is it worth it to invest in high-end abrasive discs for a machine, or can I get away with cheaper rolls for hand-sanding?
Listen, if you’re running a machine, spend the extra coin on high-end discs. A machine has no mercy; it’ll chew through cheap, low-quality abrasives in minutes, and you’ll spend more time swapping them out than actually working. For hand-sanding, though, you can get away with the cheaper rolls. You’ve got more control with your own hands to feel when the grit is spent. Use the good stuff where the power is.
When I'm working on old, rusted cast iron, should I start with a coarse grit or go straight to something finer to avoid gouging the surface?
You never go straight to the fine stuff. If you try to skip the heavy lifting, you’ll just end up polishing the rust into the pores of the iron instead of removing it. Start with a coarse grit—something around 60 or 80—to strip that scale and corrosion away. Work steady and let the grit do the work. Once the metal is clean and even, then you can move up the ladder to smooth it out.
