I remember standing over a forge in my first year of apprenticeship, watching a senior smith pull a piece of high-carbon steel from the coals. The smell of scorched oil and the rhythmic hiss of the quench tank are sounds you never quite forget. I was young, impatient, and thought I could skip the slow soak and go straight to the quench. I ended up with a piece of steel so brittle it shattered like cheap glass the moment I took a file to it. That was my first hard lesson: heat treating metal isn’t some magic trick you can perform with a stopwatch and a prayer; it’s a conversation between you and the molecular structure of the material.
I’m not here to sell you a fancy, computerized furnace or a three-hundred-dollar textbook full of academic jargon that won’t help you when you’re actually standing at the anvil. My goal is to give you the straight truth based on forty years of making things that actually work. I’m going to show you how to read the colors, respect the cooling rates, and avoid the common mistakes that turn good steel into scrap. If you’re willing to put in the patience, I’ll make sure you get it right the first time.
Table of Contents
The Truth Behind Martensite Formation in Steel

Now, don’t let the fancy terminology scare you off, but you need to understand what’s actually happening inside that piece of steel when you plunge it into the oil. When we talk about martensite formation in steel, we aren’t just talking about a change in color or temperature; we are talking about a fundamental shift in the very bones of the metal. As you pull that red-hot blade from the forge and hit it with the quenchant, you’re essentially trapping carbon atoms in a state of panic. They don’t have enough time to migrate back into a stable structure, so they get locked into a strained, needle-like arrangement called martensite.
This is where most beginners trip up and ruin a perfectly good project. That martensite structure is what gives your tool its edge, but it’s also incredibly brittle. If you stop right there, your steel will shatter like glass the moment it hits a hard surface. You have to respect the quenching and tempering process to find that sweet spot between a blade that’s too soft to hold an edge and one that’s too brittle to survive a day’s work. It’s a delicate balancing act of science and intuition.
Understanding Hardness vs Ductility in Metals
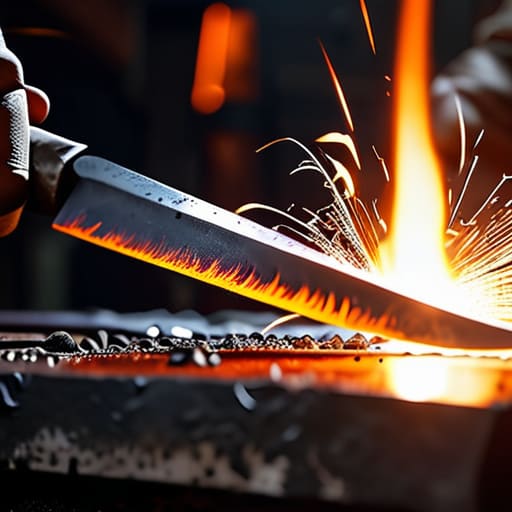
Now, you can’t talk about making a tool useful without talking about the tug-of-war between hardness and ductility. It’s a delicate balance. If you make a blade too hard, it’ll hold an edge like a dream, but the first time you hit a knot in a piece of oak, that edge will snap like a dry twig. On the flip side, if you leave it too soft, it’ll bend like a spoon and won’t hold any utility at all. You’re looking for that sweet spot where the metal is tough enough to resist wear but pliable enough to absorb an impact without shattering.
Getting there isn’t magic; it’s about managing the quenching and tempering process with a steady hand. When you quench, you’re essentially locking the atoms into a rigid, stressed state to gain that hardness. But that state is brittle. To fix it, you have to bring the heat back up—just a little—to allow some of that internal tension to relax. This is where you truly master hardness vs ductility in metals. You aren’t just changing the temperature; you’re guiding the metal to find its strength.
Five Rules to Keep Your Steel from Failing You
- Watch your temperature like a hawk. Don’t just eyeball the color and hope for the best; a shade too dark and you’ve burned the carbon right out of the steel, leaving you with nothing but scrap.
- Slow down the cooling process. If you’re quenching in oil, don’t just dunk it and walk away. You need to move it to ensure even cooling, otherwise, you’ll end up with internal stresses that’ll crack the piece the moment you look away.
- Never skip the tempering stage. I’ve seen too many young fellas get excited about a hard edge and forget that a brittle tool is a dangerous tool. You’ve got to bring that hardness back down to a usable level if you want it to actually work.
- Clean your metal before it hits the heat. Any grease, oil, or even the sweat from your palms can cause uneven heating or carbon spotting. If the surface isn’t clean, the heat won’t travel true.
- Respect your quenching medium. Use the right oil for the specific grade of steel you’re working with. Using a generic bucket of old motor oil is a shortcut that’ll lead to nothing but cracked blades and wasted time.
The Bottom Line Before You Strike
Respect the thermal cycle; you can’t cheat the physics of how steel changes structure, so don’t try to rush a quench just to get finished early.
Aim for the middle ground between a brittle glass-like tool and a soft piece of scrap; finding that sweet spot of toughness is what separates a craftsman from a hobbyist.
Treat your heat treatment like a blueprint, not a suggestion—if you don’t control your temperatures, the metal will make the decisions for you, and usually, they aren’t good ones.
## The Cost of a Shortcut
“You can’t bully steel into behaving; you have to listen to what the heat is telling you. If you try to force a quench before the metal is ready, you aren’t just saving time—you’re inviting a crack that’ll ruin a perfectly good piece of stock before the day is done.”
Alistair Fenwick
The Final Word on the Forge
At the end of the day, heat treating isn’t some magic trick you can skip or fake. We’ve talked about how martensite dictates the strength of your tool, and why you can’t just chase hardness without paying the price in brittleness. If you don’t find that sweet spot between hardness and ductility, you aren’t making a tool; you’re making a piece of glass that’ll shatter the first time it hits a hard knot in a piece of oak. You have to respect the chemistry of the steel and, more importantly, you have to respect your own patience. If the temperature isn’t right or your quench is too aggressive, you’ve just wasted good material and a whole lot of your own time.
My advice to you is simple: don’t be in such a hurry to see the finished product that you neglect the foundation. There is a certain kind of satisfaction that comes from stepping back and knowing that the steel beneath your hands was treated with the discipline it deserves. We aren’t just making things look pretty for a showroom; we are building things that are meant to be used, abused, and passed down. Do it right the first time, and you’ll find that a well-tempered piece of metal is one of the most honest things you’ll ever own. Now, get back to the anvil.
Frequently Asked Questions
How do I know if I've actually hit the right temperature without a fancy digital furnace?
You don’t need a digital readout to tell you when the steel is ready; you just need to pay attention. Most of us rely on the color. Keep a clean piece of scrap metal nearby to compare against. Watch for that cherry red or a deep straw hue. If you’re working a forge, look for the way the light plays off the surface. It’s about developing an eye for it. Trust your eyes, not a sensor.
Is it worth the extra time to temper a tool, or can I get away with just quenching it?
If you think you can skip the temper, you’re just building a tool that’s destined to fail. Sure, quenching it makes it hard, but it also makes it brittle as glass. You hit a knot in the wood or a hard spot in the metal, and that tool will snap right in your hand. Tempering isn’t “extra” time; it’s the most important part. It gives the steel the toughness it needs to actually work.
What's the best way to tell if I've accidentally ruined a piece of steel by overheating it?
You’ll know it the moment you see the color change from a bright cherry red to a dull, scaly grey. If you see heavy oxidation or “scale” flaking off like dead skin, you’ve likely burned the carbon right out of the steel. Once that carbon’s gone, you’re just working with soft iron, and no amount of quenching will bring that edge back. If it looks burnt and feels gummy, it’s likely toast.
