I remember standing over a workbench back in ’84, the sharp, biting scent of ferric chloride stinging my nose while a young apprentice tried to tell me he could speed up the process by just doubling the acid concentration. He thought he was being efficient, but all he did was create a pitted, uneven mess that ruined a perfectly good sheet of copper. That’s the problem with the way folks approach metal surface etching these days; they treat it like a race to the finish line instead of a conversation with the material. You can’t bully metal into doing what you want by rushing the chemistry, and if you try to skip the meticulous cleaning phase, you’re just asking for a failure that’ll haunt you once the piece dries.
I’m not here to sell you on some fancy, high-tech kit that costs more than a decent welder. What I want to do is show you how to get it right using the fundamentals that actually work. I’ll walk you through the real-world grit of metal surface etching, from the proper prep work to the exact moment you need to pull that piece out of the bath. We’re going to focus on doing it once and doing it right, so you can stop wasting good metal and start making marks that actually hold their ground.
Table of Contents
Choosing Ferric Chloride for Metal Etching Done Right
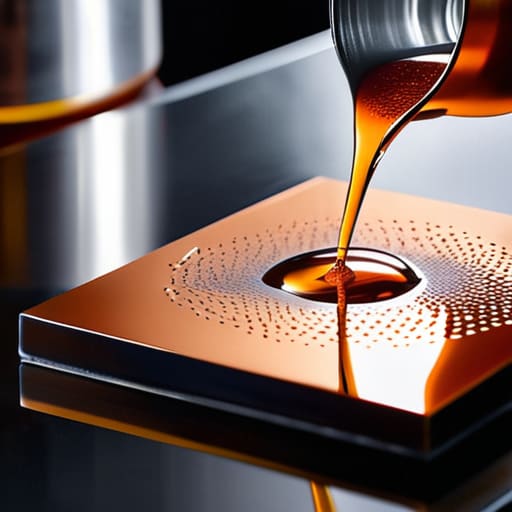
Now, when you go to pick up your supplies, don’t just grab the first bottle of liquid you see on the shelf because it’s cheap. Most folks think all acids are created equal, but if you’re looking for real results in your chemical etching process, you need to pay attention to the concentration. I’ve seen too many beginners try to save a few bucks on low-grade solutions, only to find the reaction is so sluggish it leaves the edges looking fuzzy and unprofessional. I prefer a high-quality ferric chloride for metal etching because it’s predictable. When you know exactly how the solution is going to bite into the copper or brass, you aren’t constantly guessing or staring at the clock.
You also need to consider how you’re going to manage the waste. In a proper shop, we treat these chemicals with respect, not like they’re just drain cleaner. If you’re moving toward more precision metal decoration techniques, you’ll find that the purity of your solution dictates how clean those lines stay. A contaminated batch will eat away at your design in ways you can’t control, and once you’ve ruined a good piece of stock, there’s no undoing it.
The Slow Chemical Etching Process Beats Rushing the Acid
I’ve seen plenty of young fellas walk into a shop, dump a piece of brass into a bath of ferric chloride, and wonder why the lines look like they were chewed by a dog. They think the faster the acid eats, the better the result. That’s a mistake. When you rush the chemical etching process, you aren’t getting clean lines; you’re getting undercut edges and a messy, blurred design that looks amateur at best. If you want that sharp, crisp look required for real precision metal decoration techniques, you have to let the chemistry do its work at its own pace.
The secret is to keep the bath at a steady, moderate temperature and move the piece occasionally to prevent sediment from settling in the grooves. It’s tempting to keep adding more acid to speed things up, but that’s just a shortcut to a ruined workpiece. I always tell my apprentices that patience is your most important tool in the shop. If you take the time to monitor the reaction, you’ll get a depth and clarity that no rushed job can ever match. It’s about doing it right the first time, not just getting it done.
Five Rules to Keep Your Etching from Turning into a Mess
- Clean the surface until your fingers ache. If there’s even a trace of oil from your skin or a bit of shop grease left on that plate, the acid won’t bite evenly. You’ll end up with blotches and uneven lines that no amount of sanding will fix later.
- Mask your edges with more than just a prayer. Don’t rely on cheap tape that curls up when it gets damp. Use a proper resist—whether it’s a heavy-duty lacquer or a dedicated etching wax—and make sure it’s applied thick enough to actually stand a chance against the bath.
- Watch the temperature, not just the clock. If your workshop is freezing, that chemical reaction is going to crawl like molasses; if it’s too hot, you’ll lose control and eat into the metal where you didn’t intend to. Keep your workspace steady.
- Neutralize the acid immediately once you’re done. The second you pull that piece out of the tray, you need to get it into a neutralizing bath. If you leave even a tiny bit of residue in the pores of the metal, it’ll keep eating away long after you think you’re finished.
- Don’t be afraid to stop and inspect. I’ve seen too many young folks leave a piece in the acid because they’re in a hurry to get to the next job. Pull it out every few minutes, rinse it, and look at it. You can always add more time, but you can’t take metal back once it’s gone.
The Bottom Line on Etching
Don’t skimp on the prep work; if you don’t get that metal surgically clean before it touches the acid, you’re just wasting good ferric chloride on a messy, uneven finish.
Watch the clock, not just the clocking; patience is your best tool here, so let the chemical do the heavy lifting instead of trying to force a result by rushing the dip.
Respect the chemistry and your safety gear, because once you start etching, you’re working with materials that don’t care about your schedule—they only care about precision.
## Respect the Reaction
“You can’t bully the acid into working faster; if you try to force a deep etch by cranking up the heat or rushing the dip, you’ll just end up with a jagged, uneven mess that no amount of sanding will ever truly fix.”
Alistair Fenwick
The Final Polish
At the end of the day, successful etching comes down to the fundamentals we’ve talked about: picking a reliable mordant like ferric chloride and, more importantly, having the discipline to let the chemistry do its job. You can’t bully the metal into cooperating. If you try to force a deep etch by cranking up the heat or rushing the immersion, you’re going to end up with uneven lines and a ruined workpiece. It’s about the prep work and the patience you put in before the acid even touches the surface. Take the time to clean your metal until it shines, mask your lines with a steady hand, and remember that shortcuts are just expensive ways to make mistakes.
I’ve seen plenty of folks walk into a workshop thinking they can skip the slow way and still get professional results, but the metal always tells the truth in the end. There’s a quiet satisfaction in watching a pattern emerge slowly and steadily under the surface, knowing you didn’t cheat the process. My advice? Don’t be in such a hurry to get to the finished product that you forget to respect the material. Build it right the first time, and you’ll have something that stands the test of time rather than something you’ll have to toss in the scrap bin next week. Now, get back to the bench and get to work.
Frequently Asked Questions
How do I stop the acid from bleeding under my stencil and ruining the clean lines?
That bleeding is a headache, but it’s usually down to poor prep or a weak bond. If your stencil isn’t sitting flush against the metal, that acid’s going to find a way in. I always make sure the surface is scrubbed clean and degreased—any oil or fingerprint will ruin your seal. I also recommend applying a bit of pressure with a heavy roller to seat the stencil. If you rush the application, you’re just asking for messy lines.
What’s the best way to neutralize the metal once the etching is finished so it doesn't keep eating away at the surface?
You can’t just rinse that acid off with water and call it a day. If you leave even a trace of ferric chloride in the pores of the metal, it’ll keep eating away at your work long after you’ve put it down. I always keep a tray of baking soda mixed with plenty of water on hand. Submerge the piece and watch for the fizzing to stop completely. Once it stops reacting, you’re finally safe.
Can I use these same etching methods on aluminum, or am I going to need a completely different setup?
Hold your horses there. If you try to use ferric chloride on aluminum, you’re going to have a mess on your hands and a wasted batch of acid. Aluminum reacts differently; it’s much more reactive and finicky. You’ll need a different mordant—something like a copper sulfate solution—to get a clean bite. It’s a different beast entirely, so don’t go swapping them out without adjusting your prep and safety gear first.
