I remember sitting in my old shop back in the nineties, the air thick with the sharp, biting scent of ferric chloride and the low hum of a ventilation fan. I was working on a custom brass plate for a client, trying to get a fine line to hold, when I realized I’d been rushing the acid bath because I wanted to get to lunch. I ended up ruining a perfectly good piece of brass because I didn’t respect the chemistry of the metal etching process. That lesson—that you can’t bully the material into doing what you want—is something most people learn the hard way, often after throwing a lot of money at expensive, over-engineered kits that don’t actually teach you the soul of the craft.
I’m not here to sell you a fancy hobbyist setup or some complicated chemical concoction that requires a degree in engineering to use safely. What I want to do is show you how to handle metal etching with the patience and precision it demands. I’ll walk you through the real-world methods I’ve used for forty years, focusing on how to control the bite of the acid and how to prep your surfaces so the results actually last a lifetime.
Table of Contents
The Foundation Why Proper Metal Surface Preparation Matters
You can have the best stencil in the world and the highest quality acid, but if you start your work on a dirty piece of brass or steel, you’ve already lost the battle. I’ve seen many beginners jump straight into the bath, only to find their lines are blurry or the etch is uneven. That’s because any trace of oil from your fingerprints, oxidation, or even a bit of dust acts as a barrier. True metal surface preparation isn’t just a suggestion; it’s the difference between a crisp, professional finish and a messy waste of time.
I always tell my apprentices to treat the cleaning stage like they treat the actual carving. You need to scrub that metal until it’s clinical. If you’re using ferric chloride for metal etching, that solution is hungry to react with the surface, but it can’t bite through a layer of grease. Take the time to degrease, sand, and rinse thoroughly. It might feel like you’re just spinning your wheels, but if you don’t get the foundation right, you’ll be spending twice as much effort trying to fix a mistake that could have been avoided with a bit of elbow grease.
Choosing Your Bite Ferric Chloride for Metal Etching
Now, once you’ve got that surface cleaned up and ready, you need to decide what’s actually going to do the work. In my shop, I’ve found that ferric chloride for metal etching is the old reliable. It isn’t flashy, and it won’t give you that instant gratification some of the newer, boutique chemicals promise, but it’s consistent. If you’re working with copper or brass, this stuff bites deep and clean. You aren’t looking for a superficial scratch; you want a controlled chemical etching process that respects the integrity of the base metal.
But don’t go thinking this is something you can just wing. Ferric chloride is hungry, and it doesn’t care if it’s eating your workpiece or your workbench. You need to be disciplined about your safety equipment for acid etching—gloves, goggles, and a well-ventilated space aren’t optional suggestions; they’re the bare minimum. I’ve seen too many young fellas treat this like a science fair project, only to realize too late that you can’t undo a mistake once the acid has gone too deep. Respect the chemistry, and it’ll reward you with a finish that lasts.
Five Rules to Keep Your Etch from Going Sideways
- Watch your temperature like a hawk. If your ferric chloride gets too cold, the reaction slows to a crawl and you’ll get frustrated; if it gets too hot, the acid starts eating unpredictably and ruins your fine lines. Keep it steady.
- Don’t skimp on the resist. Whether you’re using a professional coating or a homemade wax, if there’s even a microscopic pinhole or a smudge of grease, that acid is going to find its way in and bite where it shouldn’t.
- Agitation is your best friend. Don’t just toss the metal in the bath and walk away to grab a coffee. Give the solution a gentle stir or move the piece around periodically to clear out the spent acid settling in the grooves; otherwise, you’ll get uneven depth.
- Neutralize the second you’re done. As soon as you see the etch has reached the depth you’re looking for, get that piece into a neutralizing bath immediately. If you leave it sitting, the acid keeps working in the pores of the metal, and you’ll end up with a messy, pitted finish.
- Respect the fumes. I’ve seen too many young fellas treat etching like a casual hobby without realizing they’re working with caustic chemicals. Do this in a space with real airflow, or better yet, under a hood. It’s not worth your lungs just to save a few minutes of setup.
The Bottom Line: Don't Waste Your Metal
If your surface isn’t clean, your etch won’t be either; spend the extra time on the degreasing and sanding now, or you’ll just be staring at a ruined piece later.
Patience is your best tool when working with ferric chloride—let the acid do the heavy lifting instead of trying to force a deep bite by rushing the soak.
Always respect the chemistry of what you’re using, because once you’ve over-etched a detail, there’s no way to put that metal back where it belongs.
## Respect the Bite
You can have the finest design in the world, but if you haven’t scrubbed that surface clean and respected the chemistry of the etch, you’re just making a mess. Metal doesn’t forgive a lazy prep job; it’ll show every fingerprint and every bit of grease in the final result.
Alistair Fenwick
Putting the Work to the Metal
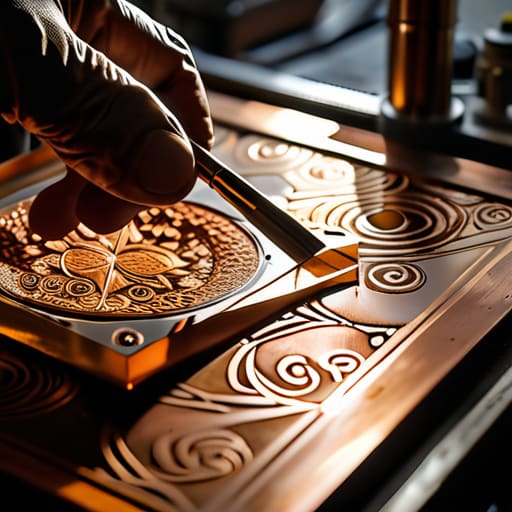
At the end of the day, successful etching isn’t about some magic chemical or a fancy new gadget; it comes down to the basics we’ve talked about. You’ve got to respect the surface preparation, or you’re just etching dirt instead of metal, and you’ve got to understand how your ferric chloride is going to react with the specific alloy in your hands. If you skip the cleaning or try to force a deep bite in half the time, you’re going to end up with blurry lines and uneven depths that no amount of sanding will fix. Take the time to monitor your bath, keep your edges protected, and don’t rush the chemistry. If you follow the process properly, the metal will do exactly what you tell it to do.
I know it can feel a bit tedious when you’re standing there waiting for the acid to do its work, but that’s where the real skill is built. We live in a world that wants everything done at the push of a button, but there’s a deep, quiet satisfaction in seeing a design bite into a piece of steel because you did the prep work right. When you finish a piece and run your thumb over a clean, etched edge, you aren’t just looking at a decoration; you’re looking at something you mastered. Build it right the first time, and you’ll have something that carries your mark long after the cheap, factory-made junk has rusted away.
Frequently Asked Questions
How do I stop the acid from eating too deep and ruining the fine details of my design?
You’ve got to watch the clock, not just the metal. If you let that acid sit too long, it’ll undercut your lines and turn a sharp design into a blurry mess. I always recommend doing test strips first to see how fast your specific batch bites. Once you’re working the real piece, pull it out, rinse it thoroughly, and check your progress. It’s better to etch in short, controlled stages than to hope for the best.
What’s the best way to clean the metal after the etch so I don't end up with leftover residue eating at the surface?
Once that etch is done, you can’t just rinse it off and call it a day. If you leave even a trace of that ferric chloride behind, it’ll keep eating at your work long after you’ve put the tools away. I always use a heavy soak in a bath of water and baking soda to neutralize the acid completely. Scrub it well with a stiff brush to get into the grooves, then dry it immediately.
Is there a way to etch different types of metals, like brass or copper, without having to buy a whole new set of chemicals?
You don’t need a whole new chemistry set for that. The beauty of ferric chloride is its versatility; it’ll bite into copper and brass just as well as it does steel. The trick isn’t in changing the liquid, but in how you manage the reaction. Brass can be a bit more temperamental, so just keep a close eye on the color of the solution and don’t let the heat build up too fast.
