I remember standing over a piece of seasoned carbon steel back in ’84, squinting through a haze of grinding dust and a single, flickering bulb that did nothing but cast long, deceptive shadows. I thought I was making a clean bevel, but when I went to the welder, the seam was a jagged mess because I couldn’t actually see the metal I was working on. People will try to sell you on these fancy, overpriced smart-lighting systems that promise the moon, but let me tell you, most of that high-tech nonsense is just a distraction. When it comes to metalwork workshop lighting, you don’t need a computer to tell you how to see; you just need enough honest, steady light to catch the grain and the heat without blinding yourself.
I’m not here to waste your time with flashy gadgets or marketing fluff that belongs in a showroom rather than a shop. My goal is to show you how to set up your space so that you can actually trust your eyes when you’re making a cut or checking a weld. I’ll be sharing exactly what works for me in my own studio—the kind of practical, no-nonsense setups that prioritize clarity over cost, ensuring you spend your time crafting instead of squinting.
Table of Contents
High Lumen Workshop Lights Seeing the Grain Before You Strike

When you’re standing over an anvil or a welding bench, you aren’t just looking at a piece of metal; you’re looking for the subtle tells—the slight discoloration of overheated steel or a hairline fracture that hasn’t quite opened up yet. This is where most folks trip up. They settle for dim, amber-tinted shop lights that make everything look like a murky soup. If you want to see the grain before you strike, you need to invest in high lumen workshop lights that actually cut through the gloom. I’ve found that if you don’t have enough raw brightness, your eyes will fatigue halfway through a job, and that’s exactly when you make a mistake you can’t take back.
I’ve spent plenty of time debating LED vs fluorescent workshop lighting, and for my money, the choice is clear. Fluorescents flicker and hum, which is a nuisance, but more importantly, they don’t provide the steady, crisp output you need for precision work. You want a light source that stays consistent. I always tell my apprentices: if you can’t see the true color of your heat tint, you’re just guessing. Don’t guess with your material.
Mastering Shadow Reduction in Metalworking for Precision Work

You can have the brightest bulbs in the county, but if they’re all hanging from a single point in the center of the ceiling, you’re going to have a problem. When you’re leaning over an anvil or a welding bench, your own body becomes a wall, casting a dark patch right where you need to be looking. This is where most fellas trip up; they focus on brightness but ignore overhead shop light placement. To get real precision, you need to stop thinking about one big light and start thinking about multiple light sources coming from different angles. By staggering your fixtures, you fill in those dark pockets, ensuring that when you’re checking a weld or a fine grind, you aren’t working in a hole of your own making.
Effective shadow reduction in metalworking isn’t just about seeing more; it’s about seeing clearly. If you’ve got a shadow obscuring a hairline crack in a piece of steel, you’re going to miss it, and that’s how accidents happen or how a repair fails down the line. I always tell my apprentices to check their work from three different positions. If the light stays consistent as you move, you’ve done it right. Don’t settle for a shop that leaves you squinting.
Five Ways to Stop Working in the Dark
- Get rid of those single, swinging bulbs. If you only have one light source hanging from the ceiling, you’re just creating a massive shadow right where your hands and your workpiece meet. You need multiple points of light coming from different angles to wash out those dark spots.
- Invest in high-CRI (Color Rendering Index) bulbs. It sounds like fancy shop talk, but it’s practical. If you can’t tell the difference between a heat tint on steel and a bit of surface oxidation because your light is yellow and muddy, you’re going to make a mistake you can’t un-make.
- Keep a dedicated, high-intensity LED task light on your bench at all times. Sometimes the overheads aren’t enough when you’re doing fine detail work or checking a weld. Having a light you can move around and aim exactly where the metal is tells you the truth about your finish.
- Watch out for the glare. I’ve seen too many young lads set up bright lights that bounce right off a polished surface and blind them. Position your lights so they hit the metal at an angle, rather than reflecting straight back into your eyes, or you’ll be squinting instead of working.
- Clean your fixtures as often as you clean your tools. Dust, oil mist, and metal filings settle on every light cover in a shop. A layer of grime on a bulb might not seem like much, but it kills your visibility and makes everything look duller than it actually is.
The Bottom Line on Shop Lighting
Don’t settle for dim, yellow bulbs that hide the flaws in your steel; invest in high-lumen, daylight-balanced lighting so you can actually see the grain and the heat before you commit to a cut or a strike.
Position your lights to kill the shadows, not create them, because working in a dark patch is the fastest way to misjudge a measurement or nick a finished edge.
Treat your lighting as a tool, just like a hammer or a grinder, because if you can’t see exactly what your hands are doing, you aren’t crafting—you’re just guessing.
## The Cost of a Shadow
“You can buy the most expensive piece of tool steel in the county, but if you’re working in a shop filled with dark corners and dancing shadows, you aren’t craftsman—you’re just a man guessing where his hammer is going to land.”
Alistair Fenwick
Don't Leave Your Craft in the Dark
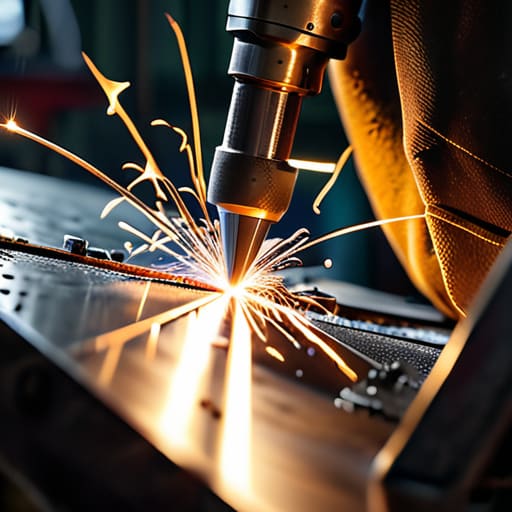
At the end of the day, setting up your lighting isn’t about making the shop look pretty for a magazine spread; it’s about the practical reality of the work sitting right in front of you. We’ve talked about why you need high-lumen output to actually see the grain of the steel, and why you’ve got to fight those damn shadows that hide a hairline crack or a bad weld. If you skimp on the lumens or ignore the placement of your fixtures, you’re essentially working blind, and that’s a recipe for ruined material and unnecessary frustration. Take the time to position your lights so they complement your movements, not fight them, and you’ll find that precision becomes second nature rather than a constant struggle against the gloom.
I’ve spent enough years hunched over an anvil and a workbench to know that a man’s tools are only as good as his ability to use them properly. Good lighting is just as much a tool as a well-balanced hammer or a sharp chisel, yet it’s the one thing most folks overlook until they’ve already made a costly mistake. Don’t let a dim shop be the reason you lose your edge. Invest in your visibility, respect the metal, and treat your workspace with the same discipline you bring to the fabrication itself. When you can see exactly what you’re doing, you aren’t just making things; you’re building something that lasts.
Frequently Asked Questions
How do I stop those bright LED shop lights from reflecting off my polished steel and blinding me while I'm trying to weld?
That glare is more than just a nuisance; it’s a safety hazard that’ll have you squinting and missing your mark. If you’re working with polished steel, stop pointing those high-output LEDs straight down at your bench. You need to diffuse the light. Mount your fixtures at an angle or use frosted lenses to scatter the beam. Better yet, use indirect lighting—aim the light at a neutral wall or ceiling so the glow fills the room without hitting that mirror-finish steel directly.
Is it worth the extra money to get high-end fixtures, or can I just rig up some decent shop lights and get the job done?
Look, if you’re just hanging a string of cheap shop lights to see where you’re walking, that’s one thing. But if you’re doing precision welding or fine grinding, don’t skimp. Cheap fixtures flicker and cast a muddy light that’ll trick your eyes into thinking a seam is straight when it’s actually crooked. You’ll spend more time correcting mistakes than you would have spent buying the better gear. Buy once, buy right.
What’s the best way to position my task lighting so I’m not constantly working in my own shadow when I'm leaning over the bench?
The trick isn’t just more light; it’s where you place it. If you’ve got a single overhead bulb, you’re always going to be standing in your own darkness the moment you lean in. You need to mount your task lights at an angle, coming from the sides rather than directly above. Aim for dual-source lighting—one from the left and one from the right. This cross-lighting fills in those shadows you’d otherwise cast.
