I remember standing over a sheet of brushed steel back in ’84, trying to apply a simple pattern, only to watch the paint bleed under the edges like a leaking faucet. I’d spent three hours prepping the surface, but because I’d rushed the masking, the whole thing looked like a child’s finger painting instead of professional fabrication. Most folks today think you can just slap a piece of plastic over some metal and call it a day, but they quickly learn that proper metal stencil work is more about the preparation than the actual painting. If you don’t respect the surface tension and the way the material breathes, you aren’t crafting; you’re just making a mess that’ll peel off in a month.
I’m not here to sell you on some fancy, overpriced spray kit or a “magic” solution from a big-box store. What I’m going to give you is the straight truth on how to prep your substrate, how to manage your pressure, and how to ensure those lines stay sharp enough to cut. We’re going to do this the right way—the way that ensures the work actually lasts.
Table of Contents
- Metal Surface Preparation for Stenciling No Shortcuts Allowed
- Achieving Superior Stencil Paint Adhesion on Steel
- Five Rules to Keep Your Stencils from Looking Like a Mess
- The Bottom Line on Stenciling Steel
- The Truth About the Finish
- Final Thoughts Before You Pick Up the Spray
- Frequently Asked Questions
Metal Surface Preparation for Stenciling No Shortcuts Allowed
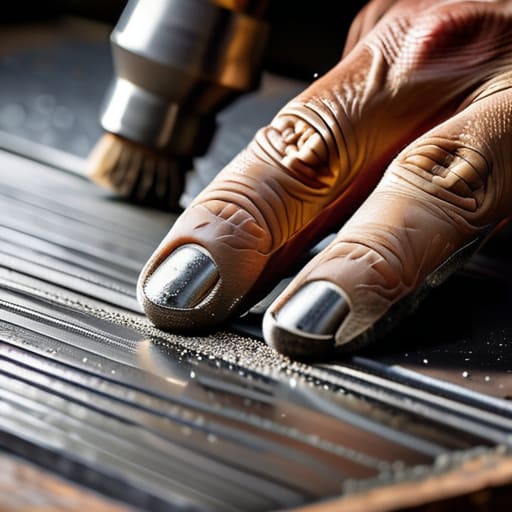
Before you even think about picking up a stencil, you need to look at the surface you’re working on. I’ve seen too many young fellas try to slap a pattern onto a piece of steel that’s still covered in mill scale, oil, or even just a bit of fine shop dust. If you don’t get that surface clean, you’re essentially painting on top of nothing. For proper metal surface preparation for stenciling, you’ve got to get down to the bare, honest metal. I usually grab a degreaser or a bit of solvent to strip away any lingering oils. If the surface is pitted or rusted, you’ll need to hit it with some medium-grit sandpaper—I keep a small piece in my pocket for a reason—until it’s smooth and ready to accept the coat.
The real secret to longevity isn’t the paint itself; it’s the stencil paint adhesion on steel. If you skip the cleaning stage, that paint is going to peel off the first time it sees a bit of moisture or temperature change. You want that finish to bite into the metal, not just sit on top of the grime. Take the extra ten minutes to wipe it down one last time with a clean rag. It might feel like overkill, but precision starts with the prep, not the application.
Achieving Superior Stencil Paint Adhesion on Steel
Once you’ve got your surface clean and degreased, you can’t just start slapping paint on and hope for the best. If you want real stencil paint adhesion on steel, you have to respect the chemistry of the material. I’ve seen too many folks skip the primer step because they’re in a hurry to get to the finish, only to watch their hard work flake off like dry skin a month later. If you’re working on something that’s going to see any real use—say, a tool chest or a piece of outdoor machinery—you need a high-quality, metal-specific primer that bites into the surface.
When it comes to the actual application, less is always more. I always tell my apprentices to use a dry brush or a fine-mist sprayer. If you load up the brush too heavy, the paint will bleed right under the edges of your stencil, turning your precision metal layout methods into a messy, blurred disaster. You want a thin, even coat that builds up in layers. It takes longer, sure, but that’s how you achieve durable metal stencil patterns that actually stand the test of time.
Five Rules to Keep Your Stencils from Looking Like a Mess
- Watch your spray distance. If you hold that can too close to the metal, you’ll get pooling and drips that run right under the edges of your stencil, turning a clean design into a blurry smudge. Keep a steady, even distance—about six to eight inches—and use light, misting passes rather than one heavy coat.
- Don’t ignore the edges. Even with the best prep, air can sneak under the stencil. I like to use a bit of painter’s tape or a tacking method to ensure those edges are seated tight against the surface. If the stencil is lifting, your lines will be crooked, and no amount of sanding will fix a bad stencil layout.
- Check your temperature before you start. If you’re working in a cold garage or on a piece of metal that’s chilled from the morning dew, the paint isn’t going to bite the way it should. Make sure the material is at a stable, room-temperature state so the finish cures properly and doesn’t peel off in a week.
- Less is more with the first coat. I’ve seen too many youngsters try to lay down a thick, heavy layer of paint right out of the gate. That’s a recipe for disaster. You want to build up your color in thin, controlled layers. It takes a bit more patience, but it’s the only way to get a professional finish that actually stays put.
- Clean your tools immediately. If you’re using stencils that are reusable, don’t let that paint dry hard on them. Once it cures, you’ll be fighting it just to get the stencil clean again, and you’ll likely tear the material in the process. Wipe them down while the paint is still tacky so they’re ready for the next job.
The Bottom Line on Stenciling Steel
Treat your surface prep like the foundation of a building; if you leave even a thin film of oil or grit behind, your stencil work will peel off before the paint is even dry.
Patience beats speed every single time, so don’t go slapping on heavy layers of paint—build up your color in thin, controlled coats to keep the edges sharp and the metal clean.
Invest in quality materials and take the time to mask your edges properly, because it’s a lot easier to do the job right once than it is to spend an hour grinding off mistakes.
The Truth About the Finish
A stencil isn’t just about the pattern you’re laying down; it’s about the patience you show the surface underneath. If you try to force the paint over a surface that hasn’t been properly prepped, you aren’t crafting anything—you’re just masking a mistake that’ll peel off the moment it sees a bit of real work.
Alistair Fenwick
Final Thoughts Before You Pick Up the Spray
At the end of the day, successful stencil work on metal comes down to the ground you lay before you ever touch a can of paint. If you’ve done the work right—meaning you didn’t skip the degreasing, you cleaned the surface until it was truly pristine, and you applied your layers with a steady hand—the result will speak for itself. Remember, it’s not about how fast you can get from the stencil to the finished product; it’s about respecting the material and ensuring that the bond between the pigment and the steel is permanent. If you try to rush the drying times or ignore a bit of surface oxidation, you’re just setting yourself up to peel it all off and start over next week. Don’t let laziness dictate your craftsmanship.
I know there’s a lot of pressure these days to just buy something pre-finished and call it a day, but there is a particular kind of pride that comes from looking at a piece of metal you’ve personally marked and protected. When you take the time to do it properly, you aren’t just decorating a surface; you are building something that lasts. Whether it’s a tool chest in your shop or a decorative gate, make sure it’s done with the kind of precision that would make an old fabricator nod in approval. Now, get back to the bench, keep your workspace clean, and make it worth the effort.
Frequently Asked Questions
How do I stop the paint from bleeding under the edges of the stencil if the metal isn't perfectly flat?
Look, if you’re working with metal that’s got a bit of a wave or a pit in it, you can’t just lay the stencil down and hope for the best. You’ll end up with a mess. Use a spray adhesive on the back of the stencil—not too much, just enough to grab. Then, take a rubber mallet or a clean block and firmly press it into those low spots. If it’s still acting up, use a thicker, more viscous paint. Thin paint is your enemy here; it’ll find every gap you leave open.
What’s the best way to clean off a stencil once I'm done without stripping the finish I just applied?
Now, don’t go reaching for the heavy solvents just yet. If you go too aggressive with a chemical stripper, you’ll likely lift the very finish you just spent an hour perfecting. Once the paint is set, I find it best to use a bit of warm, soapy water and a soft cloth. Work gently around the edges. If there’s stubborn residue, a very fine abrasive pad can do the trick, but watch your pressure.
If I'm working with rusted or pitted iron, can I still get a clean stencil line, or is that a lost cause?
It’s far from a lost cause, but you’ve got to stop thinking about it as a simple paint job and start thinking about it as a restoration. If you try to slap a stencil over raw rust, you’ll get a jagged, bleeding mess. You need to get in there with a wire brush or some coarse grit to level those pits as much as possible. It won’t be perfectly smooth, but a solid foundation makes all the difference.
