I remember sitting at my workbench back in ’84, staring at a rusted-out set of old machinist calipers that had been tossed in a scrap bin like they were nothing more than junk. Most folks today would look at that pitted surface and tell you to just buy a new set from a big-box store, but they’re wrong. There is a massive difference between scrubbing away the surface grime and actually polishing metal tools to restore their integrity. If you rush the process with a high-speed buffer and some cheap compound, you aren’t fixing the tool; you’re just masking the damage and thinning out the very metal that makes the tool reliable.
I’m not here to teach you how to make a piece of steel look like a shiny trinket for a display case. My goal is to show you how to treat your equipment with the respect it deserves so it stays in your kit for another forty years. In this guide, I’m going to walk you through the proper, slow way to handle abrasives, how to choose the right compounds for different alloys, and why patience is your best tool in the shop. We’re going to do this right, from the first grit to the final buff.
Table of Contents
- Step-by-Step Instructions
- Removing Rust From Hand Tools Without Rushing the Work
- Mastering Abrasive Grit Selection for Metal to Avoid Wasted Material
- Five Rules of Thumb for a Finish That Actually Holds
- The Bottom Line on Keeping Your Tools Right
- ## The Truth About the Shine
- The Final Inspection
- Frequently Asked Questions
Guide Overview
Tools & Supplies
- Microfiber cloths for buffing and applying compounds
- Sandpaper assortment (various grits from 400 to 2000)
- Metal polishing compound (1 small tub)
- Degreaser or rubbing alcohol (1 bottle)
Step-by-Step Instructions
- 1. Before you even think about touching a polishing compound, you need to get the grit and the grease out of the way. I’ve seen too many fellas try to polish over old oil or rust, and all they end up doing is smearing the filth deeper into the pores of the metal. Grab some mineral spirits or a decent degreaser and a stiff nylon brush. Scrub until the surface is bone-dry and clean to the touch. If there’s still pitting from rust, you’ll need to address that with a file or sandpaper first, because polishing won’t fix a hole, it’ll only highlight it.
- 2. Once the tool is clean, you’ve got to start with the coarsest grit you think you’ll need. If you’re working on an old hand plane or a chisel, don’t go jumping straight to the fine stuff. I usually start with a medium-grade abrasive to knock down the heavy oxidation. The trick here is to work in one direction rather than scrubbing in circles like you’re cleaning a kitchen floor. Moving in a consistent, linear motion ensures you aren’t just moving the scratches around, but actually leveling them out.
- 3. Now, this is where most people lose their patience and ruin a good piece of steel. You need to step through your grits—moving from medium to fine—and you have to actually finish the work of the previous step before moving on. If you skip from 220 grit straight to 600, those deep scratches from the 220 are going to stare back at you like a scar. Take your time. If you can still see the old marks under your light, you aren’t ready to move up yet.
- 4. When you’ve got the surface smooth, it’s time to bring out the buffing compound. I prefer a traditional rouge or a fine jeweler’s paste for my smaller hand tools. Apply a small amount to a piece of leather or a felt bob. Don’t go overboard; you don’t need a thick layer of sludge, just enough to create a slurry as you work. Keep your movements steady and your pressure even. If you press too hard in one spot, you’ll create a divot, and that’s a mistake you can’t easily undo.
- 5. As the metal starts to take on a luster, you’ll notice a fine dust building up. This is the “clog” that ruins a good finish. Keep a clean, dry rag handy to wipe the tool down frequently. I like to use a bit of high-quality microfiber or soft cotton to check my progress. If the metal looks cloudy, it usually means you’ve got a buildup of old compound that needs to be wiped away so you can see the true state of the surface.
- 6. The final stage isn’t about making it look like a mirror for a showroom; it’s about sealing that work. Once the tool is polished to your satisfaction, wipe it down thoroughly with a light coat of machine oil or a specialized tool wax. This creates a protective barrier against the humidity in your shop. If you skip this, that beautiful shine will be nothing more than a magnet for new rust by next Tuesday.
Removing Rust From Hand Tools Without Rushing the Work
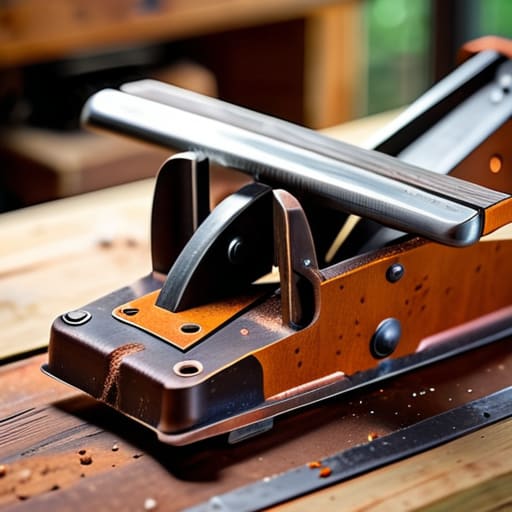
Now, before you even think about reaching for a high-speed grinder, you need to address the rot. Removing rust from hand tools isn’t a race against the clock; it’s a battle of patience. If you go in too heavy with an aggressive abrasive, you’ll strip away the temper or leave deep gouges that no amount of fine sanding will ever fix. I’ve seen plenty of young lads ruin a perfectly good vintage plane by trying to sand through a layer of oxidation in five minutes. Start with a soak in white vinegar or a gentle scrub with fine steel wool. You want to peel back the decay layer by layer, ensuring you’re actually cleaning the substrate rather than just scratching the surface.
Once the orange is gone, you’re left with the raw metal, and that’s when you’re most vulnerable. The moment you finish, the air starts working against you. If you don’t have a plan for preventing oxidation on steel immediately after the cleaning, you’ll find yourself right back where you started by next Tuesday. I always keep a rag soaked in a light machine oil nearby. Wipe it down the second the metal dries. You aren’t just cleaning it; you’re preparing the foundation for the final finish.
Mastering Abrasive Grit Selection for Metal to Avoid Wasted Material
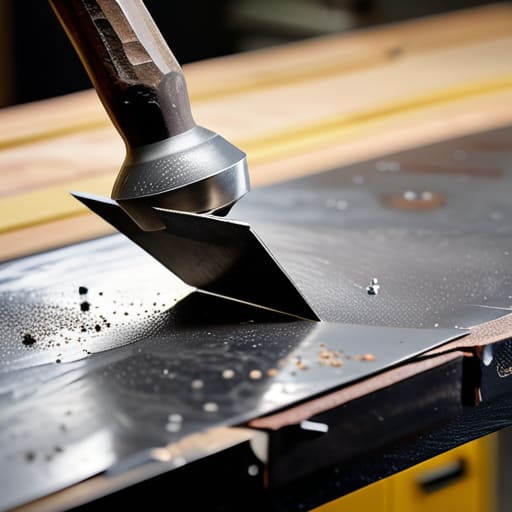
Most folks make the mistake of grabbing the finest grit they can find right out of the gate, thinking they’re being careful. That’s a fool’s errand. If you start with a high-grit paper on a surface that still has deep pits or heavy scale, you’ll spend three days spinning your wheels without ever actually leveling the surface. Proper abrasive grit selection for metal is about working in stages; you use the coarse stuff to do the heavy lifting and reshape the profile, then you move down the line to smooth out those deep scratches.
I’ve seen too many young apprentices ruin a good piece of steel by jumping straight to metal polishing compounds for beginners before they’ve even addressed the underlying texture. It’s like trying to paint a house with a cracked foundation. You have to respect the progression. If you don’t bridge the gap between your coarse grits and your fine finishes, you’ll just end up with a surface that looks shiny under a shop light but reveals every single scratch the moment you hit it with direct sunlight. Take it slow, or you’ll just end up wasting good material.
Five Rules of Thumb for a Finish That Actually Holds
- Stop jumping to the fine grits too early. If you haven’t cleared out the deep scratches with a coarse abrasive, you’re just polishing the mistakes and making them shine. Work through the grits in a logical sequence, or you’ll be fighting those marks for hours.
- Watch your heat. If you’re using a buffing wheel or a power tool, don’t let the metal get so hot you couldn’t hold it in your bare hand. Excessive heat can temper the steel or ruin the finish you’ve worked so hard to build.
- Always polish in the direction of the grain. I don’t care if it’s a brushed finish or a directional etch; if you go cross-grain, you’re creating tiny canyons of light that’ll catch the eye for all the wrong reasons.
- Keep your workspace clean between stages. A single stray grain of 80-grit sand sitting on your polishing cloth while you’re trying to hit a 600-grit finish will act like a piece of gravel, scarring the surface instantly.
- Use a bit of elbow grease, not just speed. A machine is a fine thing, but your hands tell you more about the surface than a spinning wheel ever will. Feel the metal as you work; if it feels uneven under your fingertips, it isn’t finished yet.
The Bottom Line on Keeping Your Tools Right
Don’t treat polishing like a chore to get through; treat it like a way to respect the steel, because if you rush the grit, you’ll end up gouging the metal instead of refining it.
Cheap shortcuts and fast-acting chemicals might save you twenty minutes today, but they’ll cost you the integrity of your tools tomorrow—stick to the slow, manual methods that actually preserve the surface.
A well-polished tool isn’t just about looking good on a pegboard; it’s about removing the microscopic pits where rust likes to hide so your gear stays ready for the next real job.
## The Truth About the Shine
“A mirror finish is just vanity if you haven’t addressed the metal underneath; I’d rather see a tool with a few honest scratches and a solid surface than a shiny piece of junk that’s been polished thin to hide the rot.”
Alistair Fenwick
The Final Inspection
At the end of the day, polishing isn’t just about making a tool look like it belongs in a showroom; it’s about the work you put in to ensure it stays functional for the next generation. We’ve covered a lot—from the patience required to strip away rust without pitting the surface, to the discipline of stepping through your abrasive grits properly. If you’ve rushed the process or skipped a grade of sandpaper, you’ll see it in the finish, and you’ll feel it in the metal. Remember, the goal is to remove the damage, not just mask it with a superficial shine. If you follow these steps and respect the material, you aren’t just cleaning a tool; you are preserving its integrity for years of heavy use.
I know it can feel tedious when you’re staring at a dull piece of steel and a pile of emery cloth, but that’s where the real character is built. There is a quiet sort of satisfaction that comes from holding a tool you’ve restored yourself—one that feels balanced, smooth, and ready for the bench. Don’t let the modern world convince you that everything is meant to be replaced the moment it shows a bit of wear. Take pride in the slow way of doing things. When you treat your tools with this kind of respect, you’ll find that they tend to take care of you right back when the real work begins.
Frequently Asked Questions
Is it worth the extra effort to polish the underside of a tool, or should I just focus on the parts I actually hold in my hands?
If you only polish what your hands touch, you’re just putting a coat of paint on a sinking ship. That underside is where moisture hides and rust takes root. If you leave it rough and pitted, the corrosion will eventually creep up the body and ruin the parts you actually care about. Do the whole tool. It takes more time, sure, but it ensures the metal stays stable from edge to edge.
How do I know when I've polished too much and started taking away the actual structural metal instead of just the surface oxidation?
Look, you won’t see it happening in real-time, but you’ll feel it. If you start noticing the tool’s original geometry—the sharp edge of a chisel or the crisp corner of a file—beginning to round off, you’ve gone too far. You aren’t just cleaning the surface anymore; you’re reshaping the tool. Stop immediately. If the profile looks “soft” or blurry under the light, you’ve traded structural integrity for a bit of vanity.
If I've got a tool with a heavy pitting issue from years of neglect, can polishing actually fix the surface, or am I just wasting my time and sandpaper?
Look, I’ll give it to you straight: if the pitting is deep enough to catch your fingernail, you aren’t “polishing” anymore—you’re resurfacing. You can certainly save the tool, but you’ll be eating away a lot of good metal to level it out. It’s a slow, tedious process of grinding down the high spots until the pits aren’t craters anymore. It’s not a waste of sandpaper, but don’t expect a miracle without some real elbow grease.
