I remember standing in a massive fabrication shop back in ’84, watching a young kid try to force a hardened piece of steel into a bend without properly annealing metal first. He was sweating, cursing, and hitting that workpiece like it owed him money, only to have the whole thing snap with a crack that sounded like a gunshot. He’d wasted a perfectly good piece of material because he thought he could outrun the physics of the job. That’s the problem with how things are done nowadays; everyone wants the result immediately, but metal doesn’t care about your schedule. If you don’t respect the heat, the metal won’t respect your tools.
I’m not here to give you some textbook lecture or sell you on a fancy, overpriced induction setup you don’t need. My goal is to show you how to actually do the work using nothing but your eyes, your experience, and a steady hand. I’ll walk you through the real-world nuances of annealing metal so you can stop fighting your materials and start working with them. We’re going to do this the right way—the slow way—to ensure whatever you’re building stays built.
Table of Contents
Mastering the Metalwork Thermal Cycles
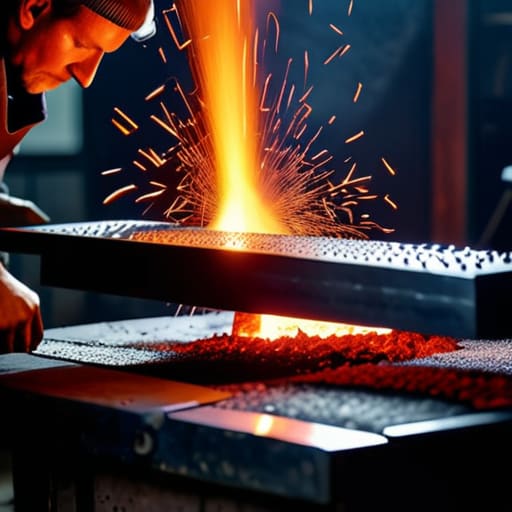
When you’re working with different alloys, you can’t just treat every piece of steel like it’s the same damn thing. You have to understand the metalwork thermal cycles if you want any hope of a clean finish. It’s not just about getting the piece red-hot and hoping for the best; it’s about how you manage the temperature over time. If you’re looking at full annealing vs process annealing, the difference usually comes down to how much you want to reset the metal’s “memory.” Full annealing is your heavy hitter—it’s what you do when the metal has become stubborn and brittle, requiring a slow, controlled soak to completely reset the structure.
If you’re just trying to soften up a part for some light shaping, you might just be relieving internal stresses left over from a previous weld or a heavy bend. But be careful. If you hold it at the wrong temperature for too long, you’ll trigger microstructure grain growth, and once those grains get too large, you’ve essentially ruined the integrity of the piece. You can’t undo that kind of damage with a file and a prayer.
Improving Metalworkability Through Proper Heat
When you’re standing over a piece of stubborn, hardened steel, you aren’t just fighting the material; you’re fighting the way its atoms have locked themselves into place. If you try to force a bend or a cut without preparation, you’re asking for a crack that’ll ruin your day. This is where improving metalworkability becomes more than just a fancy term—it’s the difference between a clean job and a pile of scrap. By applying the right amount of heat, you’re essentially telling those tightly packed grains to relax and reorganize.
Now, don’t go thinking one heat cycle fits every job. You need to understand the difference between full annealing vs process annealing before you even strike a match. If you’re looking to completely reset the material’s structure, you’ll need to go the distance. But if you’re just trying to soften it up for a bit of shaping, you might not need to go quite so heavy. The goal is always to manage the microstructure grain growth so you don’t end up with a piece of metal that’s too soft to hold an edge or too brittle to survive the hammer.
Five Rules to Keep You From Ruining Your Work
- Watch your color, not just the thermometer. A digital readout is fine, but your eyes will tell you more about the soul of the metal. You’re looking for that dull, cherry red glow—not a bright, angry orange. If it starts looking too bright, you’re pushing it too hard and risking grain growth.
- Slow down the cooling process. The biggest mistake I see is folks pulling a piece out of the forge and throwing it in a bucket of water just to get the job done faster. If you want that metal soft and workable, you need to let it cool slowly in a bed of vermiculite or even just tucked away in a bucket of dry wood ash.
- Don’t skip the soak. Once you hit your target temperature, hold it there. You can’t just flash the heat and call it a day; you need to give that heat time to soak all the way through to the core of the piece. If you don’t, you’ll find the center is still hard as a rock when you start your work.
- Clean your metal before you start. I’ve seen too many people try to anneal a piece that’s covered in scale, oil, or old shop grime. That gunk gets baked into the surface and can mess with how the heat distributes. Give it a good scrub or a light grind first so you’re working with a clean slate.
- Keep a steady hand and a patient mind. Annealing isn’t a race. If you find yourself getting frustrated because the metal isn’t behaving, step away from the anvil. You can’t force the molecular structure to change by sheer willpower; you have to work with the heat, not against it.
The Bottom Line on Getting It Right
Respect the temperature; if you’re guessing by eye without a steady hand or a pyrometer, you’re just gambling with your material.
Patience is your best tool in the shop—rushing the cooling process is the fastest way to turn a workable piece of metal into a brittle mess.
Don’t view annealing as a chore to get through, but as a necessary step to ensure whatever you’re building actually holds up under pressure.
The Cost of a Shortcut
You can try to force a stubborn piece of steel to bend to your will, but if you haven’t given it the proper heat and the time to settle, you aren’t working the metal—you’re just fighting it, and the metal always wins in the end.
Alistair Fenwick
The Long View on Heat and Hardship
At the end of the day, annealing isn’t some magic trick you pull off with a torch; it’s about understanding the relationship between temperature and time. We’ve talked about managing those thermal cycles and why you can’t just blast a piece of steel and hope for the best. If you don’t respect the soak time or if you let the cooling process happen too fast, you’re just fighting against the physics of the material. Remember, the goal is to relieve that internal stress so the metal actually works with you instead of against you. Don’t be tempted to cut corners just to get to the next stage of your project, because shortcuts only lead to wasted material and a headache you’ll have to fix later.
I know it can feel tedious to sit there watching a piece of metal slowly lose its glow, but that’s where the real craft happens. In a world that wants everything done yesterday, there is a quiet dignity in taking the time to do a job properly. When you master these fundamentals, you aren’t just moving metal around; you’re learning the language of the workshop. Take pride in that patience. Build things that have some soul and substance to them, and more importantly, build them in a way that you know how to maintain for the next fifty years. Now, get back to the bench and make it last.
Frequently Asked Questions
How do I know if I've actually reached the right temperature without a fancy digital furnace?
If you aren’t sitting in front of a digital readout, you’ve got to use your eyes and your intuition. Look for the color. A dull, cherry red is usually a safe bet for most mild steels, but don’t just guess. If you’ve got a magnet handy, keep it close. Once the metal reaches the right temperature, the magnet won’t stick anymore. That’s your signal. Trust your eyes, but let the magnet give you the final word.
Can I use a torch to anneal smaller pieces, or is that just asking for uneven heating?
You can certainly use a torch for smaller pieces, but you’ve hit the nail on the head: uneven heating is your biggest enemy. If you just blast one spot, you’ll end up with localized hardness and internal stresses that’ll make the metal snap when you try to work it. You have to move that flame constantly. Treat it like you’re painting—keep it moving in steady, overlapping circles to ensure the whole piece reaches temperature evenly.
What happens if I quench the metal in water instead of letting it cool slowly in the ash?
If you pull that piece out of the heat and dunk it straight into water, you’re not annealing anymore—you’re quenching. You’ll lock that molecular structure into a hard, brittle state. Instead of making the metal easy to work, you’re making it prone to snapping like a dry twig under a hammer. If you want that softness for shaping, you’ve got to let it sit in the ash and take its sweet time cooling down.
