I remember standing in a drafty fabrication shop back in ’84, watching a young apprentice try to force a heavy-duty joint together using nothing but a pneumatic gun and a prayer. He was rushing, trying to bypass the fundamentals of proper riveting techniques just to get to lunch early. Within twenty minutes, the vibration had loosened the whole assembly, and he was left staring at a pile of wasted material that could have been a solid, lifelong connection if he’d just respected the metal. It’s that same impatience I see today—people buying expensive, high-tech kits when all they really need is a steady hand and a proper understanding of how metal actually behaves under pressure.
I’m not here to sell you on some fancy, overpriced gadget or a complicated manual that reads like a textbook. What I’m going to give you is the straight truth, stripped of all the fluff, based on forty years of getting it right the first time. We’re going to walk through the actual mechanics of the job, focusing on how to set a rivet that stays set. I’ll show you how to read the heat and the strike so you can build things that actually last long after the modern, disposable junk has rusted away.
Table of Contents
The Truth About Proper Rivet Hole Preparation

Most folks think the real work starts when you pull the trigger on a rivet gun, but they’ve got it backward. If your holes are sloppy, your joint will be sloppy, no matter how much muscle you put into it. I’ve seen too many apprentices try to force a rivet into a hole that’s just a hair too small, or worse, one that’s been drilled with a dull bit and left with nasty, jagged burrs. When you’re dealing with metal fabrication joining, those burrs act like tiny wedges that can actually distort your workpiece or prevent the rivet from seating flush.
You need to treat your rivet hole preparation with the same respect you’d give a precision weld. I always keep a small deburring tool or a fine file handy—I’ve even got a bit of sandpaper in my pocket for those quick touch-ups—to ensure the edges are clean and smooth. If the hole isn’t perfectly perpendicular and sized correctly for the shank, you aren’t just making a mistake; you’re compromising the structural integrity of rivets before you’ve even started. Take the extra minute to clean it up. It’s the difference between a repair that holds for decades and one that fails the moment it sees a bit of stress.
Preserving Structural Integrity of Rivets Through Patience
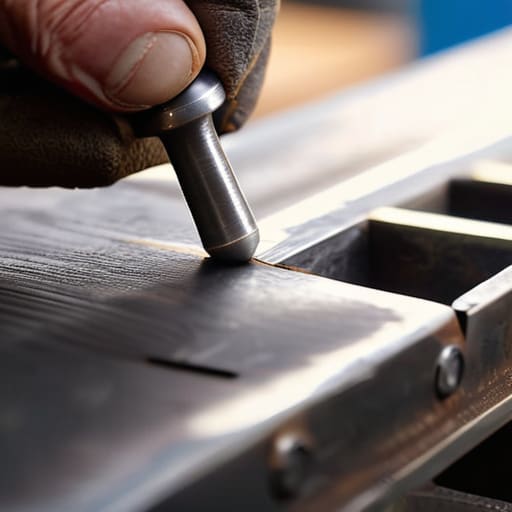
Now, once you’ve got your holes drilled and your pieces aligned, the real test of your character begins. Most folks want to get straight to the action, but if you’re rushing the process, you’re begging for trouble down the line. When you’re working on metal fabrication joining, the way you set that fastener determines whether the joint stays tight for decades or starts rattling after the first month. You have to respect the material; if you force a rivet before the surfaces are perfectly mated, you’re just creating internal stress that’ll eventually lead to a crack.
I’ve seen plenty of young apprentices try to muscle through a job using aggressive rivet gun operation without actually checking their work as they go. They think speed is a sign of skill, but it’s usually just a sign of impatience. You need to watch how the metal reacts under the pressure. If you feel the resistance changing or see the plates starting to gap, stop what you’re doing. Take a breath, check your alignment, and do it right. It’s better to spend an extra ten minutes ensuring the structural integrity of rivets is solid than to spend three hours tearing a botched job apart to start over.
Five Rules to Keep Your Rivets from Failing
- Stop using a drill bit that’s duller than a butter knife. If you’re forcing the bit through the metal and leaving a ragged, oversized hole, you’ve already lost the battle. A clean, precise hole is the only way to ensure the rivet shank actually fills the space properly.
- Match your rivet diameter to the material thickness, not just your gut feeling. I’ve seen too many young fellas try to use a tiny rivet on a heavy plate just because it looks “cleaner.” If that rivet doesn’t have enough material to expand and grip, it’s nothing more than a glorified washer.
- Don’t go at it with a heavy sledgehammer right out of the gate. You need to start with a lighter touch to set the shape and seat the head. If you come down too hard too fast, you’ll mushroom the edges out in a way that looks messy and provides zero actual clamping force.
- Watch your alignment like a hawk. If your plates aren’t clamped tight and perfectly flush before you even pick up the hammer, you’re going to end up with a gap. Once that gap is there, no amount of hammering is going to pull those pieces back together into a solid joint.
- Check the work with your hands—and maybe a bit of sandpaper if things get rough. Once you think you’re done, run your fingers over the heads. If you feel a burr or a sharp edge, smooth it down. A good rivet job should feel solid and seamless, not like a collection of jagged metal bits.
The Bottom Line on Making Rivets That Hold
Never settle for a sloppy hole; if your drill bit is dull or your center punch is off, you’re fighting a losing battle before you even pick up the hammer.
Respect the metal’s limits by letting it work at its own pace—rushing the driving process creates internal stress that’ll show up as a crack later on.
Treat every rivet as a permanent commitment to the piece, meaning you use the right material and the right force to ensure it’s a fix, not a temporary patch.
The Cost of a Quick Fix
A rivet isn’t just a fastener; it’s a commitment. If you don’t take the time to seat it properly and respect the metal’s grain, you aren’t building something—you’re just making a temporary mess that’ll fail when you need it most.
Alistair Fenwick
Making It Count
At the end of the day, a good rivet job comes down to the fundamentals we’ve talked about: prepping your holes with precision and having the discipline to let the metal work with you, not against you. If you skimp on the drilling or try to force a set before the material is ready, you’re just setting yourself up for a failure that’ll show up months down the line. Remember, it isn’t just about squeezing two pieces of metal together; it’s about creating a permanent bond that can withstand the stresses of real-world use. Don’t let a bit of impatience turn a solid project into a pile of scrap. Do the prep work right, and the assembly will practically take care of itself.
I know it’s tempting to grab a power tool and rush through a job just to get it off your workbench, but there’s a different kind of satisfaction that comes from doing things the old-fashioned way. When you finish a piece and you know every rivet was set with intention and care, you aren’t just looking at a finished product—you’re looking at something that will outlive us both. We live in a world that’s obsessed with the “quick fix,” but I’m asking you to be different. Build it right, build it slow, and make sure it lasts.
Frequently Asked Questions
How do I know if I've driven the rivet hard enough without cracking the surrounding metal?
You won’t see it with your eyes alone; you have to feel it through the hammer. When you’re driving, the vibration changes. It’ll go from a dull, heavy thud to a sharper, more consistent ring once the rivet is seated and the metal is tight. If you feel a sudden, jarring shudder or see the surrounding plate start to ripple, stop immediately. You’ve overdone it. That’s the sound of metal screaming, not working.
Is there a specific type of hammer I should be using for hot riveting versus cold work?
You don’t want to grab just any heavy mallet and hope for the best. For hot riveting, you need a heavy, high-carbon steel riveting hammer with a slightly rounded face; you need that weight to drive the shank home while the metal is still yielding. For cold work, a lighter ball-peen is your best friend. It gives you the control to shape the head without bruising the surrounding material. Don’t use a finishing hammer for heavy driving—you’ll just end up with a mess.
What's the best way to prevent a rivet from loosening up after a few years of heavy use?
If you’re seeing rivets back out after a few years, you likely didn’t get a tight enough squeeze or used a hole that was slightly oversized. The trick is ensuring a proper interference fit. Don’t just mash the head down; you need to work the shank so it expands firmly against the walls of the hole. If it’s a high-vibration job, consider a bit of thread-locking compound or a tiny drop of red lead before you set it.
