I remember sitting in my old shop back in the eighties, the smell of burnt oil and ozone thick enough to chew on, staring at a rusted-out cast iron lathe component that most folks would’ve tossed straight into the scrap bin. There’s a certain kind of frustration that sets in when you realize the modern world thinks everything is replaceable, but I’ve always believed that a bit of grit and the right technique can bring anything back from the brink. People tend to overcomplicate the metal restoration process with expensive, flashy chemicals that do more harm than good, or they try to skip the prep work entirely. If you don’t respect the oxidation, you’re just painting over a corpse instead of actually bringing the piece back to life.
I’m not here to sell you on some magic spray-on miracle or a complicated system that requires a degree in chemistry. What I’m going to give you is the honest, hard-earned truth about how to actually handle a project from the first scrape to the final polish. We’re going to talk about the patience required to do it right, focusing on the fundamental mechanics of cleaning, stabilizing, and protecting your metal so it stays that way for another fifty years.
Table of Contents
The Patience of Metal Oxidation Removal
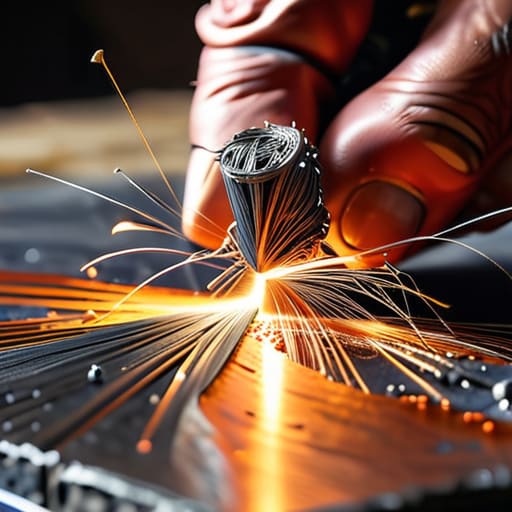
Now, when you’re tackling metal oxidation removal, the first thing you need to do is check your ego at the workshop door. I’ve seen plenty of young lads come in here wanting to blast through a layer of rust with a heavy grinder in five minutes flat. That’s a fool’s errand. If you go in too hard, you aren’t just taking off the corrosion; you’re eating into the healthy metal underneath. You have to treat the surface like a living thing. I prefer starting with a fine abrasive or even a bit of steel wool to gently coax the oxidation away, layer by layer.
It’s a slow, tedious bit of work, but it’s the foundation of everything else. If your surface preparation techniques are sloppy, the best finish in the world won’t save you from a piece that looks pitted or uneven. You’re not just cleaning a surface; you’re preserving historical metalwork by respecting its original dimensions. Take your time with the hand tools. It might feel like you’re making no progress, but that steady, methodical approach is exactly what separates a true craftsman from someone just playing with power tools.
Surface Preparation Techniques That Wont Waste Material

Now, once you’ve cleared off that heavy scale, you have to decide how you’re actually going to get down to the true surface. I’ve seen too many young folks grab a heavy-duty grinder and start tearing into a piece like they’re trying to shave a mountain. That’s the fastest way to ruin a good project. If you’re working on something delicate, like restoring aged brass and copper, you need to respect the patina. Start with the finest grit sandpaper you can get your hands on—I always keep a small piece in my pocket for just such an occasion—and work in circular motions. You want to lift the decay, not gouge the metal.
When it comes to more stubborn bits, I prefer using a brass brush or even a fine steel wool rather than jumping straight to chemical baths. These surface preparation techniques allow you to see exactly what you’re doing at every stage. If you use a harsh acid too early, you might strip away the very character that makes the piece worth saving in the first place. Take your time with the hand tools; it’s better to spend an extra hour scrubbing by hand than five minutes destroying the integrity of the metal with a machine.
Five Hard-Won Lessons from the Workbench
- Don’t go straight for the heavy grinders. I’ve seen too many youngsters tear right through the good metal because they wanted to see progress fast. Start with the finest grit you can manage and work your way up; it takes longer, but you won’t be left with a pitted surface that’s impossible to fix later.
- Watch your temperature like a hawk. If you’re heating something to strip old coatings or straighten a bend, you need to feel the color change with your eyes, not just guess. If you push it too hot, you’ll ruin the temper of the steel, and once that’s gone, that piece is nothing more than scrap.
- Cleanliness isn’t just about looks; it’s about the bond. Before you even think about applying a sealant or a new finish, make sure there isn’t a speck of oil or dust left on that surface. I always keep a bit of sandpaper in my pocket to smooth out any last-minute rough spots before the final wipe-down.
- Invest in quality tools, not the cheap stuff from a big-box store. A tool that flexes or wobbles in your hand is a tool that’s going to make you work twice as hard for half the result. I’d rather have one decent hammer that fits my grip perfectly than a whole drawer full of junk that’s going to fail when I need it most.
- Always test your method on a scrap piece first. Every batch of metal behaves a little differently, and what worked on a piece of mild steel last week might not work on the antique cast iron sitting on your bench today. Take ten minutes to fail on a piece of junk so you don’t fail on the piece you actually care about.
The Bottom Line on Doing It Right
Don’t let your ego drive the pace; if you try to force a finish before the surface is truly clean, you’re just burying problems under a layer of polish.
Invest your time in the prep work, because a well-prepared surface is the only way to ensure your repairs actually hold up for the next forty years.
Treat your tools and your materials with respect, because rushing the process doesn’t save time—it just wastes good metal and good effort.
## The Cost of a Shortcut
You can always sand away a mistake, but you can’t un-burn a piece of metal that’s been overheated by a man in too much of a hurry.
Alistair Fenwick
The Final Polish
At the end of the day, successful metal restoration isn’t about how fast you can get to the finish line; it’s about the steps you took to get there. We’ve talked about the necessity of stripping away oxidation without scarring the base metal, and why you need to treat surface preparation like it’s the most important part of the job. If you skip the cleaning or rush the sanding, you’re just burying your mistakes under a layer of paint or oil, and those problems will always find their way back to the surface. Remember, the goal isn’t just to make it look shiny for a photo; it’s to ensure that the metal is structurally sound and properly prepared for whatever comes next.
I know it can be frustrating when a piece doesn’t respond the way you want it to, or when a stubborn bit of rust refuses to budge. But that’s where the real work happens. When you take the time to do it right, you aren’t just fixing an object—you’re honoring the history of the tool or the cookware in your hands. There is a deep, quiet satisfaction in knowing that because of your steady hand and your patience, this piece will be around for another fifty years. So, don’t be afraid to slow down and listen to the material. If you treat the metal with respect, it’ll reward you with a finish that actually lasts.
Frequently Asked Questions
How do I know when I've stripped enough oxidation off without actually thinning the base metal?
You have to trust your eyes and your hands more than any timer. When you’re working, look for the change in texture. Oxidation is usually crusty or flaky; once you hit the true surface, the metal will feel smooth and look uniform under your light. If you start seeing “pitting” or the metal looks unevenly thin, you’ve gone too far. Stop. It’s better to leave a tiny bit of scale than to ruin a good piece.
If I'm working with an old, pitted piece of cast iron, should I try to smooth out the pits or just leave them and focus on the seasoning?
Listen, you have to decide what kind of tool you’re making. If those pits are shallow, leave them be and focus on a heavy seasoning; the oil will find its way in and seal them just fine. But if they’re deep enough to snag your spatula or hold onto old food, you’ll need to sand them down. Use a fine grit, take your time, and don’t go chasing a mirror finish—just make it functional.
What's the best way to tell if I've overheated a piece during the cleaning process and compromised its structural integrity?
You’ll know you’ve pushed it too far if you see “bluing” that looks oily or uneven, or if the metal starts to look pitted and spongy. If you’re working with cast iron and notice it feels brittle or develops hairline cracks after a heat cycle, you’ve gone too far. The real giveaway is the color; if it shifts from a dull grey to a sickly, iridescent hue unexpectedly, you’re losing the temper.
